
...
- Go to rp.sciencecloud.nasa.gov and log in.
- Pick a machine size. Start it.
- Keep files in
~, in/efs/<project>, or in object storage. Everything else is lost on restart. - Work in a notebook. Ask the AI SI assistant when you are stuck. Need your own packages? Build a conda environment in
~/envsand register it as a kernel. - Big job? Dask for parallel work, NBQueue for long background runs.
- Same file as a colleague? Use the collaboration tile.
- Check the usage panel.
- Stop everything when you finish.
...
- Open rp.sciencecloud.nasa.gov in your web browser.
- Sign in. You will be briefly redirected to the Science Cloud login service (STAR) to verify your identity.
- Once signed in, you will land on the platform's main launch screen. There is nothing to install.
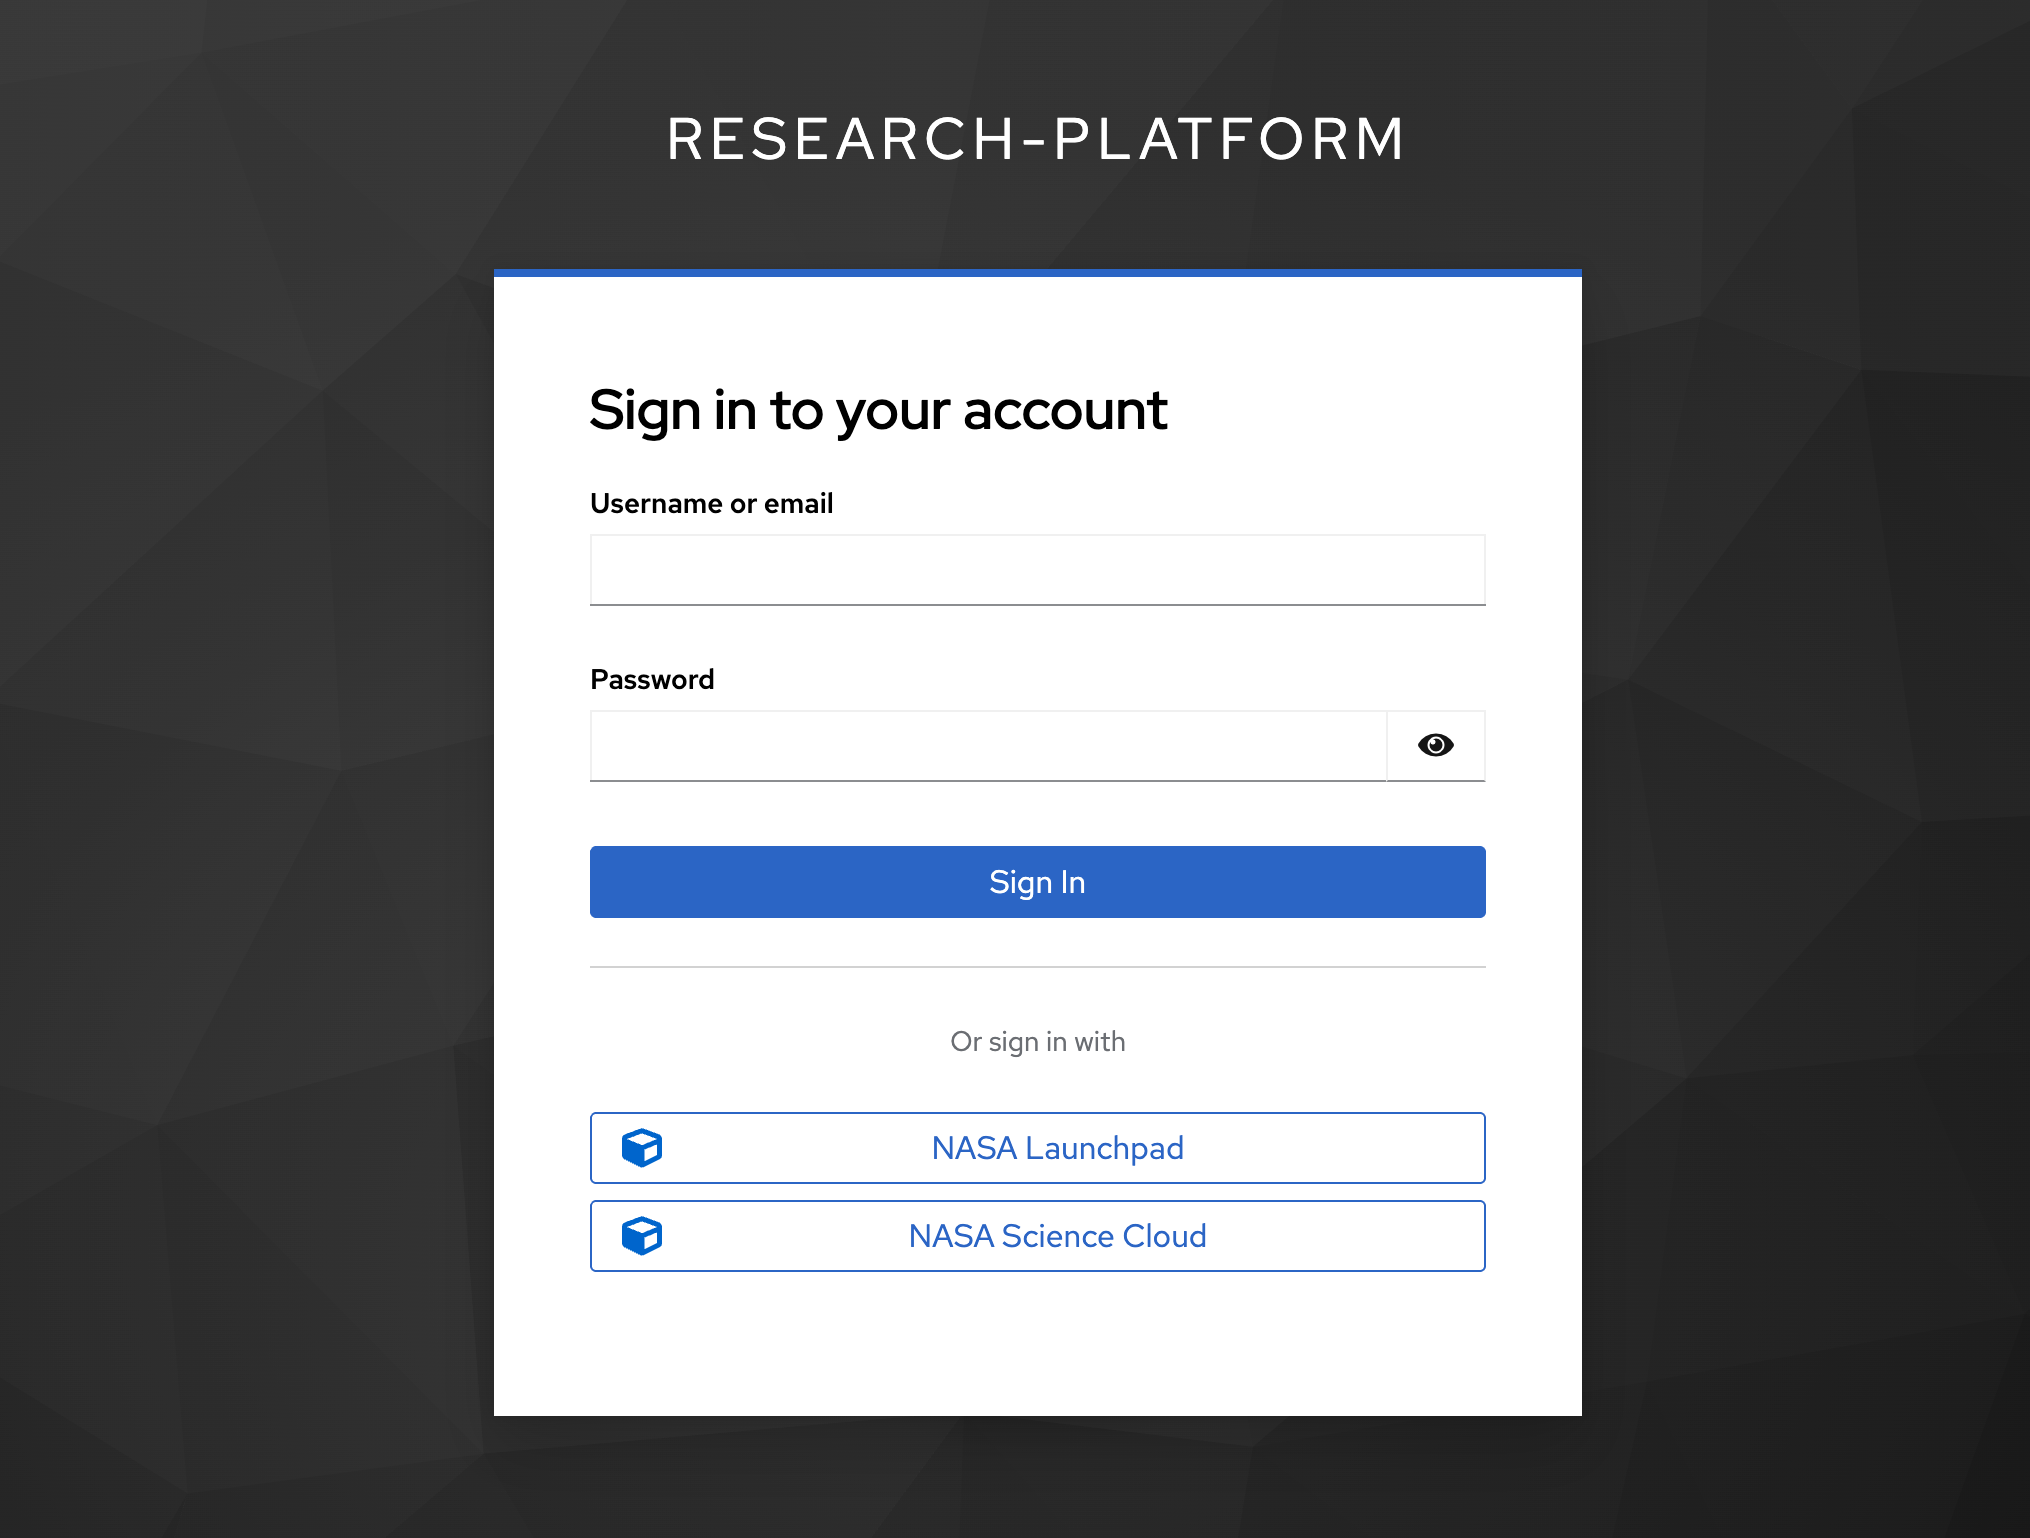
The sign-in page. Use your NASA Launchpad or NASA Science Cloud identity.
...
How big of a machine do you need? Choose your compute power from the Server Type dropdown list:
| Server Type | Resources |
|---|---|
| Standard | Up to 4 GB RAM / 4 CPU |
| Large | Up to 8 GB RAM / 4 CPU |
| Extra Large | Up to 16 GB RAM / 4 CPU |
| r5.2xlarge Node (On Demand) | Up to 64 GB RAM / 8 CPU |
Coming later: Two changes to this list are on the roadmap: adding GPU machines, and letting project admins build and maintain their own custom list of server types for their team, instead of everyone choosing from one platform-wide list.
Which software stack do you need? Select a ready-made science stack from the Images dropdown list. (An image is a packaged set of software, for example, Earth Science Server with AI SI Intelligence). (Note: If your project uses a custom container image, you can enter it into the "Other image" box).
...
- Once you have made your selections, click Start. Your workspace will open in a minute or two.
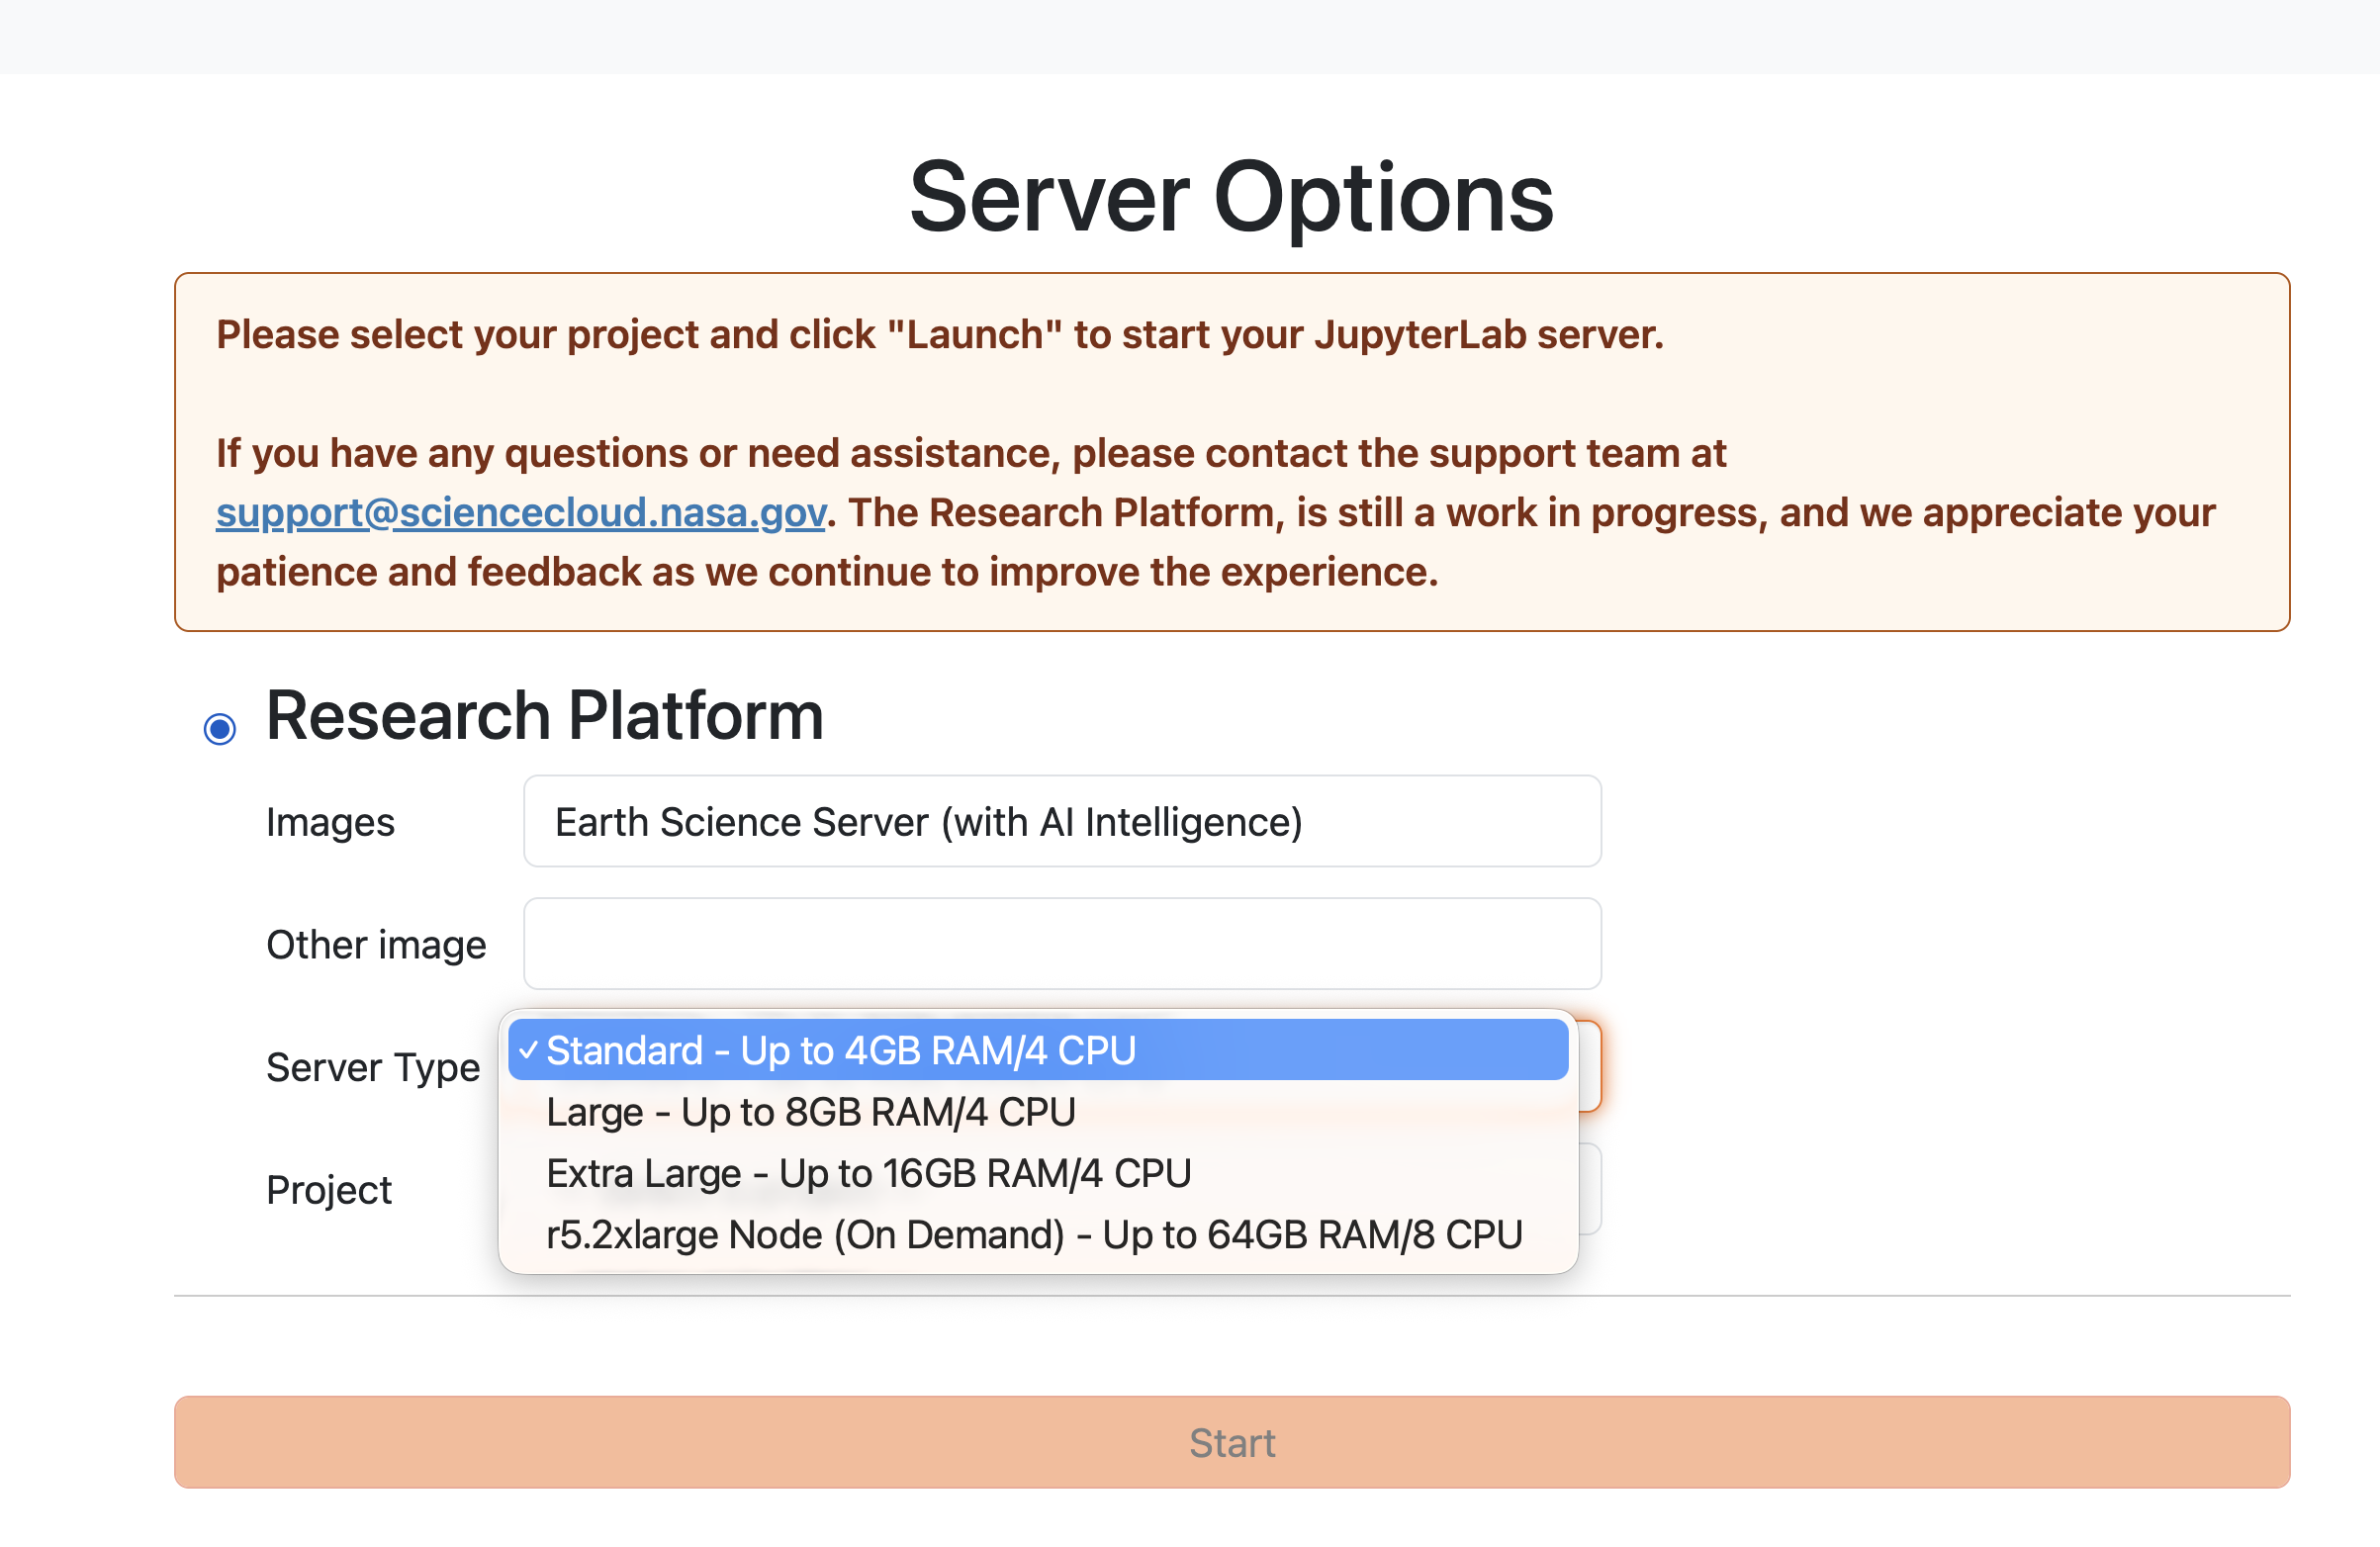
The Server Options screen: pick the image, the server type, and the project.
...
You are now in JupyterLab. The important parts:
| Part of the screen | What it is for |
|---|---|
| Left sidebar — file browser | Your files |
| Left sidebar — other icons | The platform tools: usage, data browser, |
| SI tools, background jobs | |
| Launcher (the big tile page) | Start a notebook, a console, or a terminal — and the Resource Tracker and Collaboration tiles |
| Main area | Your open notebooks |
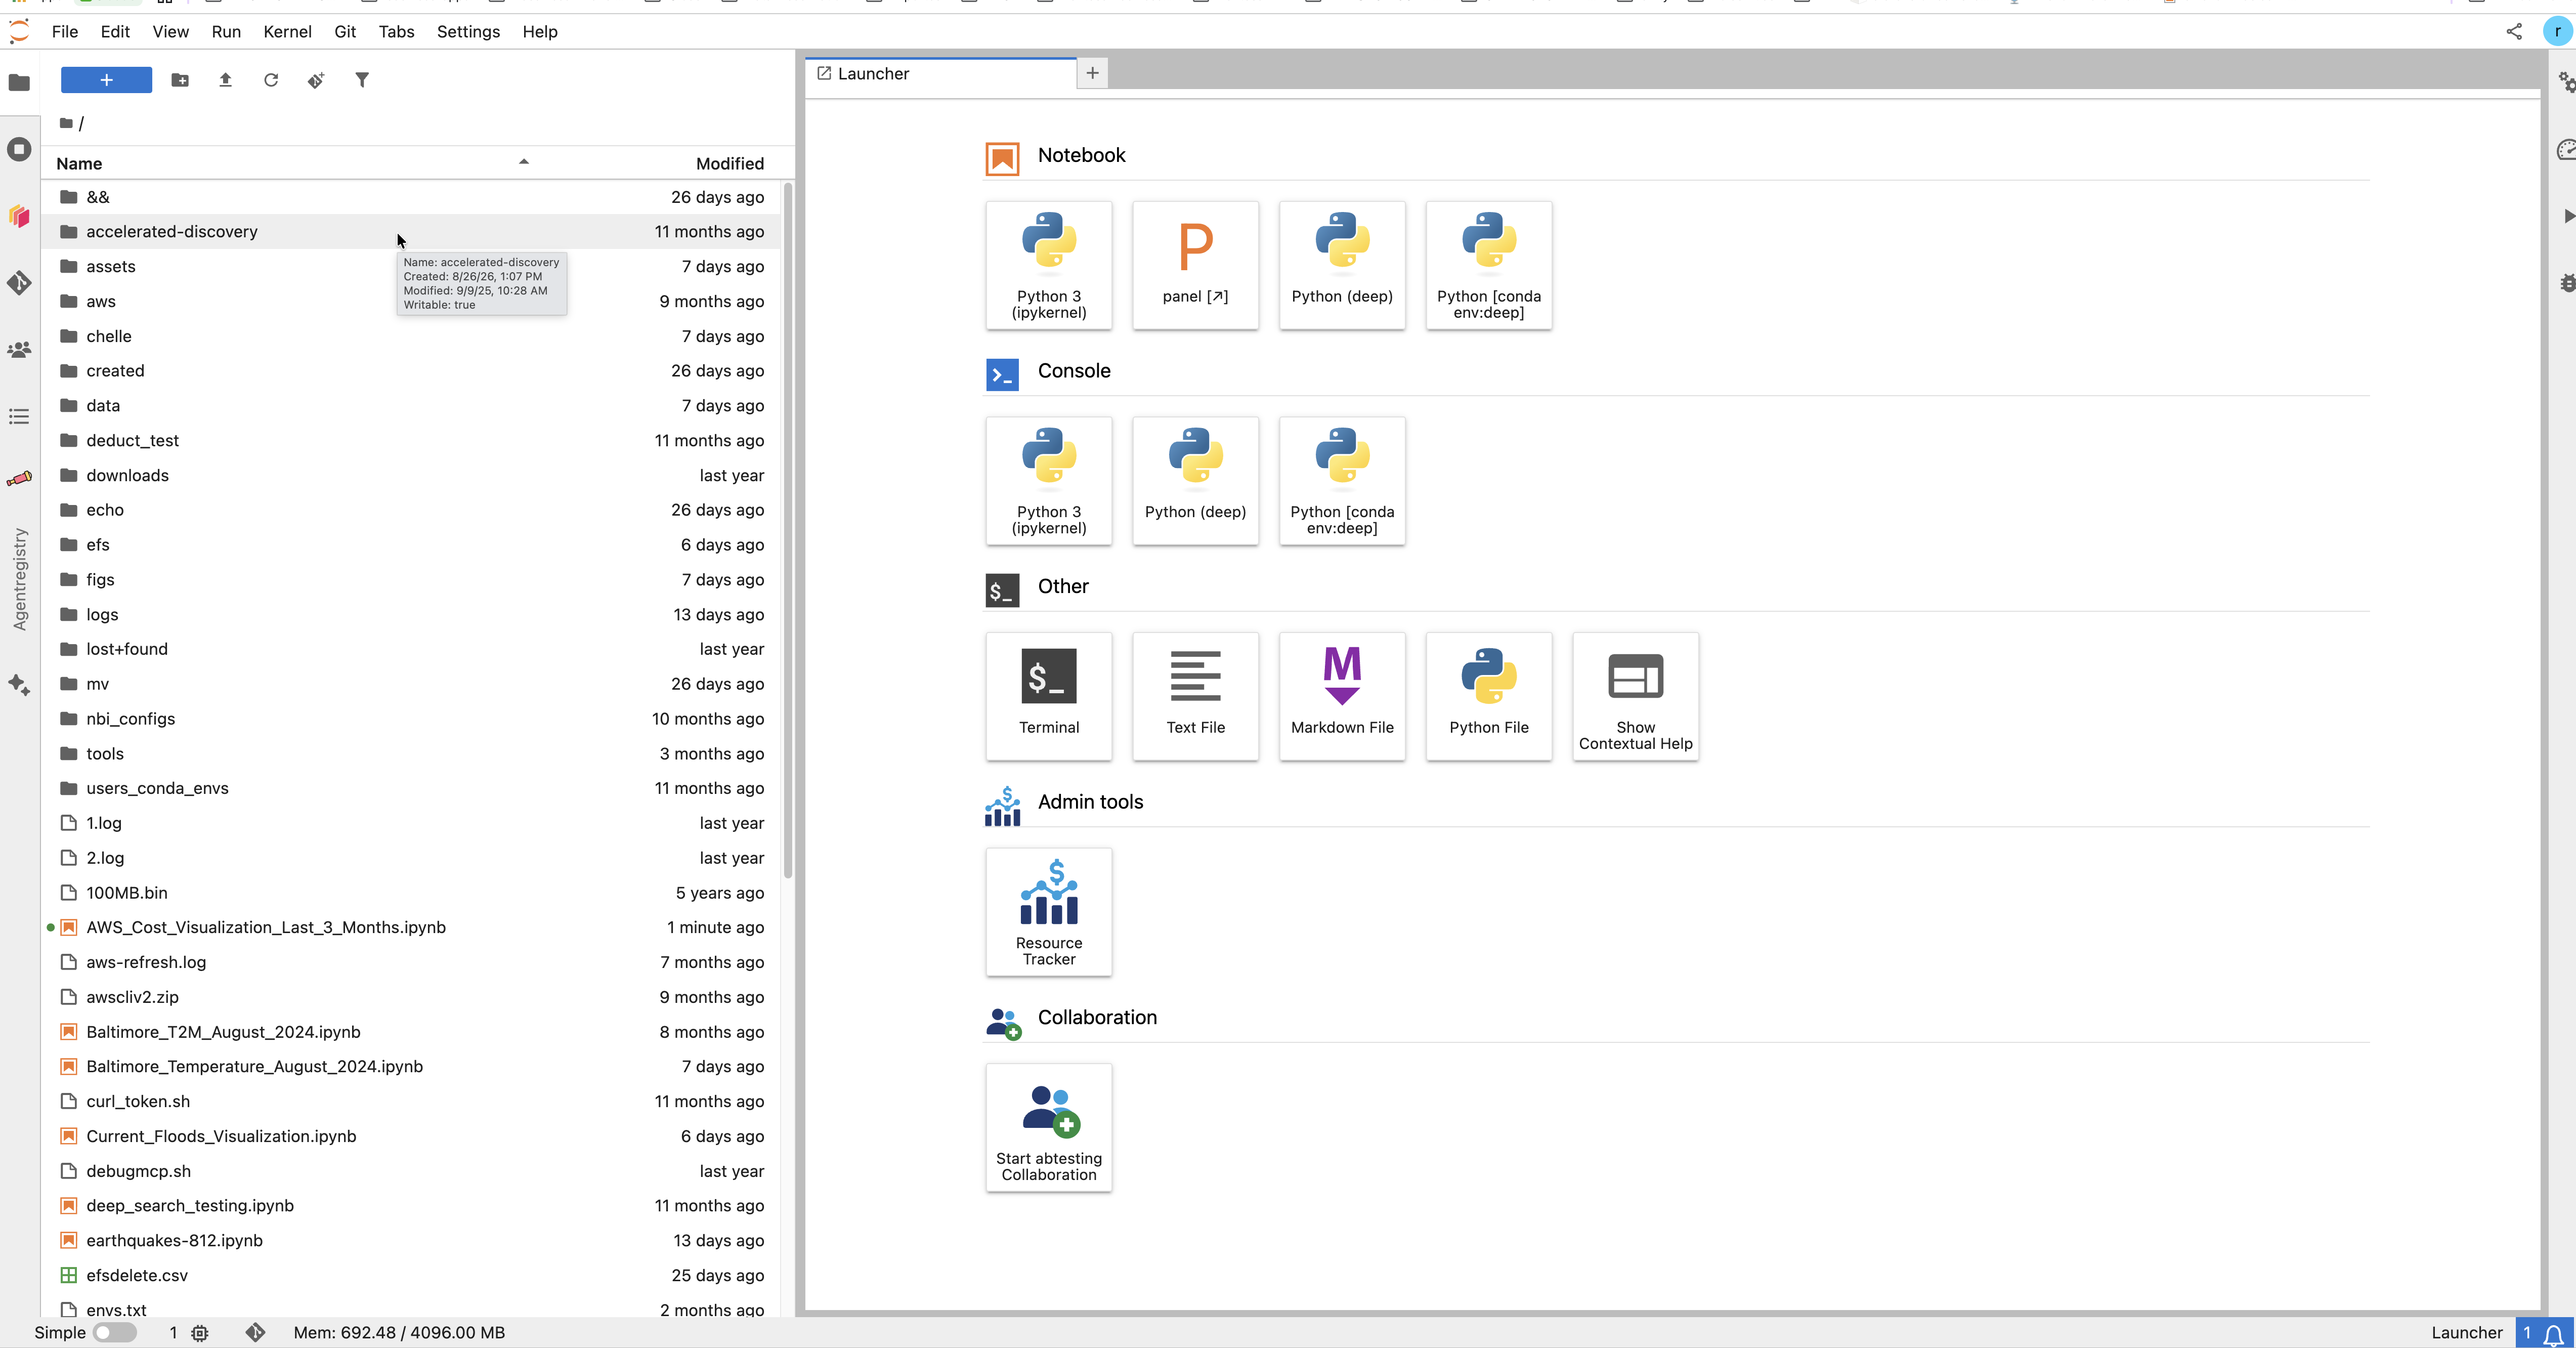
JupyterLab. The file browser is on the left; the Launcher tiles are in the middle.
...
This is the most important thing to learn on day one. Some places keep your files. Some do not.
| Place | Path | Who sees it | Survives a restart? |
|---|---|---|---|
| Your home folder | ~, which is /home/<your name> — for example /home/ramon.linan | Only you | ✅ Yes |
| Your own EFS folder | /efs/<your username> — the full email form, for example /efs/ramon.linan@navteca.com | Only you | ✅ Yes |
| A project folder on EFS | /efs/<project> — one for every project you belong to | Everyone in that project | ✅ Yes |
| Object storage — your own space | s3://<bucket>/home/<your username> | Only you | ✅ Yes |
| Object storage — project space | s3://<bucket>/<project> — the project you picked at launch | Your project | ✅ Yes |
| Anywhere else in the machine | /tmp, system folders, software you install outside your home folder | — | ❌ No. Lost. |
The rule: keep your work in ~, in /efs/…, or in object storage. Everything else disappears when your workspace restarts.
...
- EFS shows you every project you belong to. Open
/efs/and you see a folder for each one. You cannot open other people's folders — the permissions stop you. - The file browser and the terminal show the same files, laid out differently. The left-hand file browser and the command line have the same permissions. Do not worry if the two views look different.
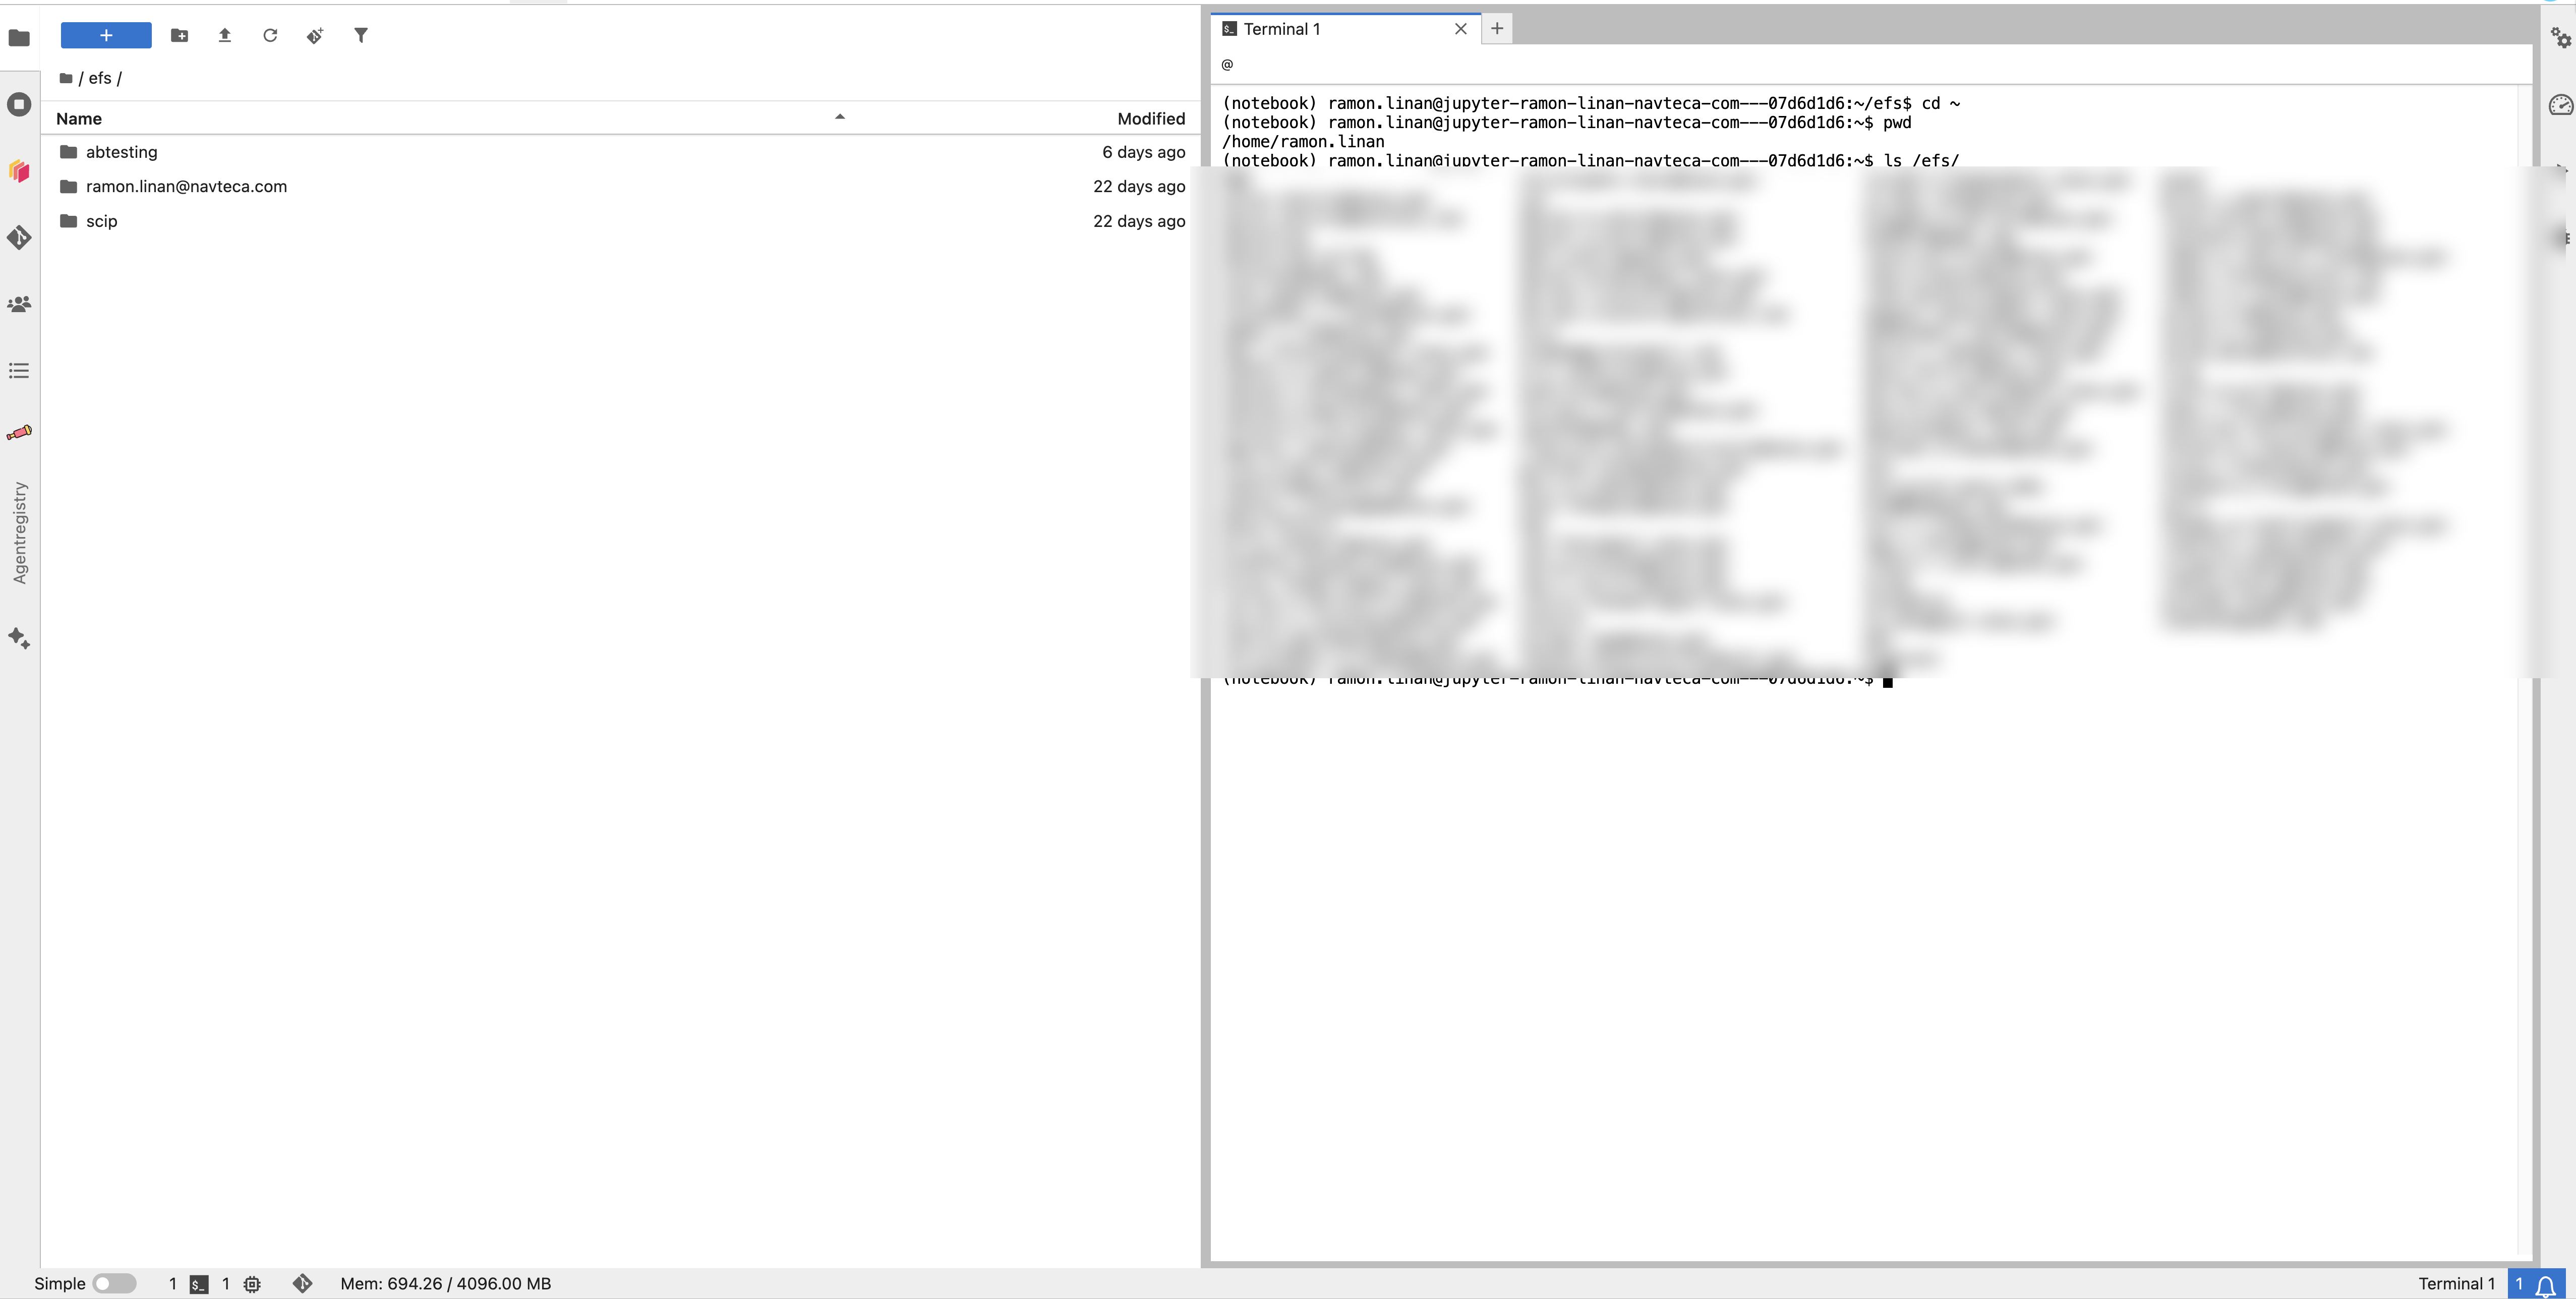
The same files, two ways: the file browser on the left, a terminal on the right. The user list is blurred on purpose.
Which one should I use?
| Your file | Put it here |
|---|---|
| My notebooks and scripts | Home folder, ~ |
| Data or a result my team needs | The project folder, /efs/<project> |
| A very large dataset | Object storage |
| A scratch file I do not care about | Anywhere. It will be lost. |
Step 5: Do the science
- Open the Launcher and start a new notebook.
- Type your code into a cell.
- Press
Shift + Enterto run it. The results will appear immediately below the cell.
...
- Use Kernel → Change Kernel in your notebook and pick it.
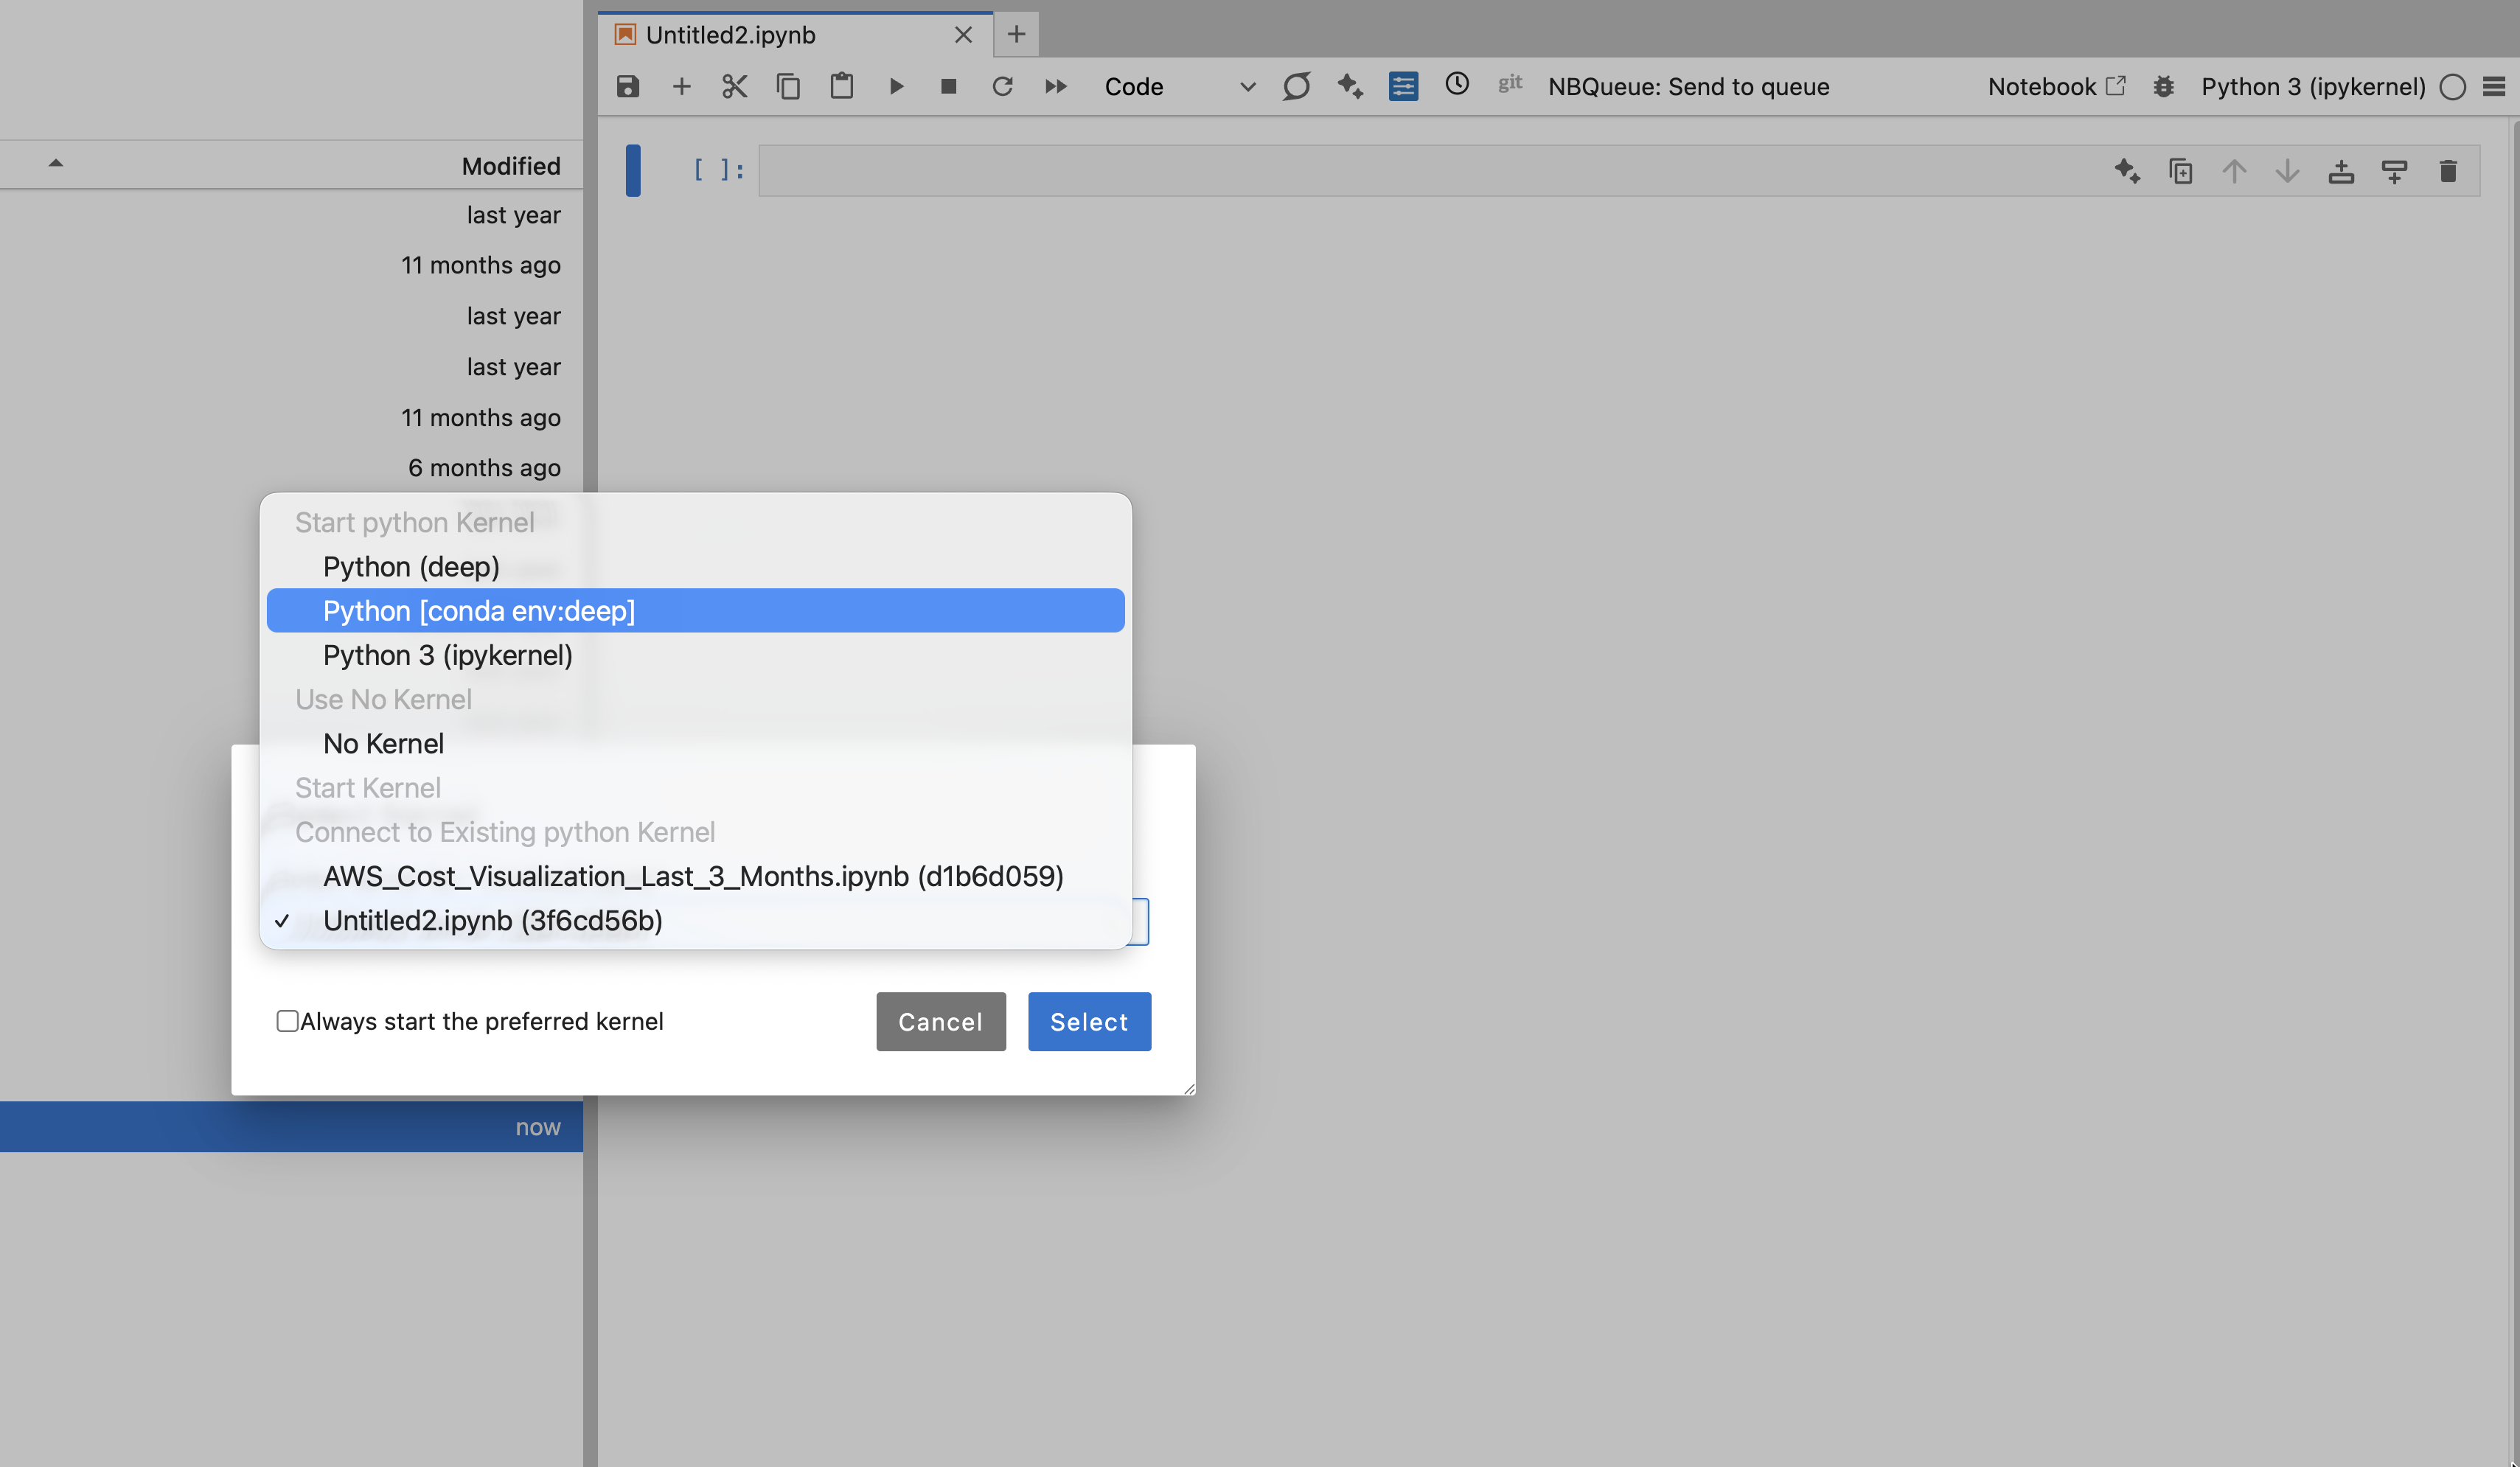
Kernel, then Change Kernel. Your own environment appears in the list.
...
Kernel not showing up? If the kernel doesn't appear in your notebook menu, you can easily register it by hand. Just run this in your terminal: python -m ipykernel install --user --name myscience --display-name "My science env"
Step 6: Get
...
SI Help While You Work
The Notebook Intelligence tool puts an AI SI assistant in JupyterLab.
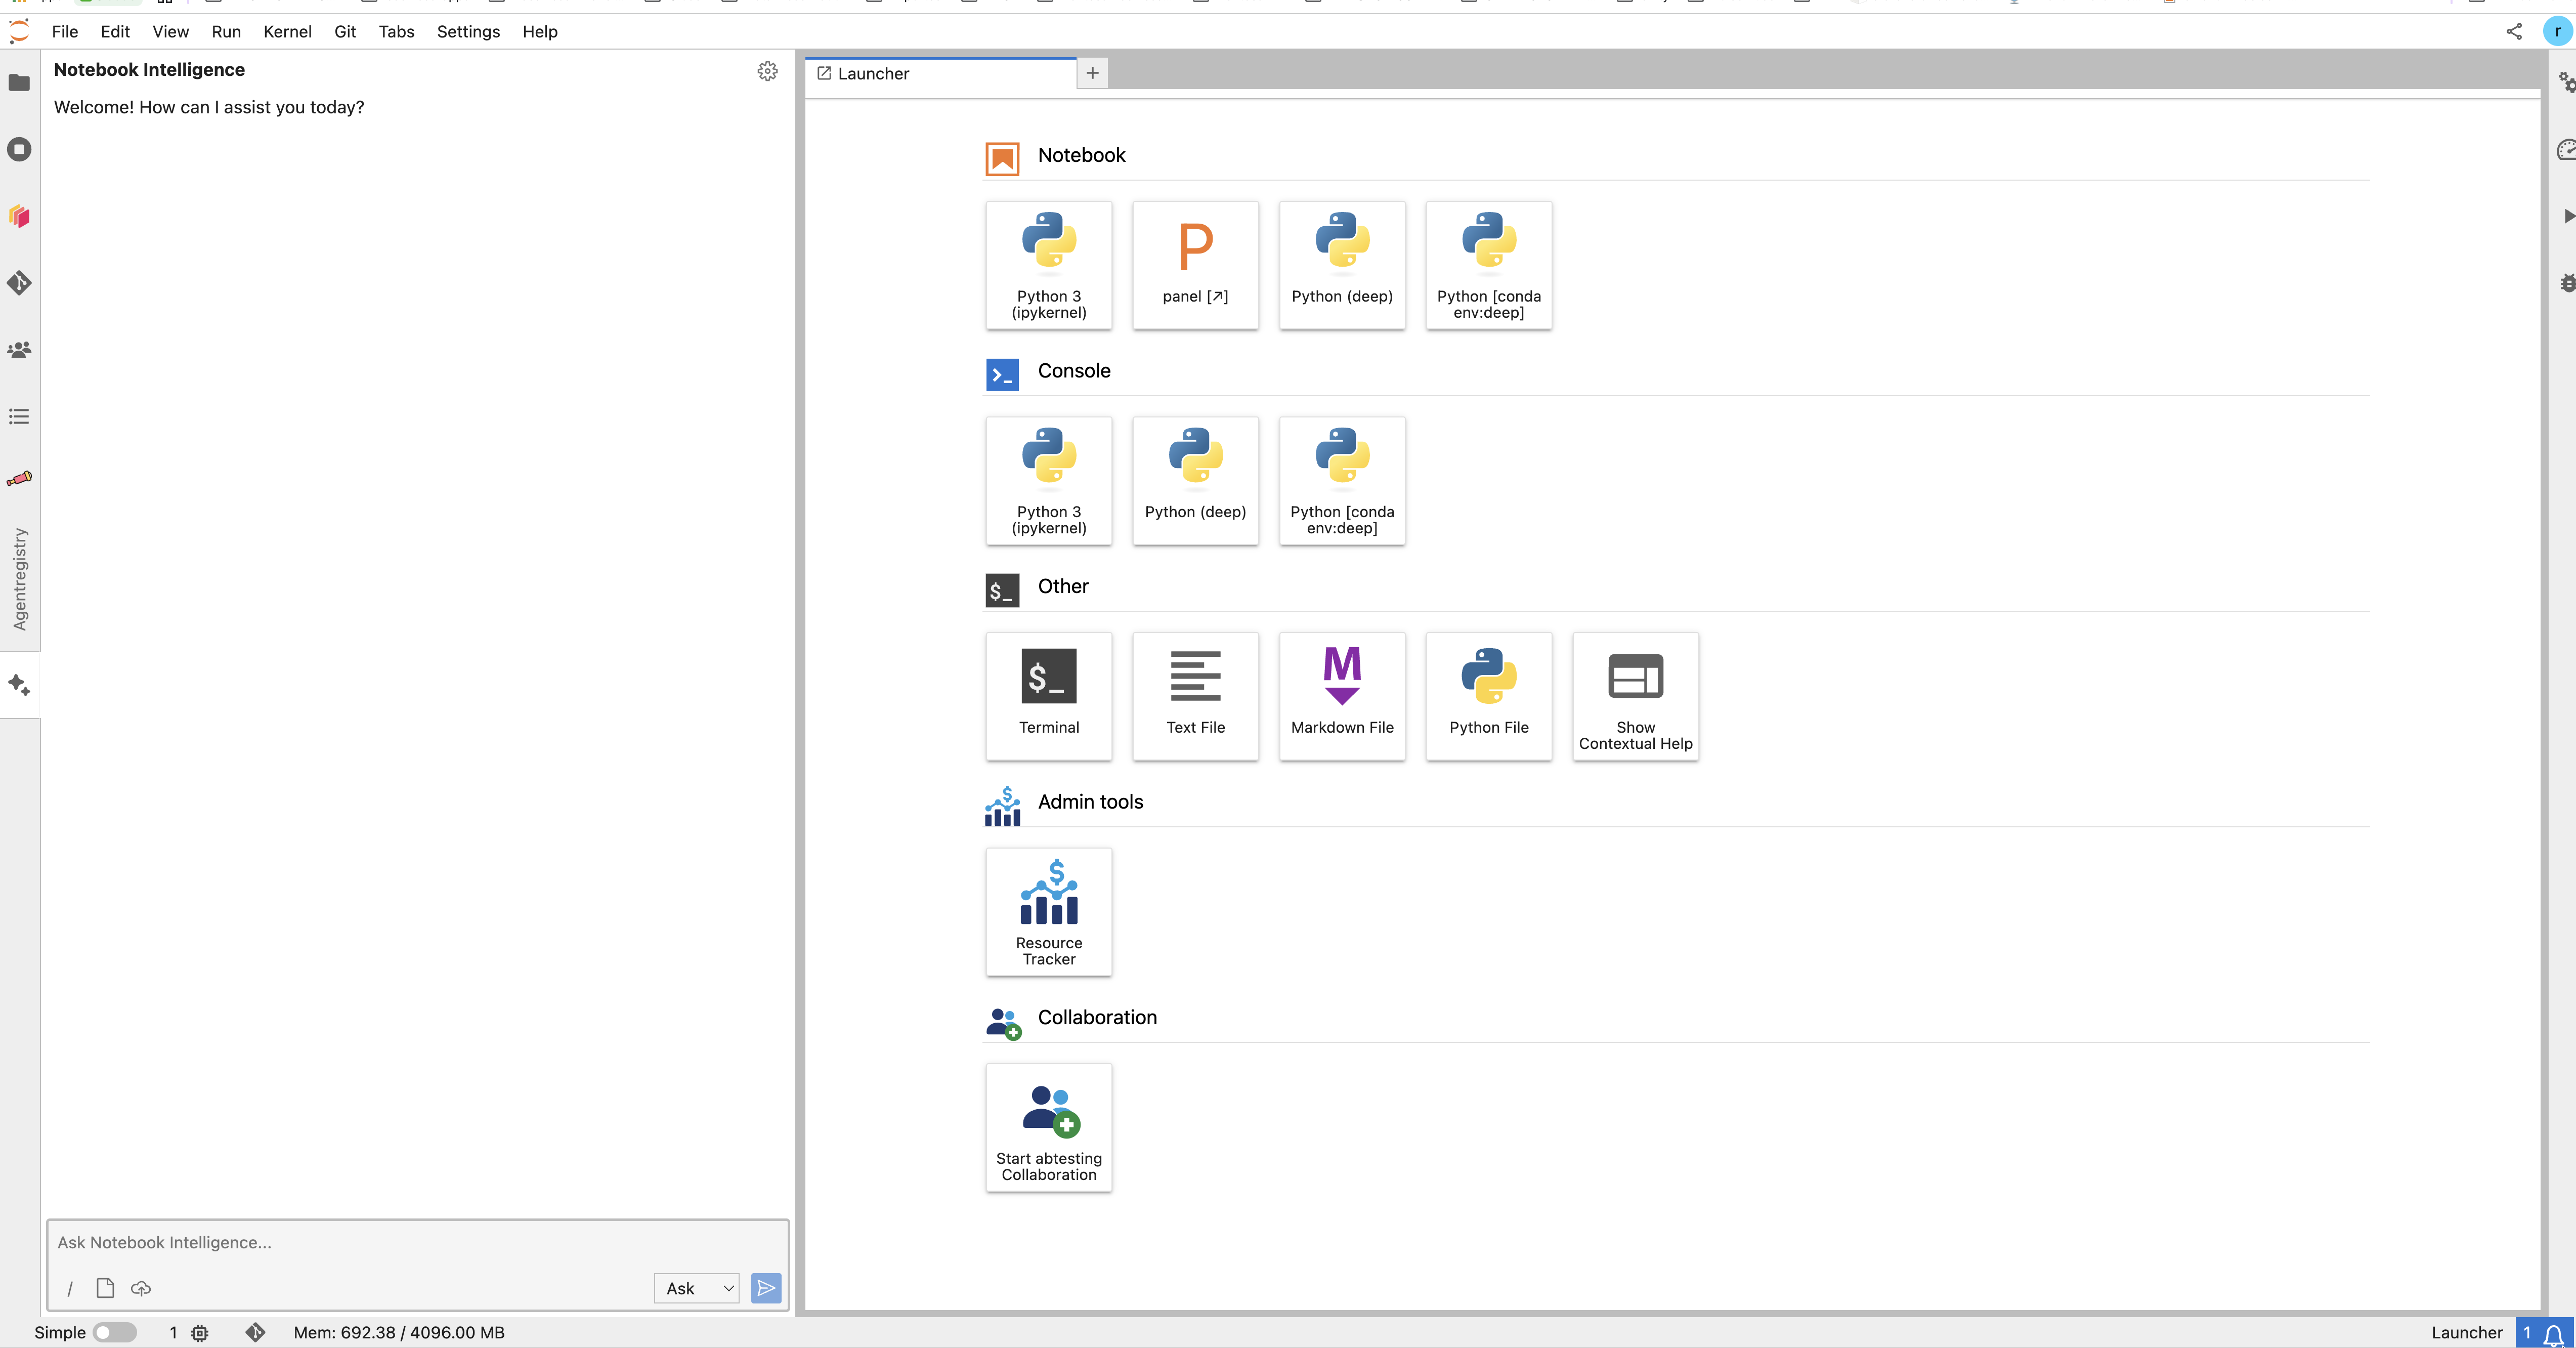
The Notebook Intelligence chat panel, open beside the Launcher.
...
| Info |
|---|
Download only. The data browser brings files in. It does not upload or write back. To put data into object storage, use the command line or your own code. |
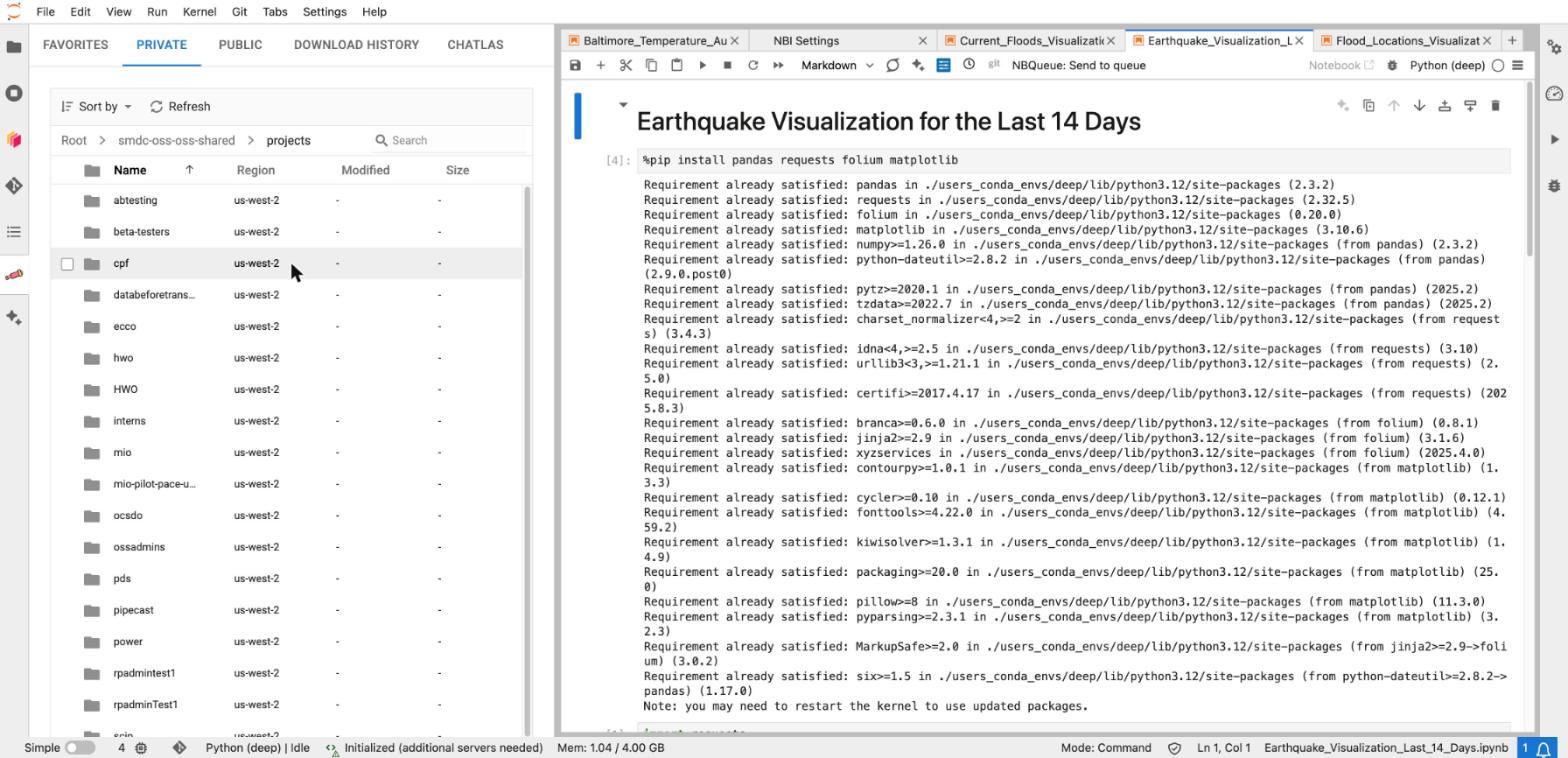
The data browser's PRIVATE tab: the platform bucket, opened to the shared projects folder.
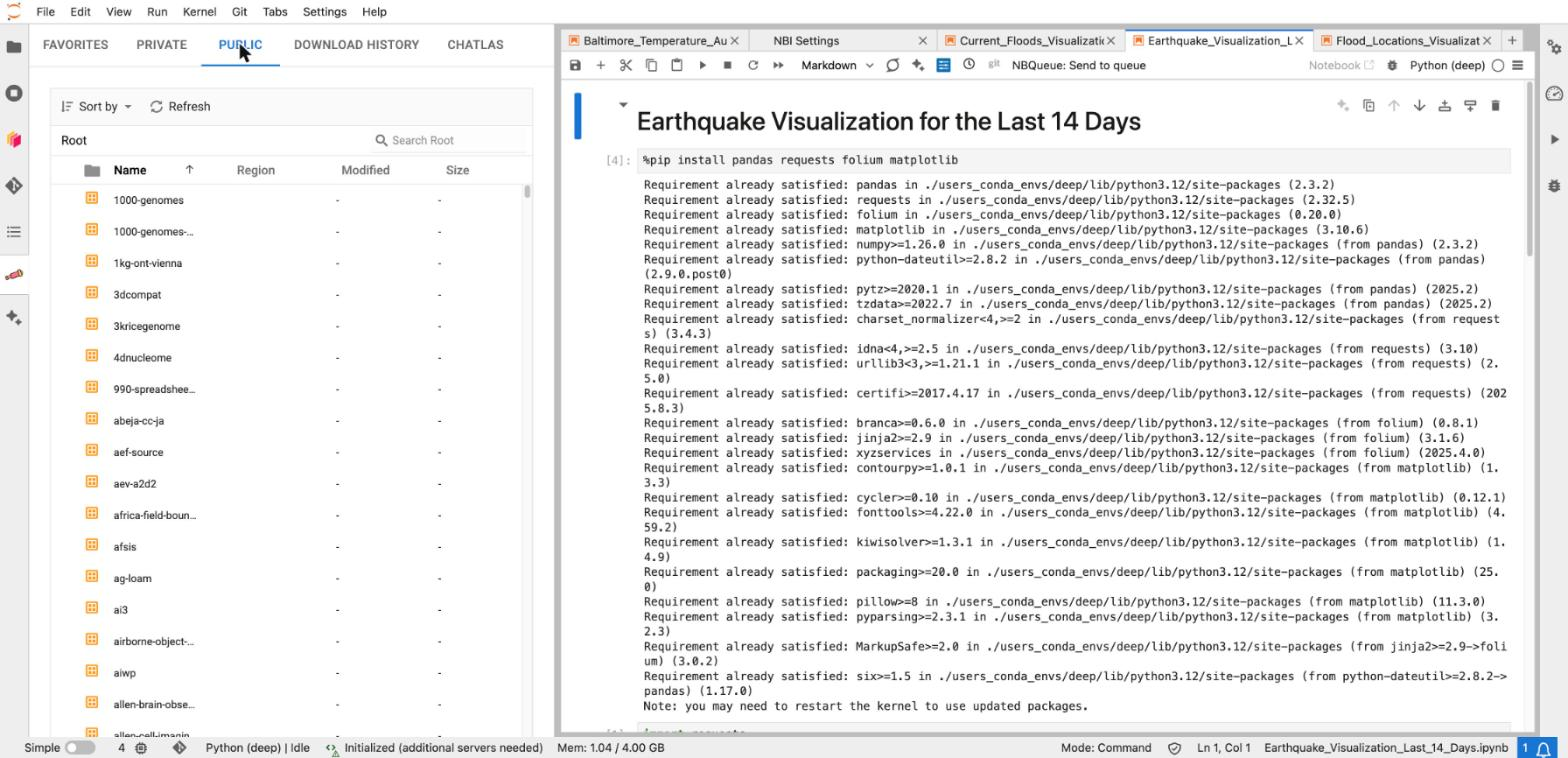
The data browser's PUBLIC tab lists public AWS science datasets.
...
Open the notebook and press NBQueue: Send to queue in the toolbar at the top. Choose the machine, and send it. Then check the status in the NBQueue panel. When it finishes, the finished notebook, with its output, is waiting for you.
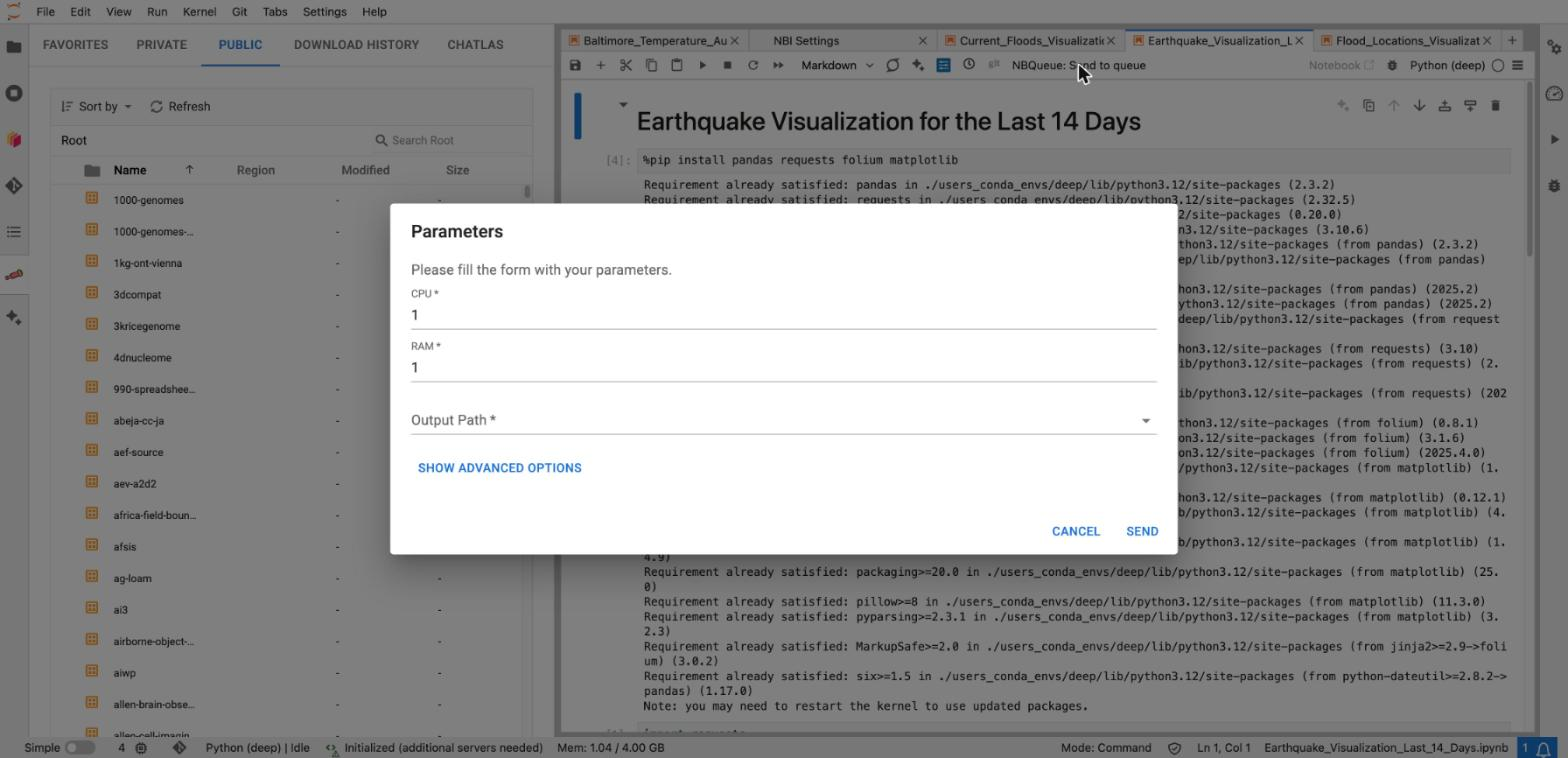
NBQueue asks for the CPU, the memory, and the output path. Then press SEND.
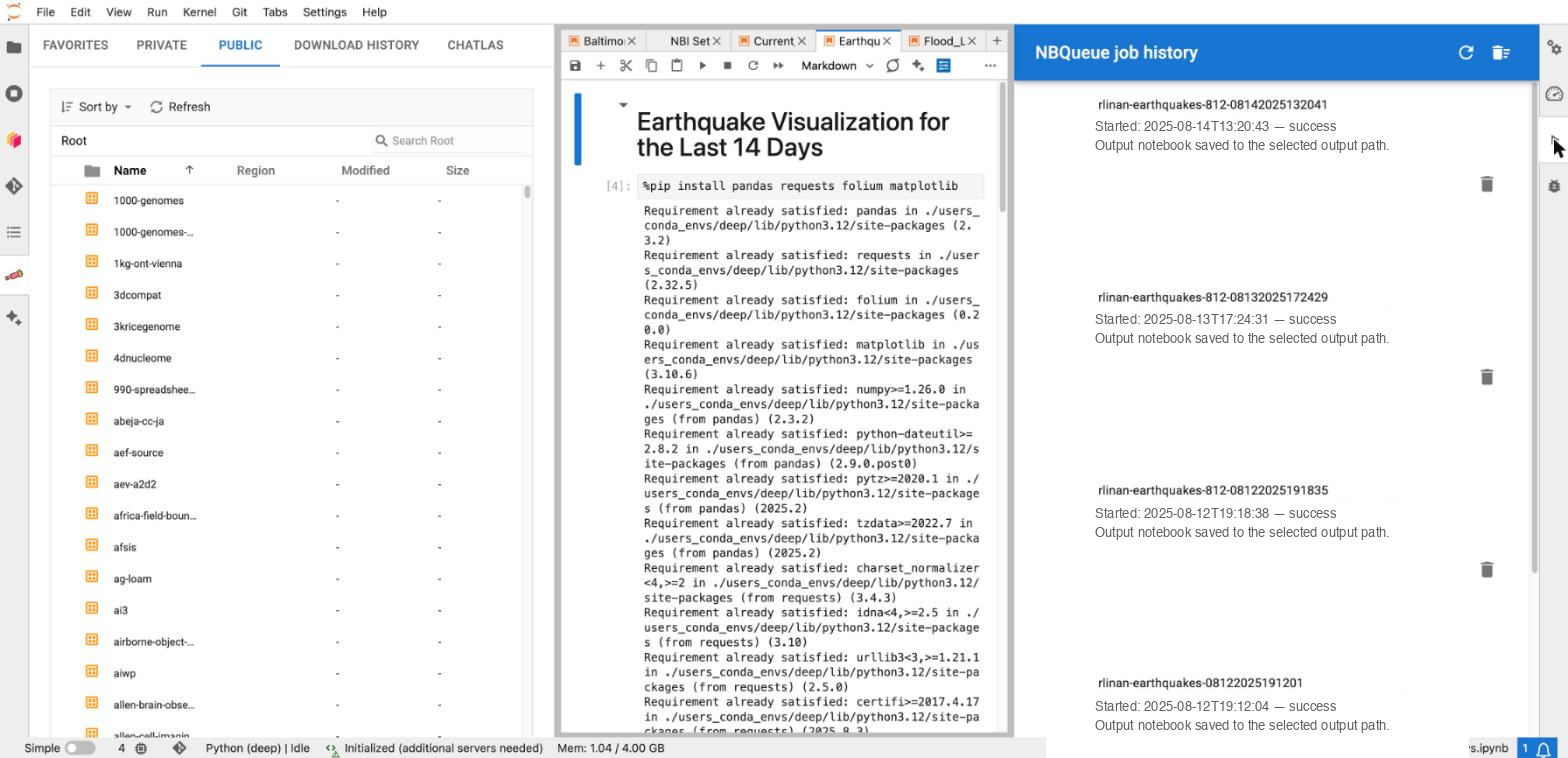
The NBQueue job history panel, in the right sidebar, lists your finished jobs.
...
| Info |
|---|
Example. Three of you must finish one notebook today. One person clicks the tile. Everyone else clicks the same tile and lands in the same session. You all edit the same notebook at once and see who is online. The files live in the shared project space. |
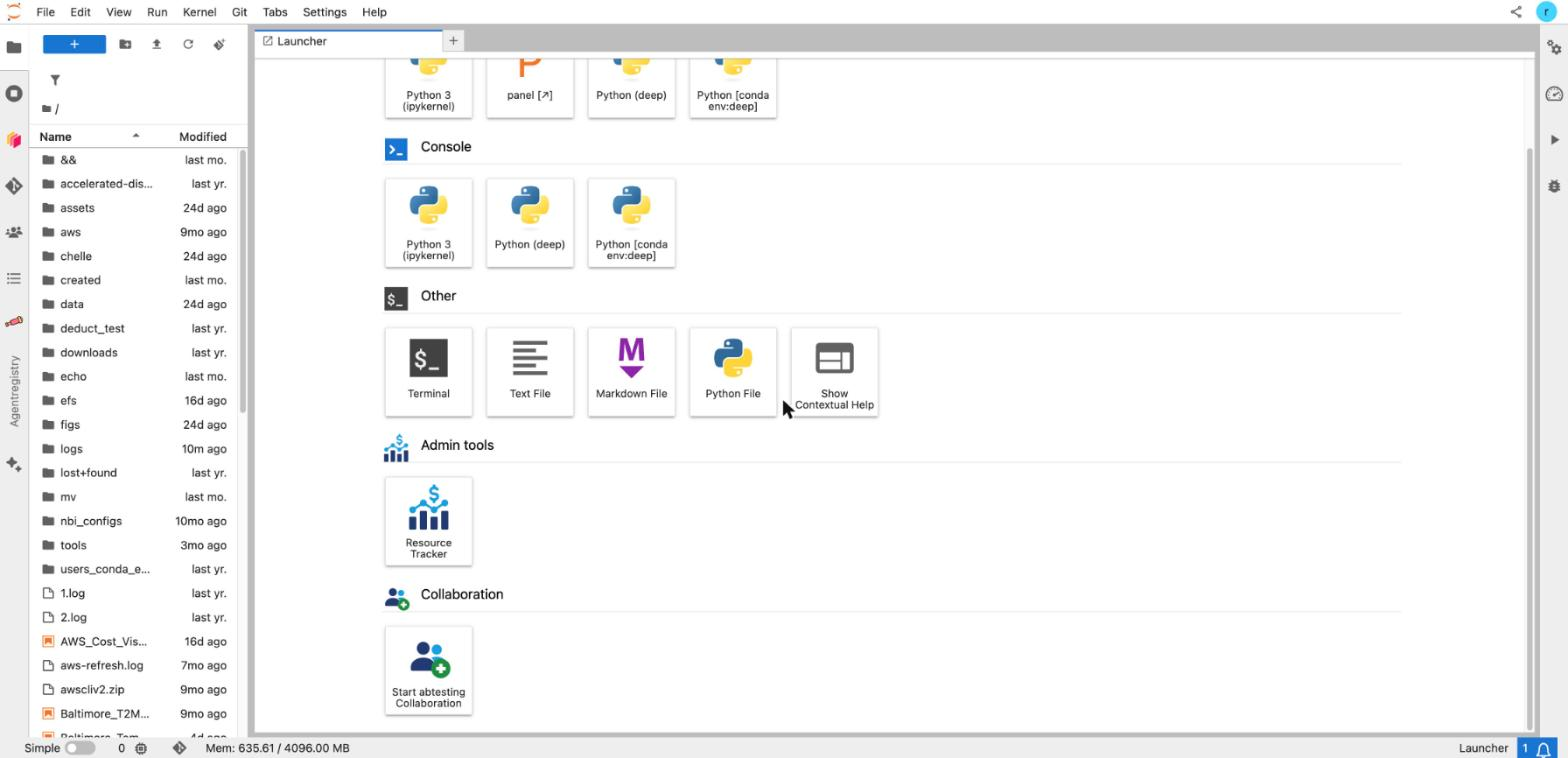
The Collaboration tile in the Launcher, before the shared session starts.
...
- This month — hours used, compute cost, and storage cost split by type.
- Funding period to date — what you have used, what you were given, and what is left.
- When the numbers were last updated.
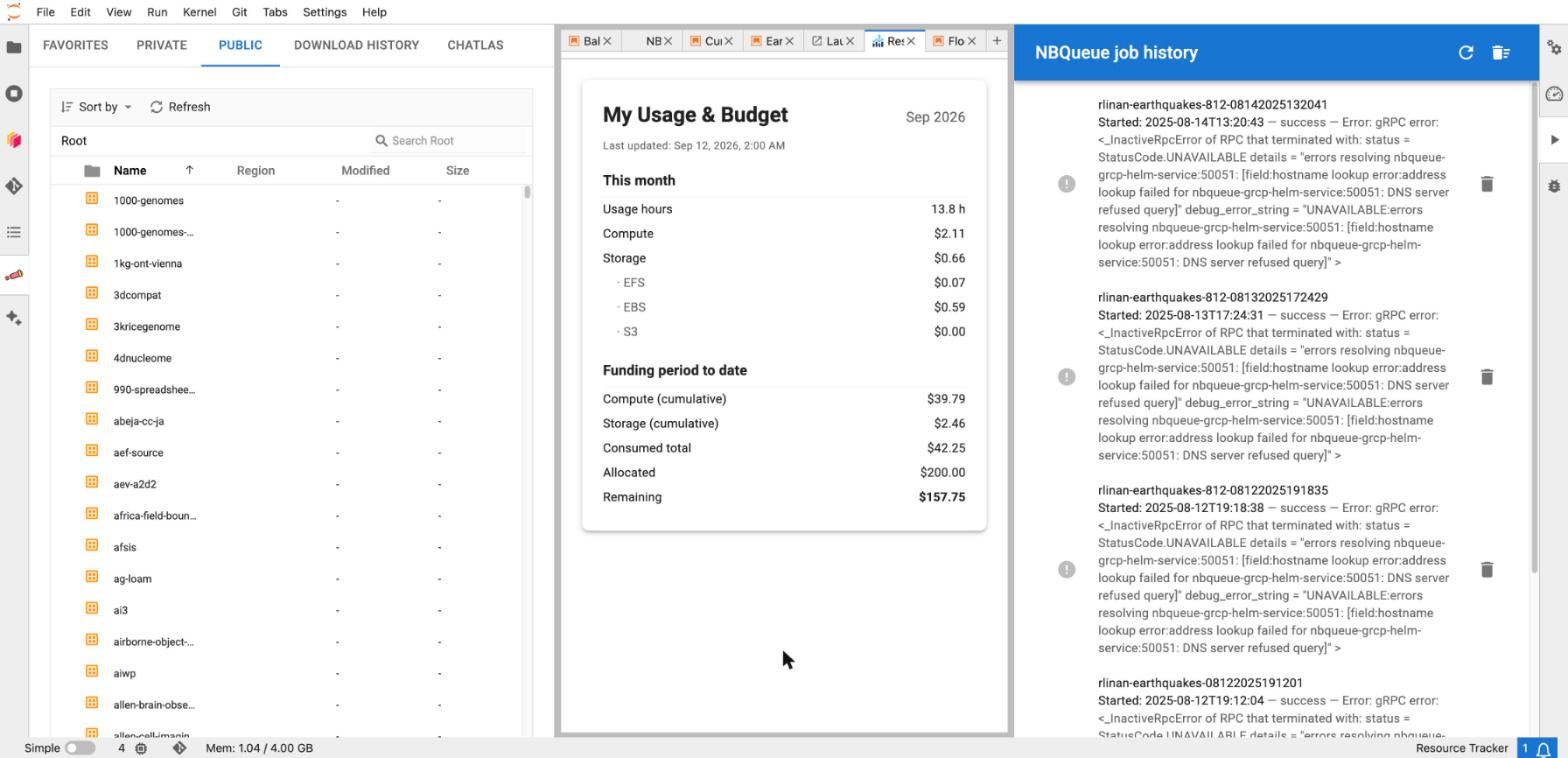
The Resource Tracker: This month, and Funding period to date.
...