Draft for review. This page is under review before the Operational Readiness Review. Panels marked as open questions are still waiting for an answer. Send corrections to the Research Platform team. |
Read time: 8 minutes. This page walks through one working day, in order. Prefer a tool-by-tool list? Read the tool reference instead. The team will decide which of the two pages to publish, or publish both. |
You need one of these, and a project:
See How to get access.
rp.sciencecloud.nasa.gov in your browser.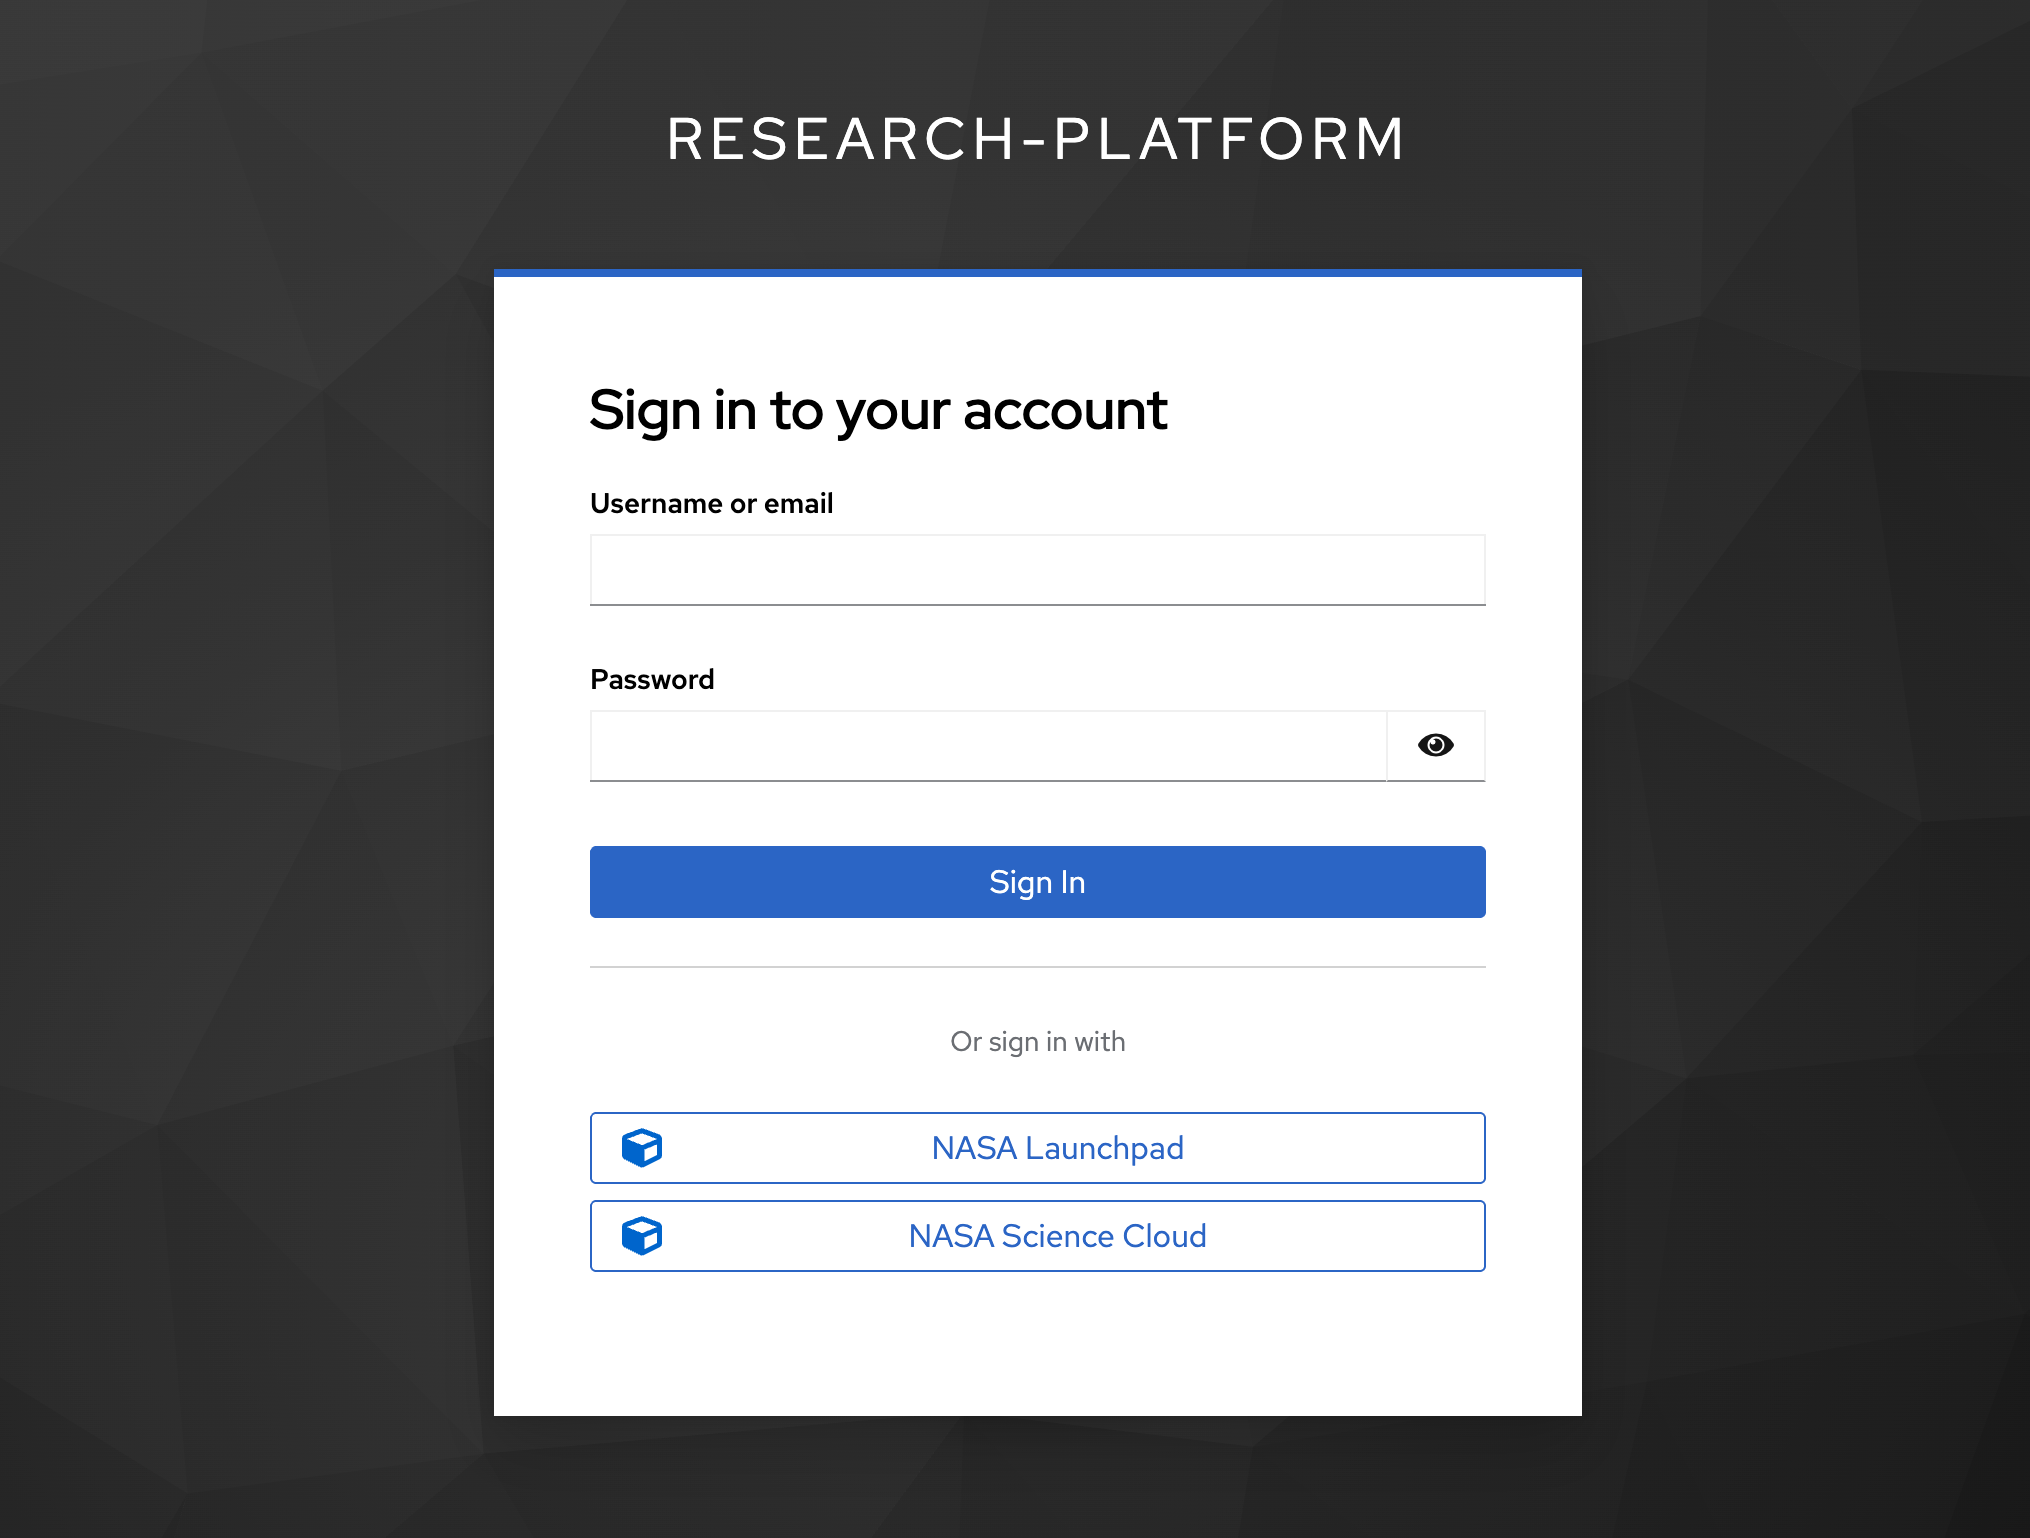
The sign-in page. Use your NASA Launchpad or NASA Science Cloud identity.
There is nothing to install.
The launch screen is called Server Options.
How big a machine? The Server Type list gives you four choices:
| Server Type | You get |
|---|---|
| Standard | up to 4 GB RAM / 4 CPU |
| Large | up to 8 GB RAM / 4 CPU |
| Extra Large | up to 16 GB RAM / 4 CPU |
| r5.2xlarge Node (On Demand) | up to 64 GB RAM / 8 CPU |
Which software set? The Images list holds the ready-made science stacks — for example Earth Science Server (with AI Intelligence). An Other image box lets a project use its own image. (An image is a packaged set of software.)
Which project? The Project list picks which project this session belongs to. It decides which project storage you can reach and which budget the session is charged to.
Coming later. Two changes to this list are on the roadmap: GPU machines, and letting a project admin build and maintain their own list of server types for their team, instead of everyone choosing from one platform-wide list. |
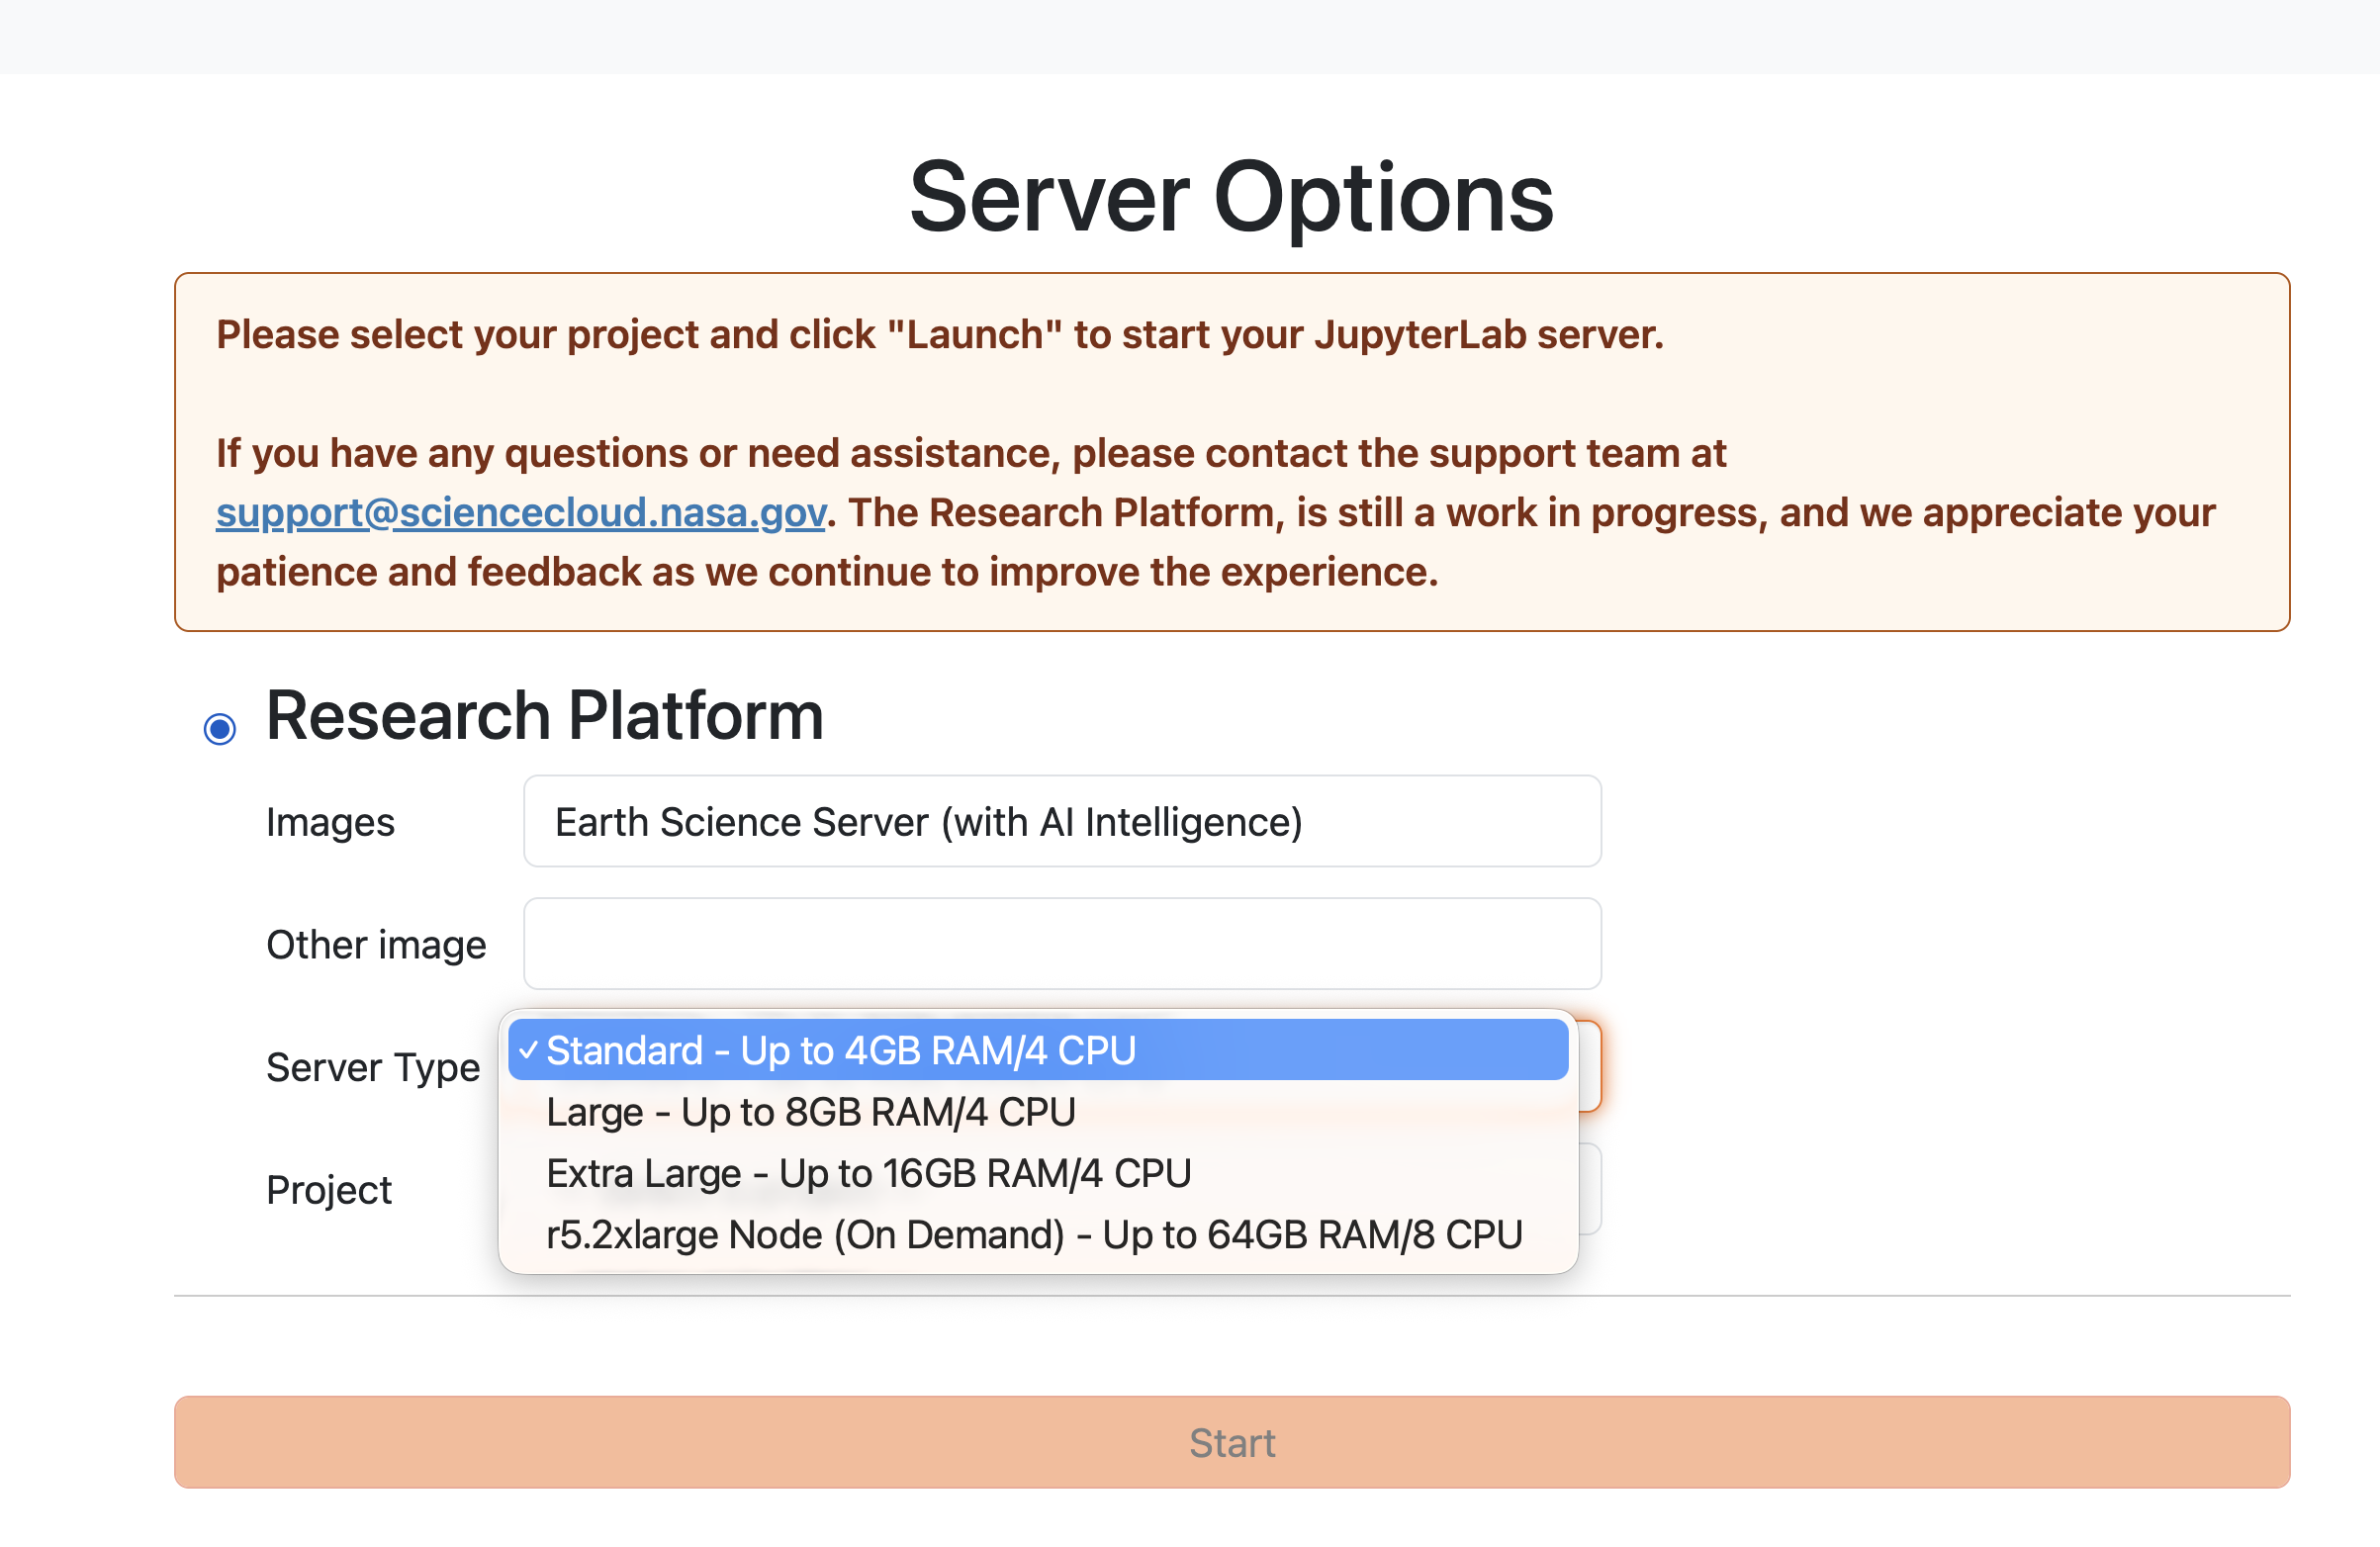
The Server Options screen: pick the image, the server type, and the project.
Press start. Your workspace opens in a minute or two.
You are now in JupyterLab. The important parts:
| Part of the screen | What it is for |
|---|---|
| Left sidebar — file browser | Your files |
| Left sidebar — other icons | The platform tools: usage, data browser, AI tools, background jobs |
| Launcher (the big tile page) | Start a notebook, a console, or a terminal — and the Resource Tracker and Collaboration tiles |
| Main area | Your open notebooks |
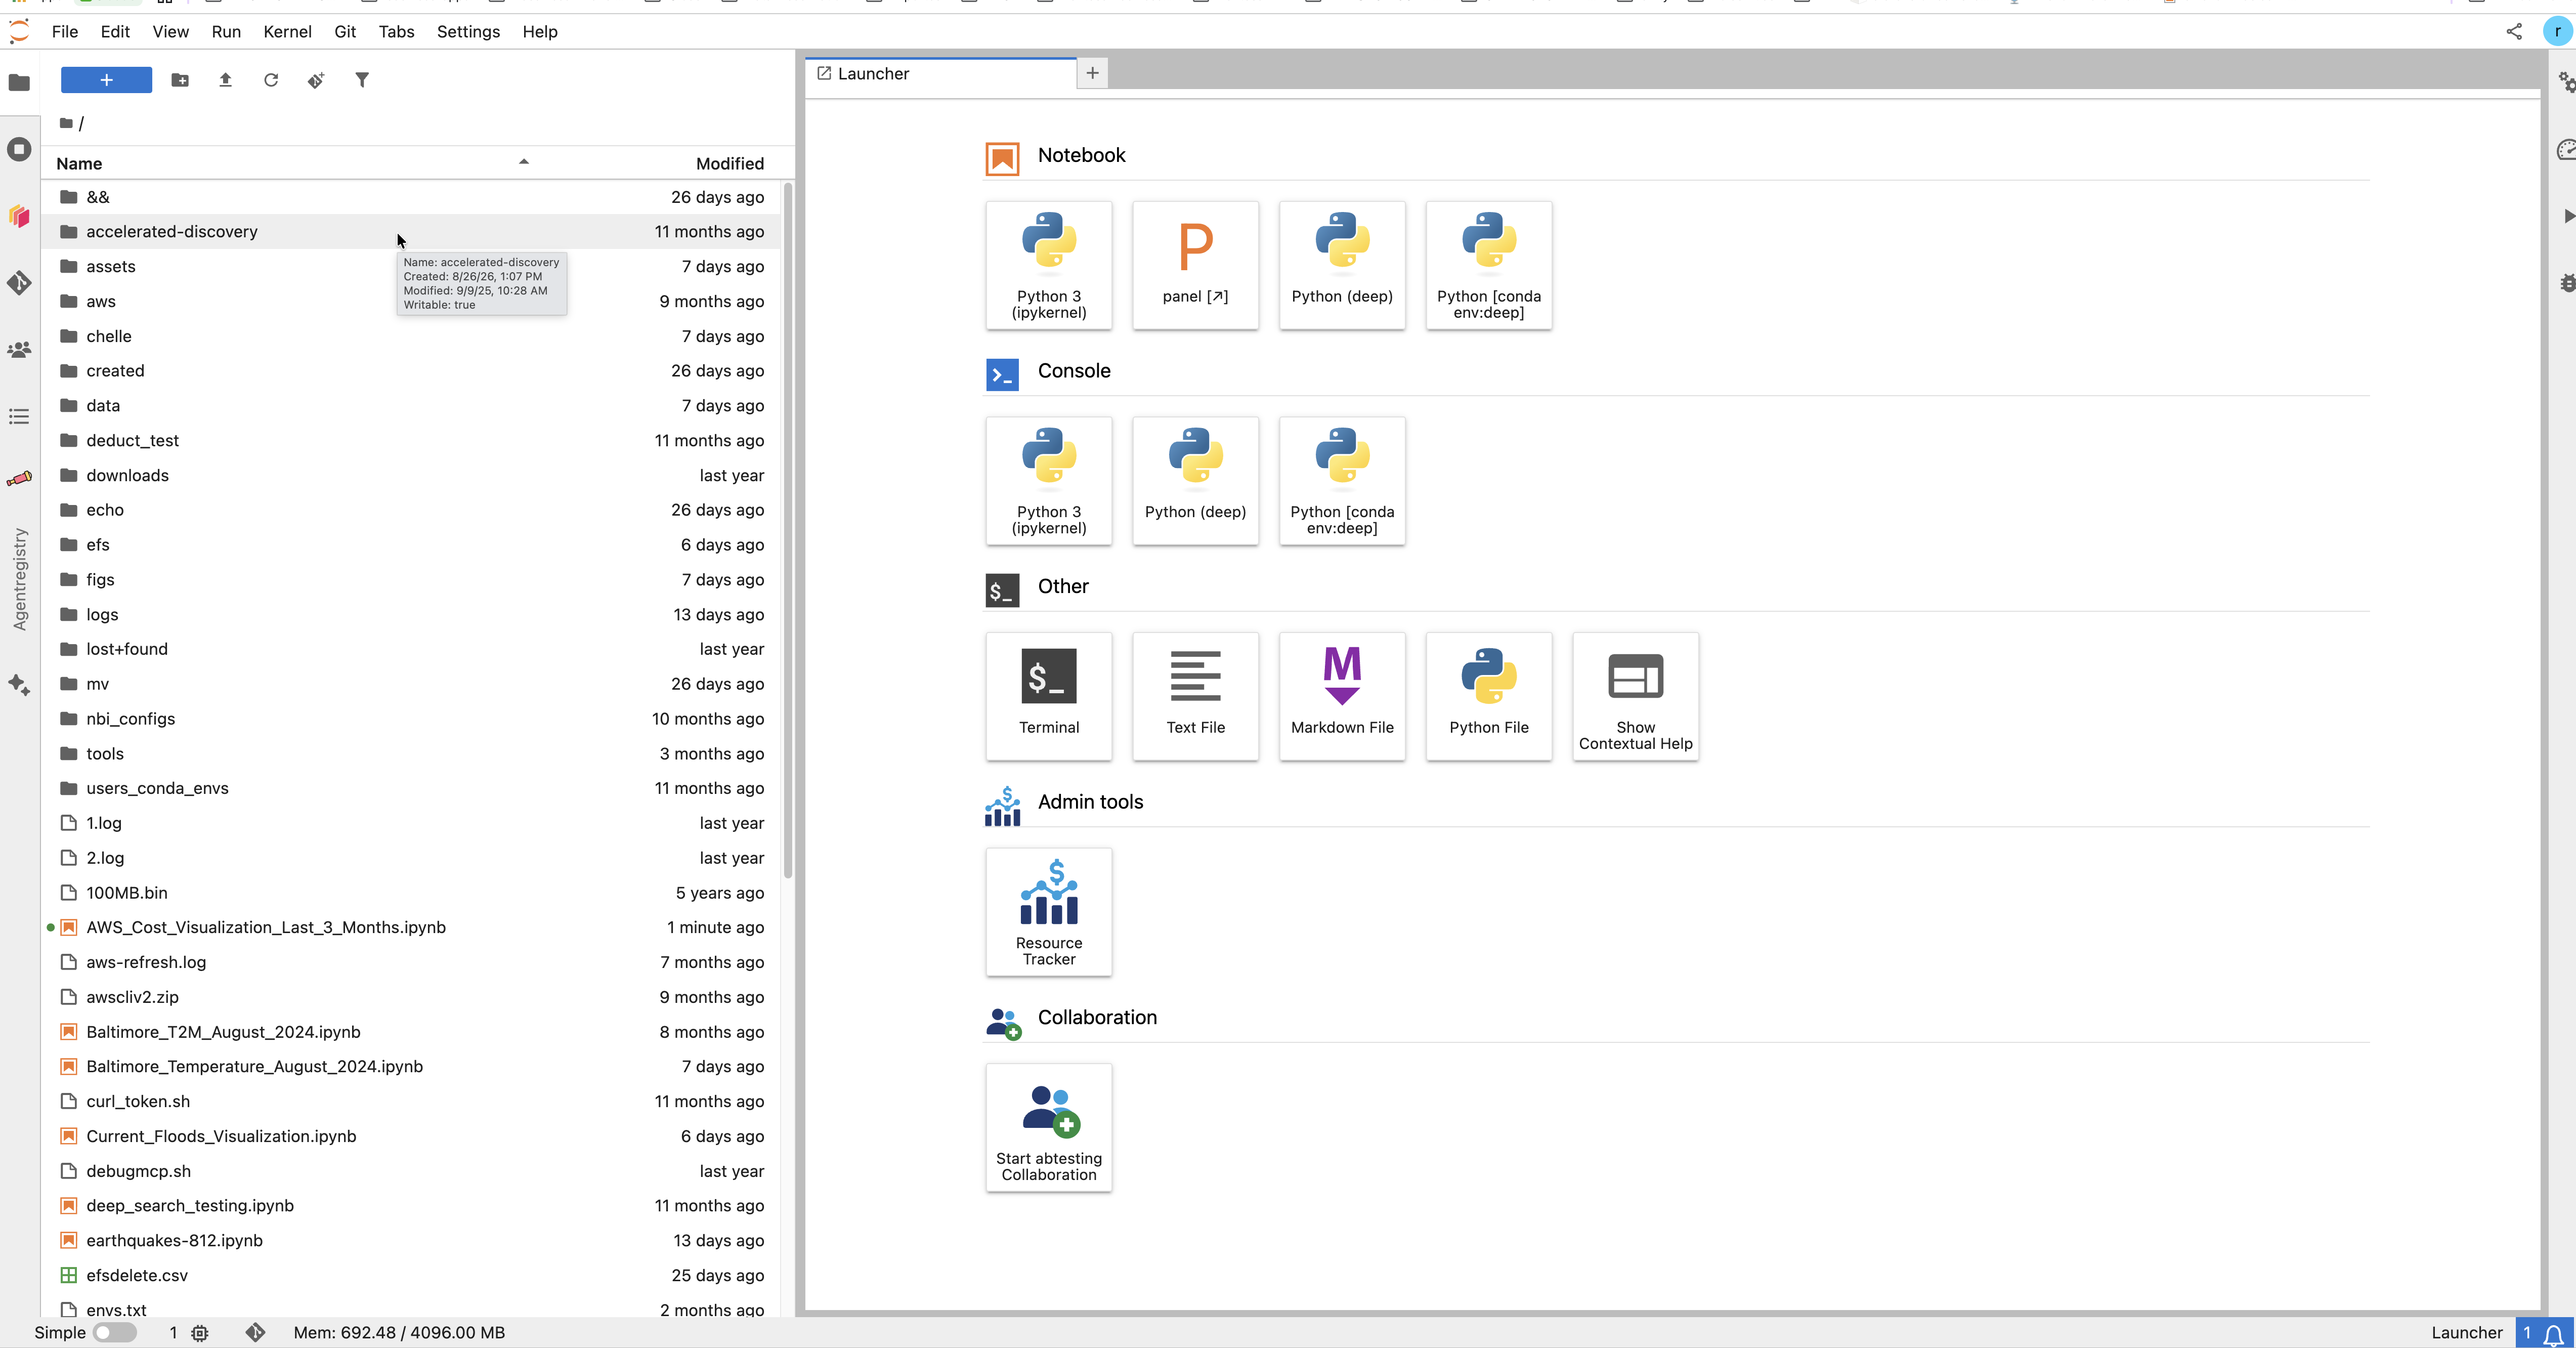
JupyterLab. The file browser is on the left; the Launcher tiles are in the middle.
This is the most important thing to learn on day one. Some places keep your files. Some do not.
| Place | Path | Who sees it | Survives a restart? |
|---|---|---|---|
| Your home folder | ~, which is /home/<your name> — for example /home/ramon.linan | Only you | ✅ Yes |
| Your own EFS folder | /efs/<your username> — the full email form, for example /efs/ramon.linan@navteca.com | Only you | ✅ Yes |
| A project folder on EFS | /efs/<project> — one for every project you belong to | Everyone in that project | ✅ Yes |
| Object storage — your own space | s3://<bucket>/home/<your username> | Only you | ✅ Yes |
| Object storage — project space | s3://<bucket>/<project> — the project you picked at launch | Your project | ✅ Yes |
| Anywhere else in the machine | /tmp, system folders, software you install outside your home folder | — | ❌ No. Lost. |
The rule: keep your work in ~, in /efs/…, or in object storage. Everything else disappears when your workspace restarts.
How big is your home folder? It starts at 10 GB. It can be made larger — ask the platform team for the size you need. Keep it sensible: a very large home volume makes your workspace slower to start. Large data belongs in /efs/<project> or in object storage.
Two things worth knowing:
/efs/ and you see a folder for each one. You cannot open other people's folders — the permissions stop you.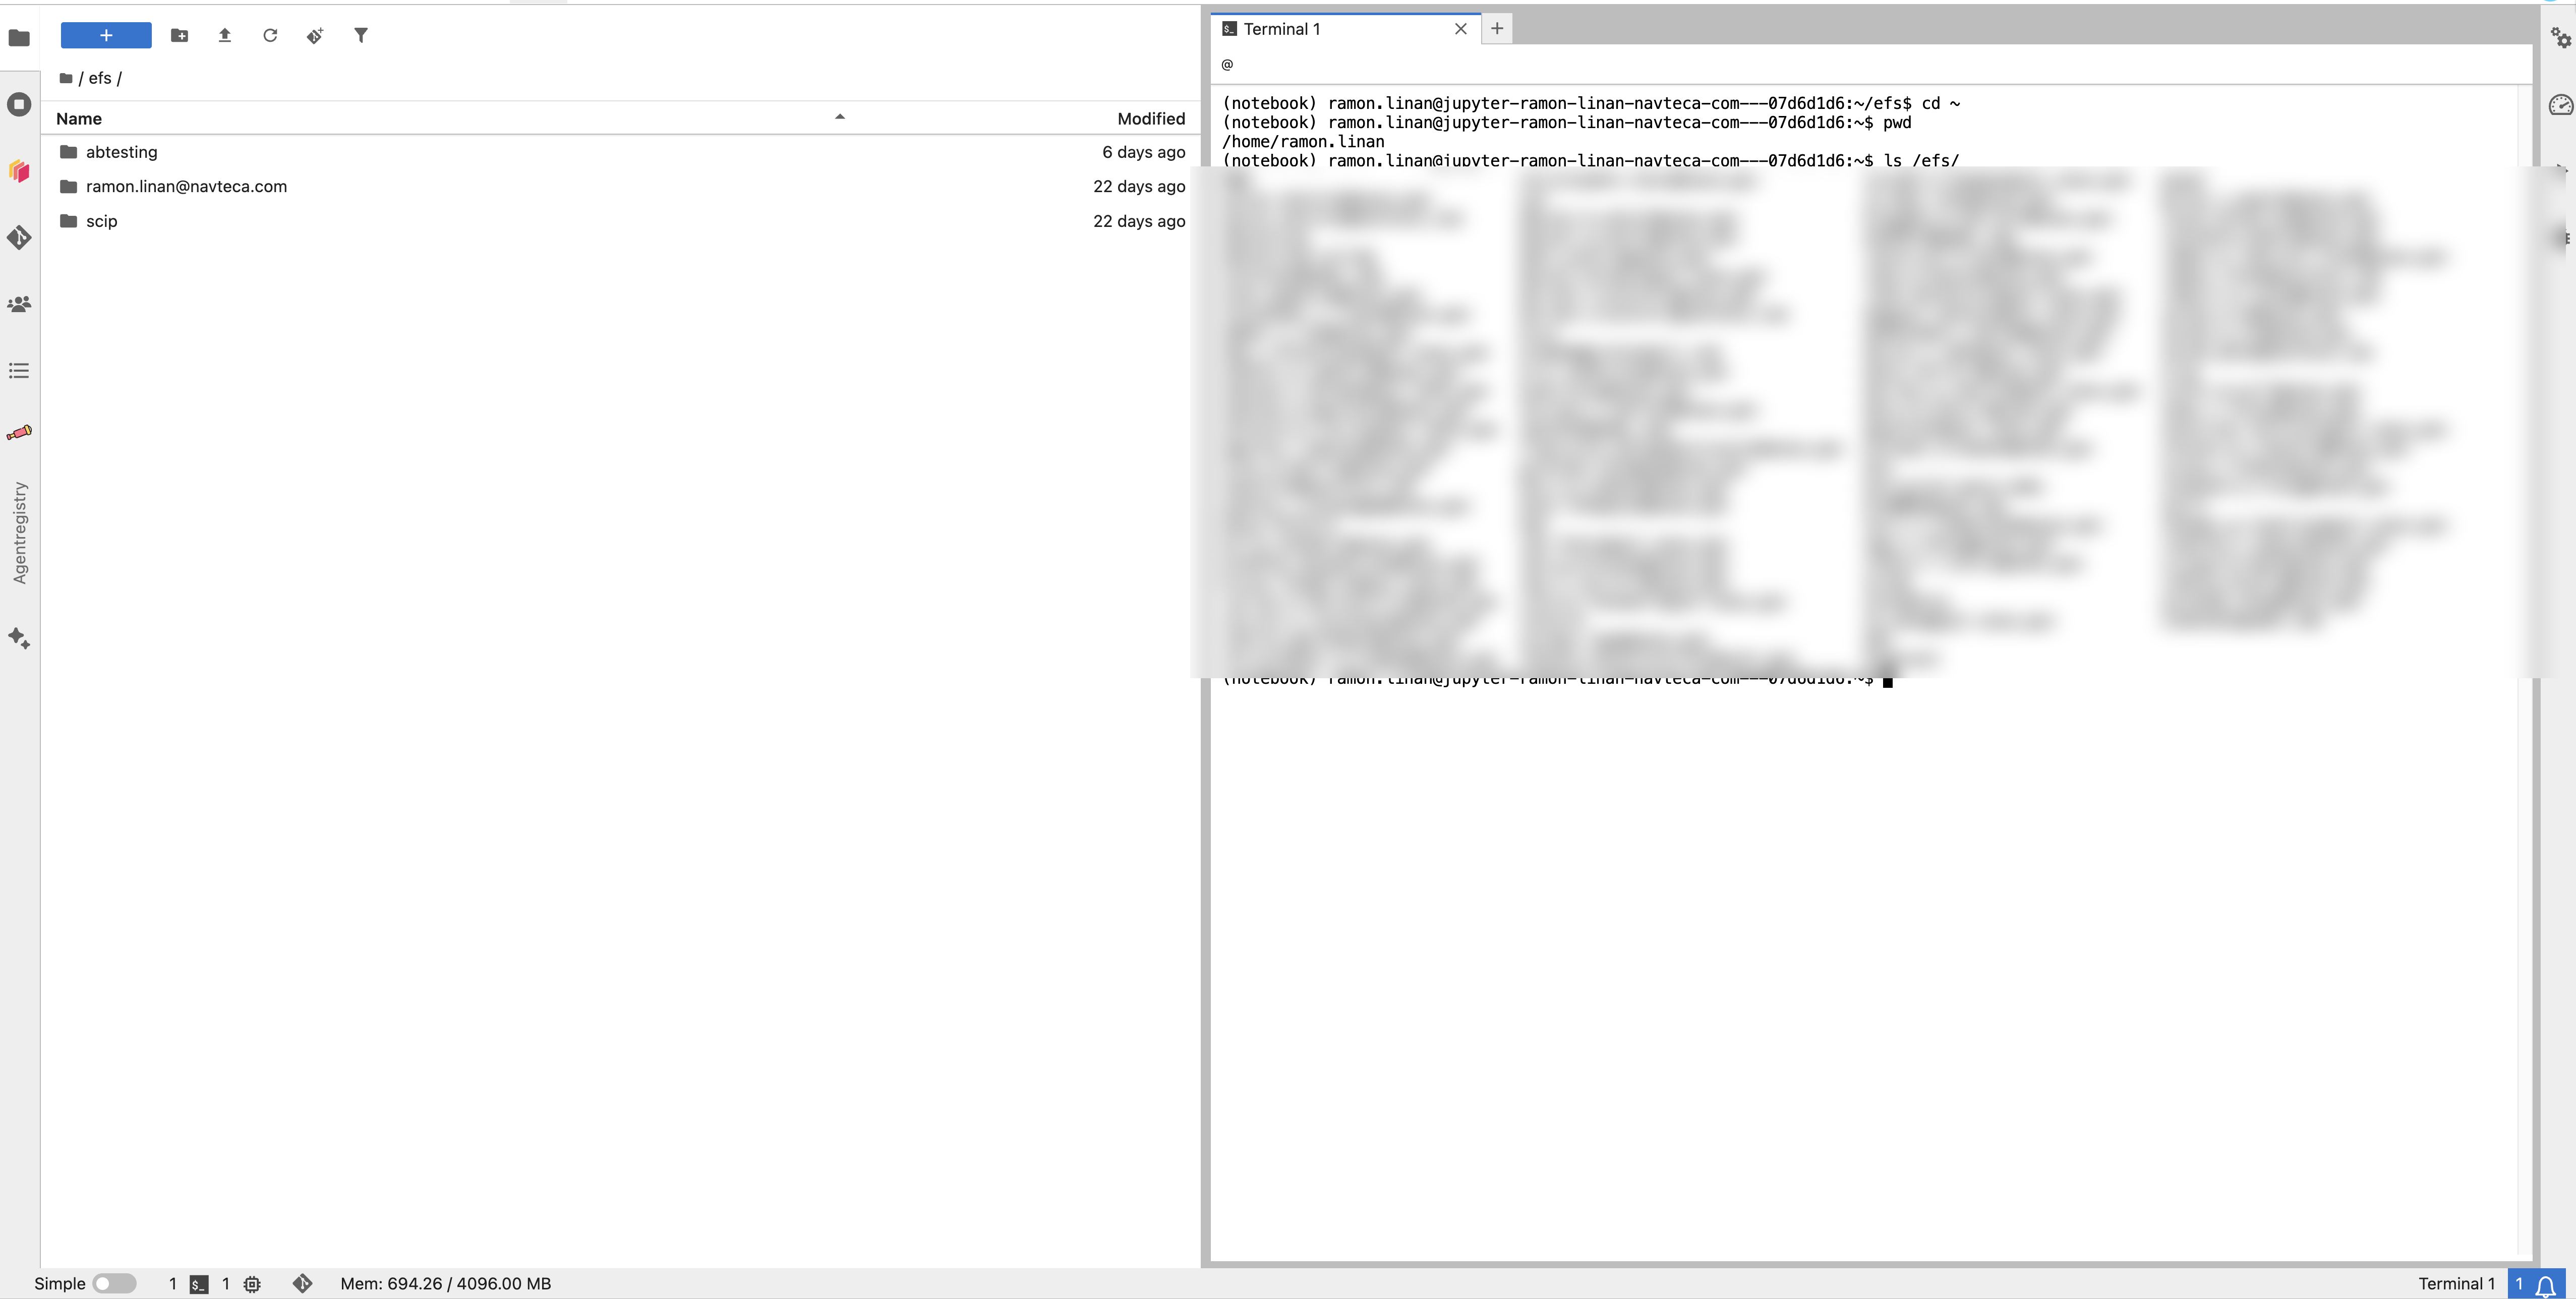
The same files, two ways: the file browser on the left, a terminal on the right. The user list is blurred on purpose.
Which one should I use?
| Your file | Put it here |
|---|---|
| My notebooks and scripts | Home folder, ~ |
| Data or a result my team needs | The project folder, /efs/<project> |
| A very large dataset | Object storage |
| A scratch file I do not care about | Anywhere. It will be lost. |
Open the Launcher and start a notebook. Write code in a cell. Press Shift+Enter to run it. The result appears under the cell.
This part is normal Jupyter. If you have used Jupyter anywhere else, you already know it.
Sometimes the ready-made software set does not have the package versions you need. You can build your own environment and use it as a kernel. (A kernel is the entry in the notebook's "choose your language" menu. An environment is your own private set of packages.)
Build it in your home folder. That is what makes it survive a restart.
Open a terminal from the Launcher and run:
# 1. create the environment (mamba is the fast version of conda) mamba create -n myscience python=3.12 ipykernel -y # 2. turn it on conda activate myscience # 3. add the packages you need mamba install -c conda-forge xarray netcdf4 -y |
That is all. The kernel appears in JupyterLab by itself, because the platform watches your environments for you.
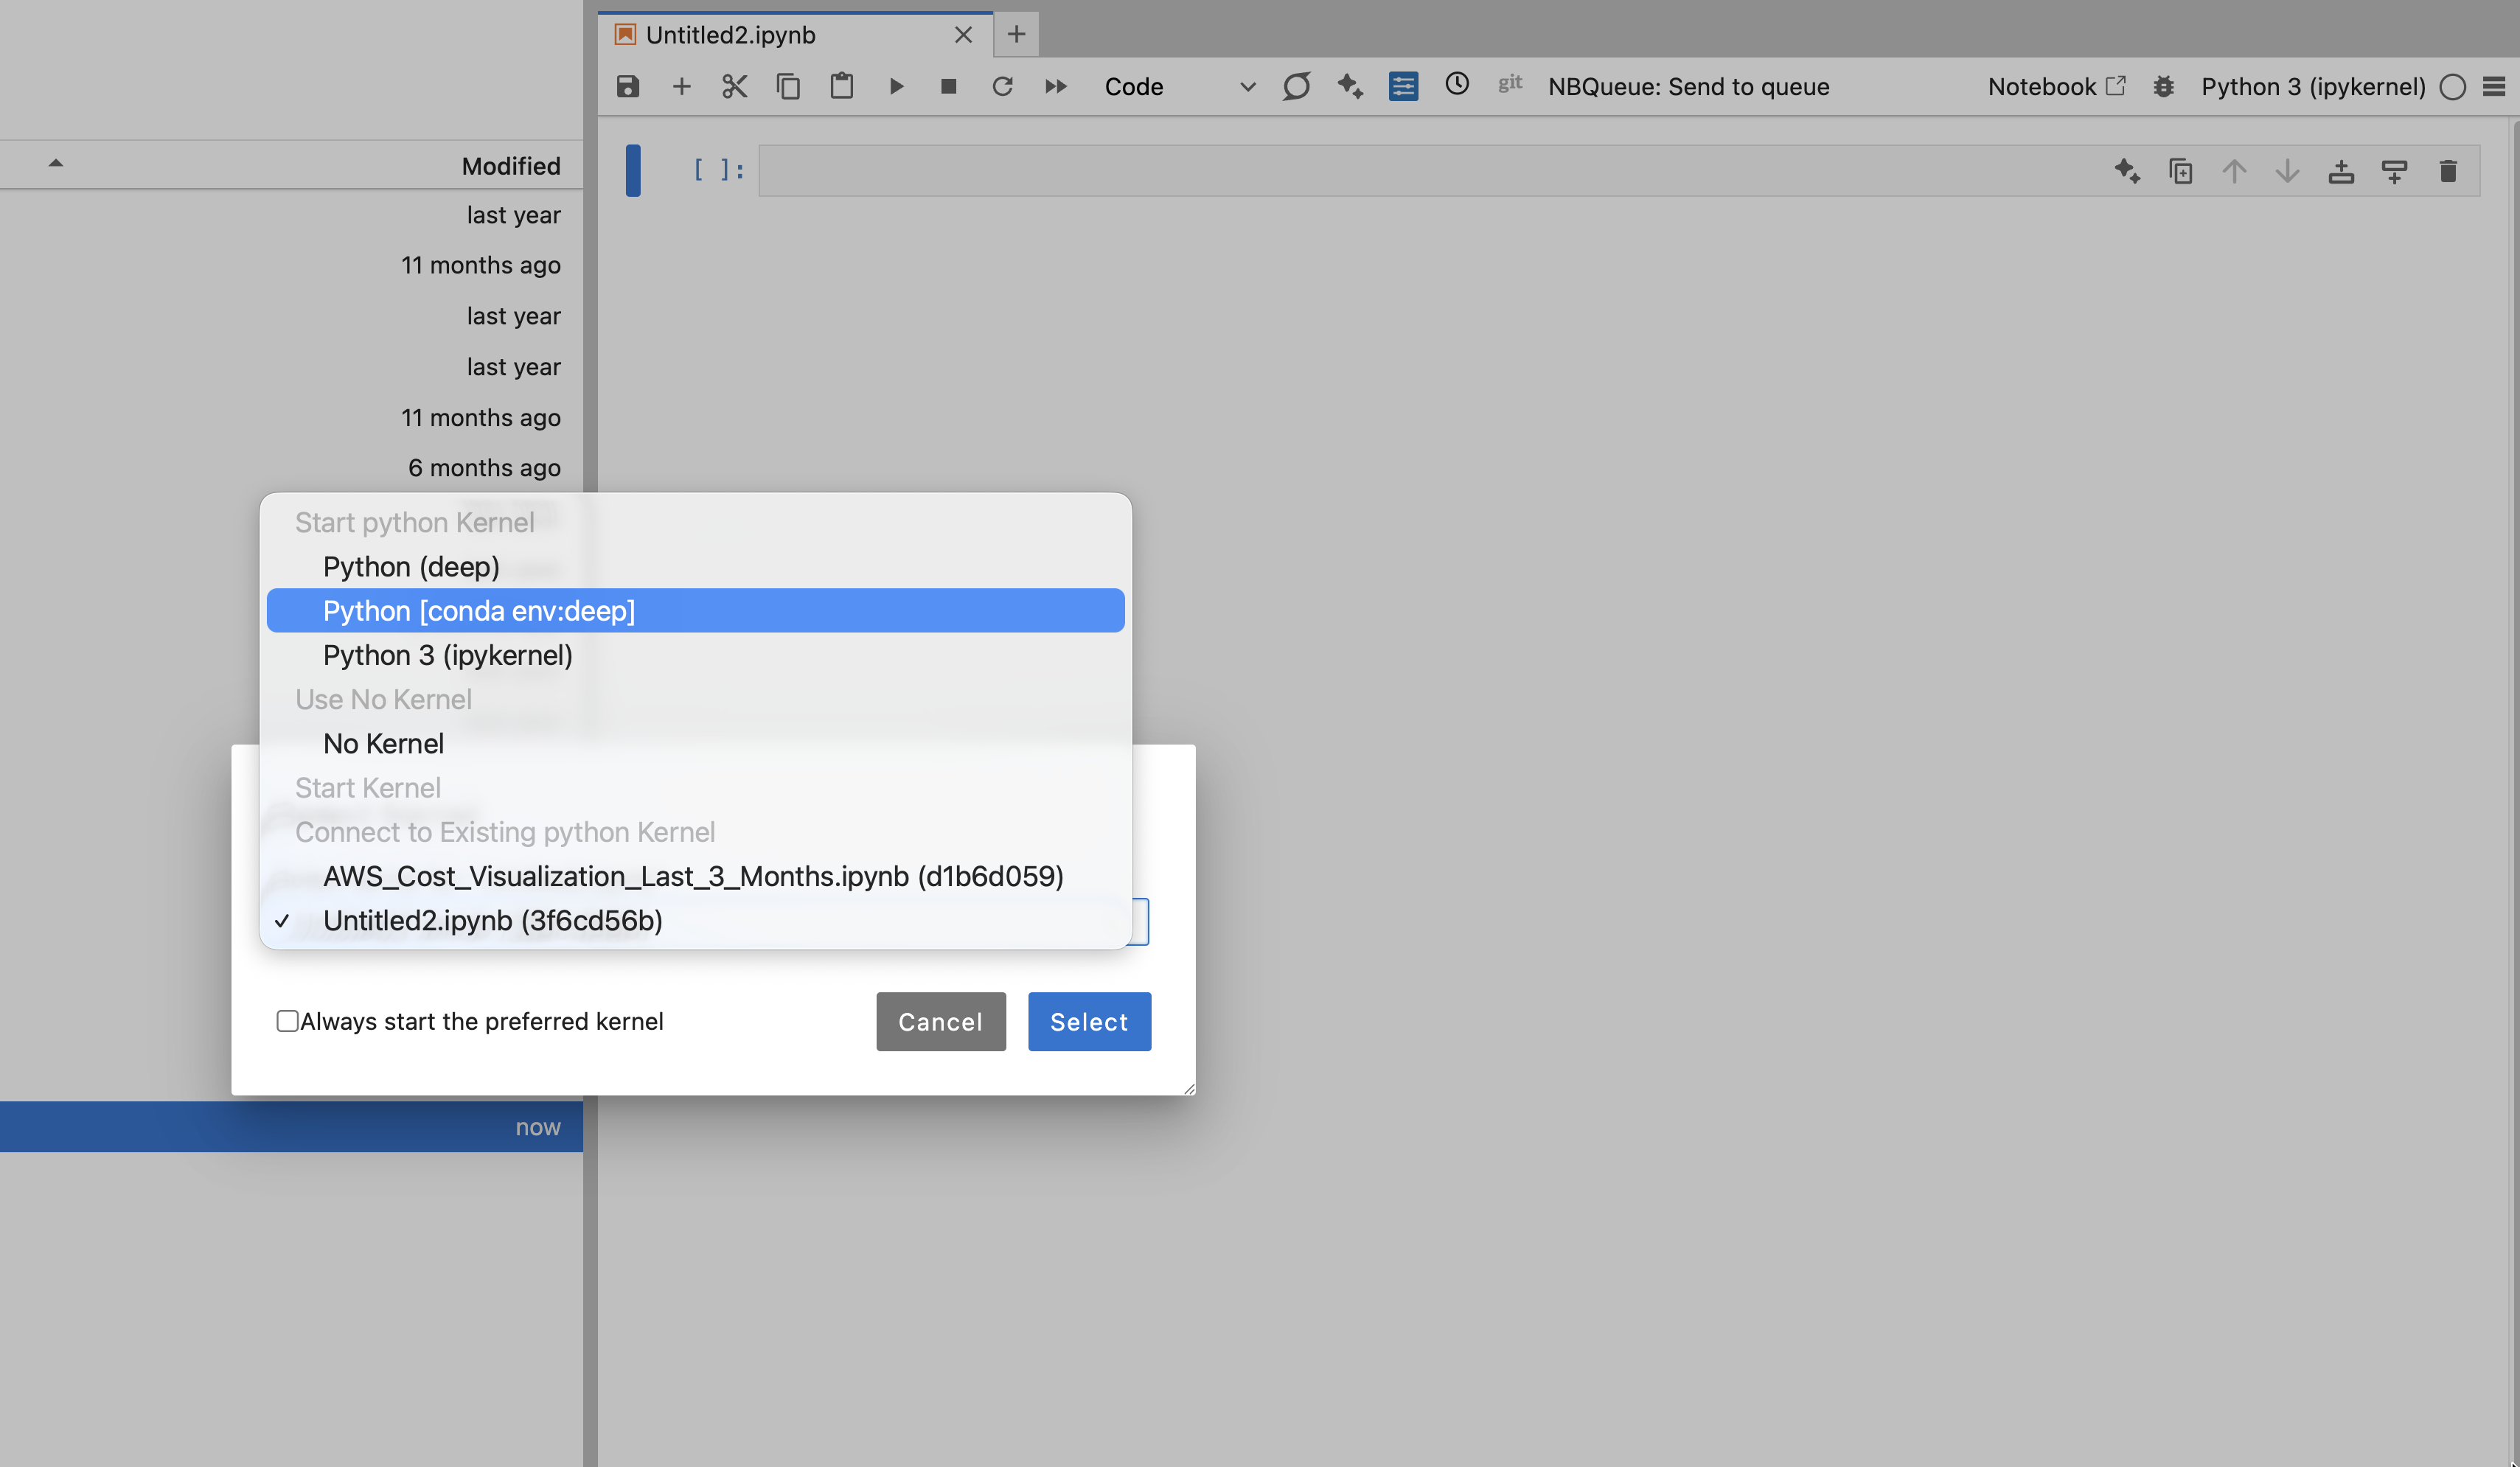
Kernel, then Change Kernel. Your own environment appears in the list.
Use Kernel → Change Kernel in your notebook and pick it.
Why this survives a restart. The platform is set up to keep your environments in |
Two things to remember. 1. Always put |
If the kernel does not appear, register it by hand: |
The Notebook Intelligence tool puts an AI assistant in JupyterLab.
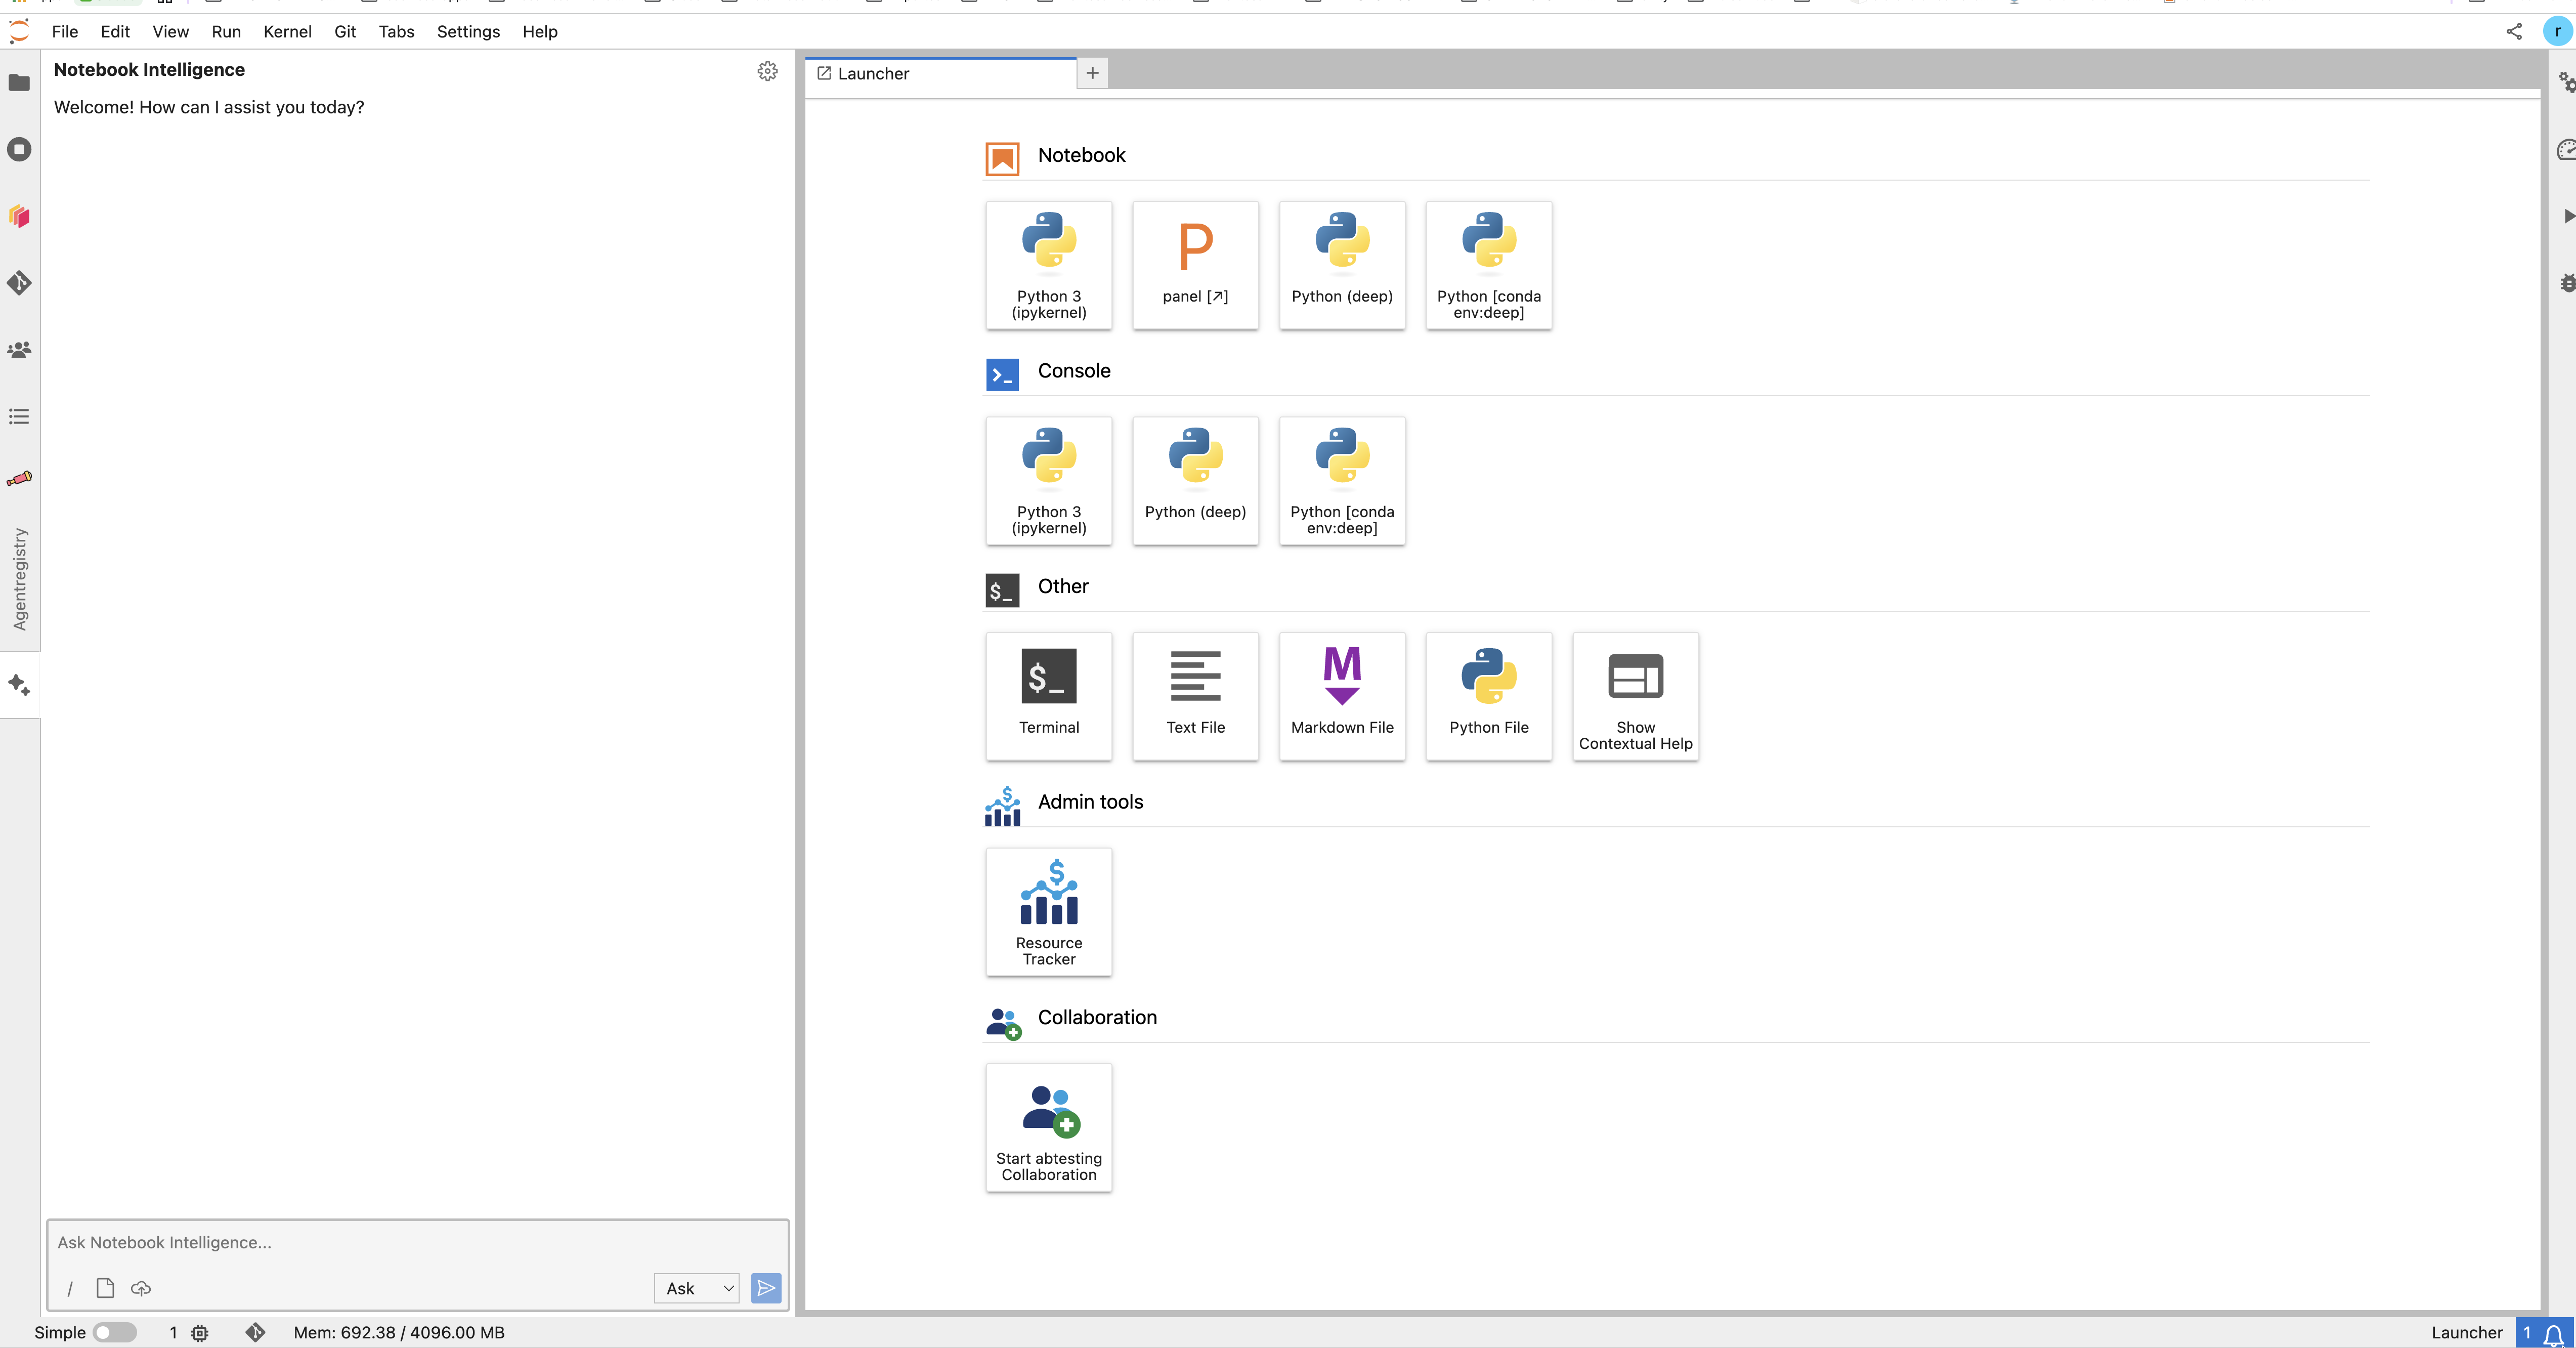
The Notebook Intelligence chat panel, open beside the Launcher.
Example — explain code. You open a colleague's notebook and do not understand a cell. Select the cell, ask the assistant to explain it, and read the answer next to the code. |
Example — write code. In an empty cell, describe what you want, such as "read this CSV and plot the monthly mean". The assistant writes the code. You check it and run it. |
Example — fix an error. A cell fails. Ask the assistant what the error means. It suggests a fix in place. |
You can also use your own model provider. See Notebook Intelligence and your LLMs.
Give the assistant new skills. The AgentRegistry panel in the left sidebar lists approved MCP servers — small services that teach the assistant a new trick, such as searching a data catalog. Press Add to NBI on one, and your assistant can use it. See the tool reference.
The data browser (jupyterlab-bxplorer) opens cloud storage inside JupyterLab. No command line needed.
Example — your own data. Open the data browser, choose your project's bucket, walk down the folders, and download the file you want into your notebook folder. |
Example — public data. Choose a public AWS science dataset, find the file you need, and pull it in — without leaving JupyterLab and without any keys. |
Download only. The data browser brings files in. It does not upload or write back. To put data into object storage, use the command line or your own code. |
Coming later: Google Cloud and Microsoft Azure storage.
Use this when one analysis is too slow or too big for your workspace. Dask spreads the work over many machines and brings the answer back.
Example. You must process a year of daily files. Alone, it takes hours. With a Dask cluster of 10 machines, it takes minutes. |
Start a cluster from your notebook, run the work, then shut the cluster down. The cluster costs money while it is up.
Example notebook — to be linked. The platform team will publish a ready-made notebook that starts a Dask cluster, runs a job, and shuts the cluster down. The link goes here. |
Use this when a notebook takes a long time and you do not want to sit and watch it.
Example. A notebook needs 6 hours and 40 GB of memory. Send it to the background queue and pick a bigger machine for it. Your own workspace stays small and responsive. You can close the browser. The job keeps running. |
Open the notebook and press NBQueue: Send to queue in the toolbar at the top. Choose the machine, and send it. Then check the status in the NBQueue panel. When it finishes, the finished notebook, with its output, is waiting for you.
If your project has collaboration turned on, your Launcher shows a Collaboration tile named "Start <project> Collaboration" — where <project> is the project you chose on the launch screen.
Example. Three of you must finish one notebook today. One person clicks the tile. Everyone else clicks the same tile and lands in the same session. You all edit the same notebook at once and see who is online. The files live in the shared project space. |
Save the group's work in /efs/<your project>. Files left in the shared session's own home folder can only be reached from inside that session.
When the work is done, click the tile again to stop the session. It costs the project money while it runs.
Full detail: Working together on the same notebook.
Open Resource Tracker — the tile under Admin tools in the Launcher. It shows:
Good to know. The numbers are taken when your workspace starts, and cost data is prepared once a day. So the panel does not tick up live. To refresh it, stop your workspace and start it again. |
This is the step people forget, and it is the one that costs money.
Your files stay. Only the running machines stop. An idle session is closed automatically after about an hour, but do not rely on that — an open browser tab can keep it alive.
rp.sciencecloud.nasa.gov and log in.~, in /efs/<project>, or in object storage. Everything else is lost on restart.~/envs and register it as a kernel.Email support@sciencecloud.nasa.gov, or use the Science Cloud Support Portal.