
This guide features one section per tool. Each section explains what the tool is, where to find it, provides an example, and highlights what to watch out for. Prefer a step-by-step walkthrough? Read the Quick Start Guide instead.
Tools at a Glance
| Tool | Common Question | Availability |
|---|---|---|
| JupyterLab and Notebooks | Where do I work? | Everyone |
| Machine Sizes and Images | How much compute power do I get? | Everyone |
| Storage | Where do my files go, and what survives a restart? | Everyone |
| Your Own Kernel | How do I install my own packages? | Everyone |
| Notebook Intelligence | Can AI help me code? | Everyone |
| Data Browser | How do I access cloud data? | Everyone |
| Dask | How do I speed up processing? | Everyone |
| NBQueue | How do I execute long-running tasks? | Everyone |
| RTC Launcher | How do we edit together? | Projects with collaboration enabled |
| Resource Tracker | What am I spending? | Everyone |
| AI Registry | What shared AI components can I reuse? | Rolling out |
| Git | How do I manage code versions? | Everyone |
1. JupyterLab and Notebooks
What it is: Your browser-based workspace. A notebook consists of a series of cells: you write code in a cell, execute it, and the result appears directly beneath it.
Where to find it: rp.sciencecloud.nasa.gov (after logging in).
Example: Open the Launcher, click on a Python notebook, type print("hello"), and press Shift+Enter.
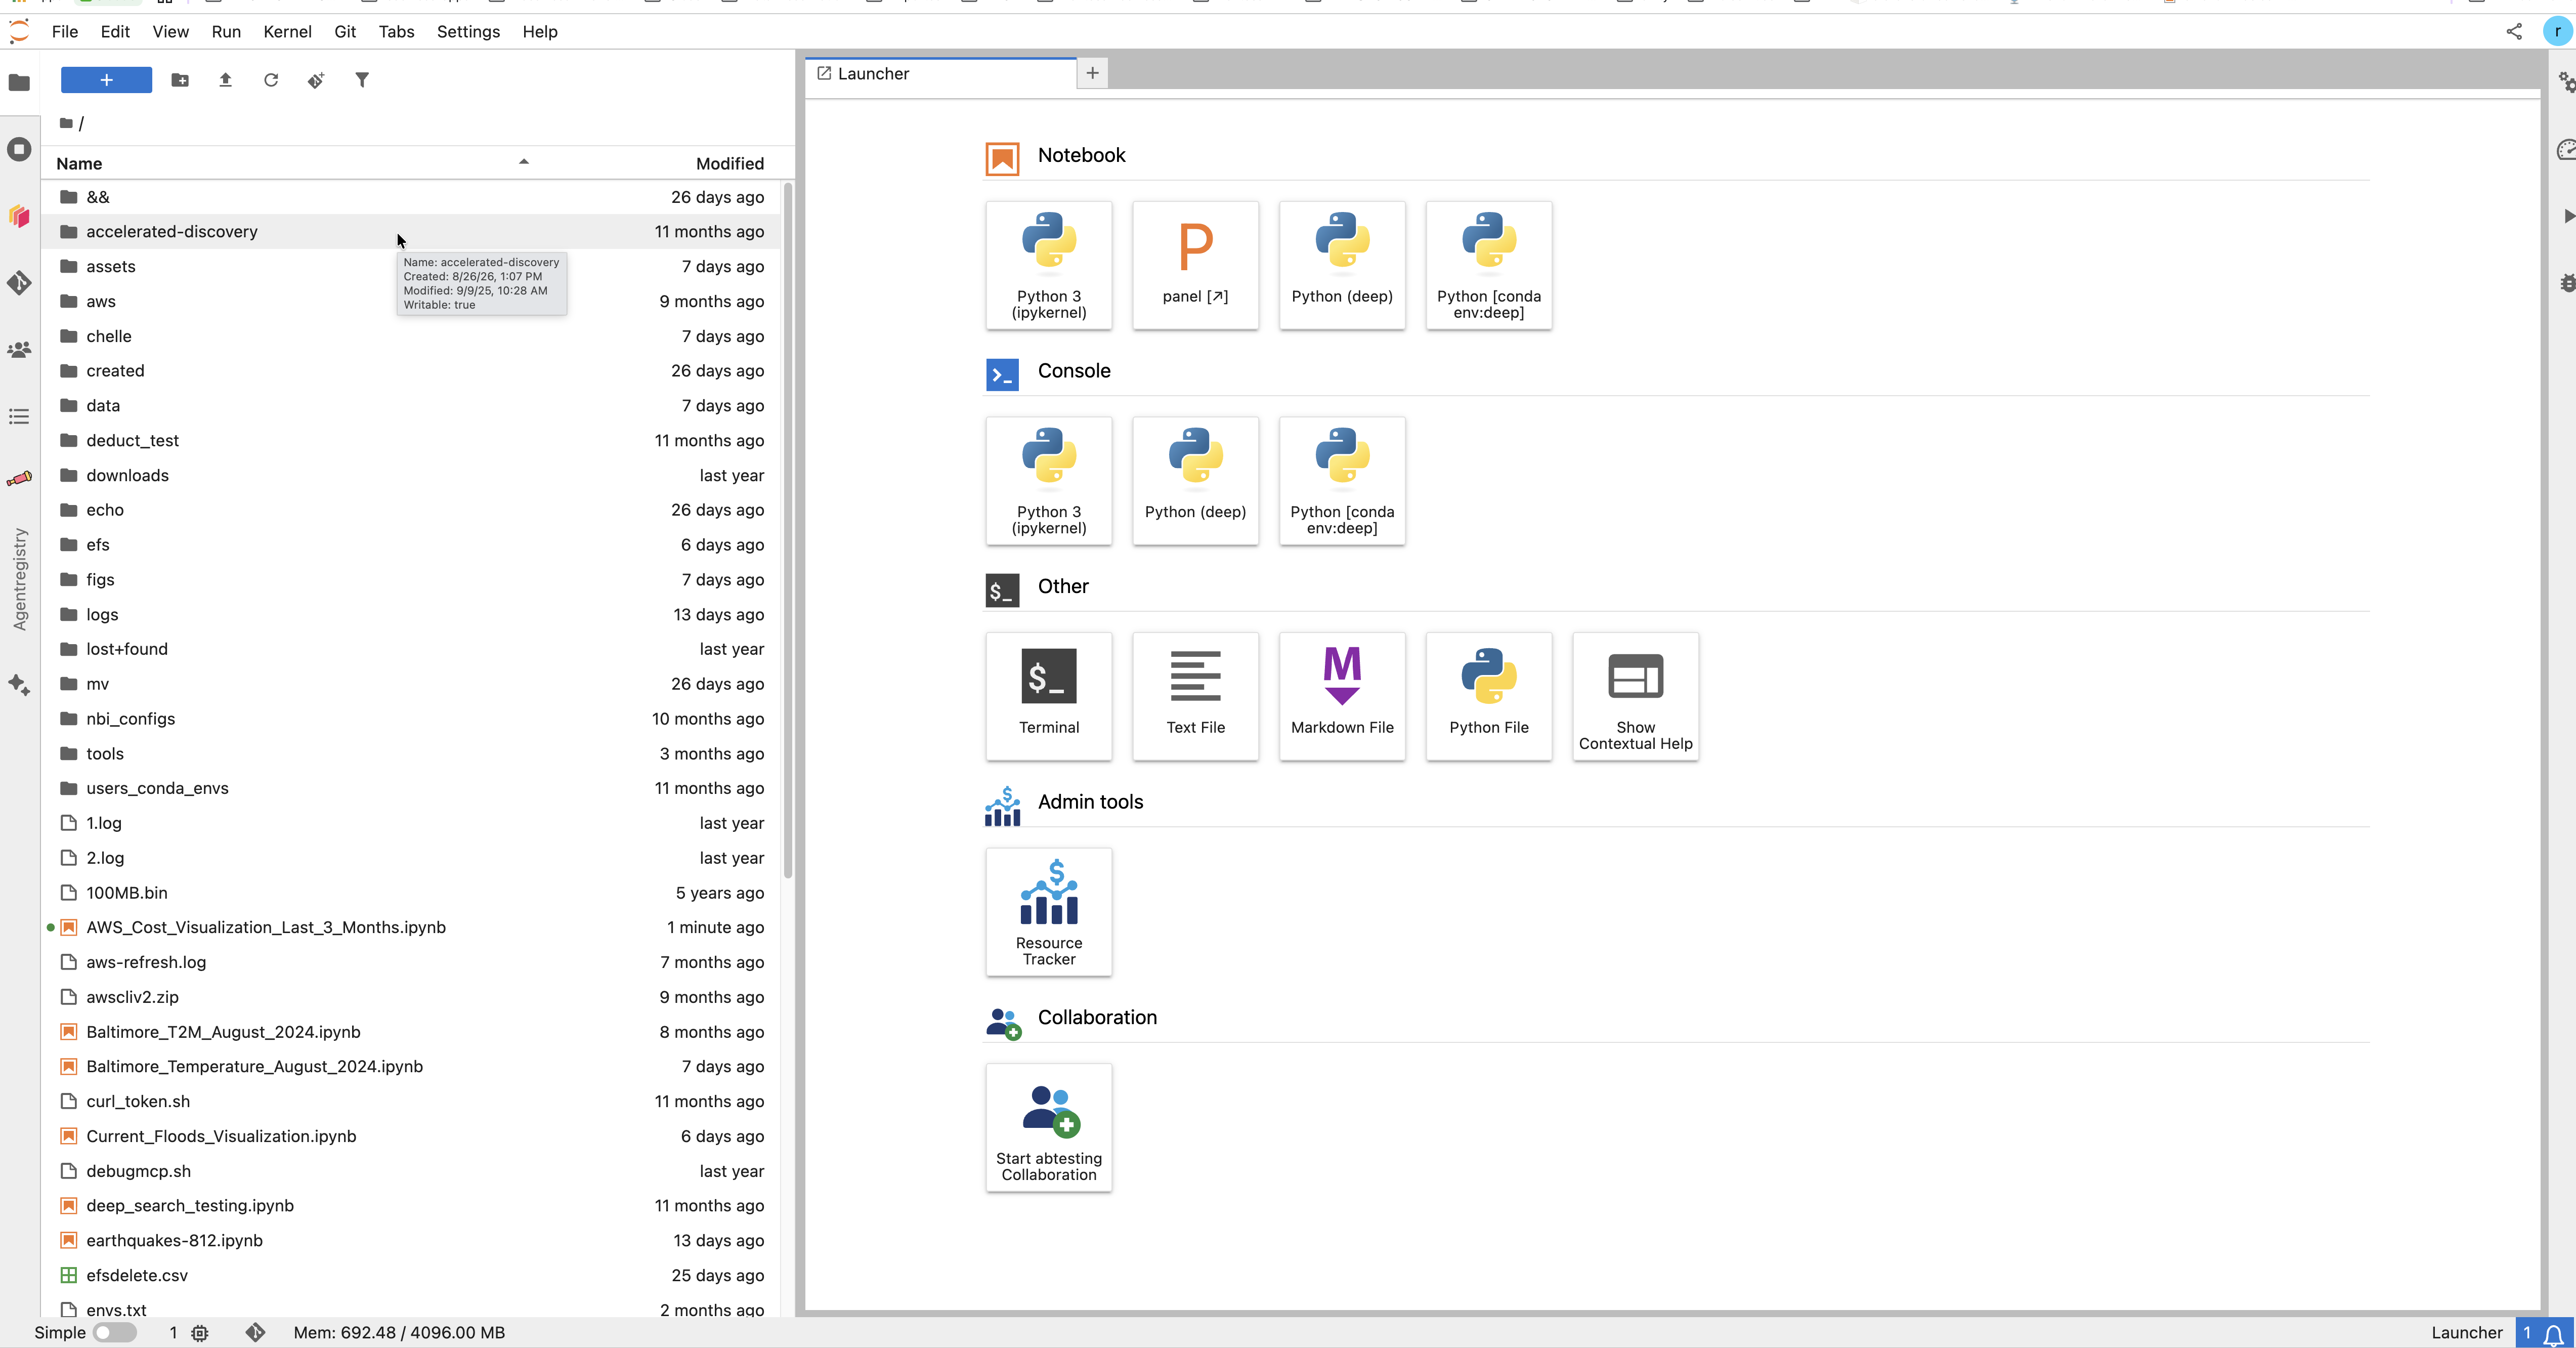
JupyterLab: file browser, Launcher tiles, and the platform tools down the left edge.
Important Reminder: Your workspace incurs costs while it runs. Please stop your session when you are finished.
2. Machine Sizes and Software Images
When launching a session, you configure your workspace by selecting your compute size, software environment, and associated project.
Choosing a Server Type
Your server type dictates your compute power. Because larger machines cost more per hour, you should select the size that best fits your immediate task to optimize your budget. For example, a Standard instance is perfect for reading a single file and creating a simple plot, whereas holding a large dataset in memory requires the r5.2xlarge node.
| Server Type | Resources Included |
|---|---|
| Standard | Up to 4 GB RAM / 4 CPU |
| Large | Up to 8 GB RAM / 4 CPU |
| Extra Large | Up to 16 GB RAM / 4 CPU |
| r5.2xlarge Node (On Demand) | Up to 64 GB RAM / 8 CPU |
Roadmap Note: GPU-enabled machines and the ability for project admins to curate custom server lists for their teams will be available in future updates.
Selecting Your Software and Project
The Images list provides ready-made software stacks, such as the Earth Science Server (with AI Intelligence). If your project has built its own software image, it appears in this list too, by name, for your project's members. How a project adds one is covered in Bring your own notebook image.
Finally, use the Project dropdown to select your active project. This ensures your session is billed to the correct budget and gives you access to the appropriate project storage.
3. Storage — home, EFS, and object storage
What it is: Storage locations for your files, each with distinct sharing rules and behaviors when your workspace restarts.
| Place | Path | Who sees it | Survives a restart? |
|---|---|---|---|
| Home folder | ~ = /home/<your name>, for example /home/ramon.linan | Only you | ✅ Yes |
| Your own EFS folder | /efs/<your username>, in email form — for example /efs/ramon.linan@navteca.com | Only you | ✅ Yes |
| Project folder on EFS | /efs/<project>, one for every project you belong to | Everyone in that project | ✅ Yes |
| Object storage — yours | s3://<bucket>/home/<your username> | Only you | ✅ Yes |
| Object storage — project | s3://<bucket>/<project> — the project you chose at launch | Your project | ✅ Yes |
| Everything else | /tmp, system folders, packages installed outside your home folder | — | ❌ No. Lost. |
Example: If you download a 200 GB dataset for your team, place it in the project's object storage rather than your personal home folder. Keep your individual notebooks in your home folder, and place shared intermediate results in /efs/<project>.
Good to know:
- The
/efs/directory lists a folder for every project you belong to. Permissions automatically prevent you from opening other users' or projects' folders. - The JupyterLab file browser and the terminal display the exact same files, just in different layouts. The permissions are identical in both.
- Object storage in a remote AWS account (such as your institution's or a specific mission's) is not charged to your Science Cloud project. (See Research Platform Billing and Costs for more details).
Home Folder Size: Your home folder starts at 10 GB. It can be expanded by submitting a request to the platform team, but avoid requesting more space than necessary—a very large home volume can slow down your workspace startup time. Instead, store large datasets in /efs/<project> or in object storage.
Cost Consideration: You incur monthly charges for the storage allocated in EFS, your home volume, and object storage—whether that space is actively used or not. To optimize costs, regularly delete files you no longer need.
3b. Your own kernel from a conda environment
What it is. A private set of packages that appears in JupyterLab's kernel menu. Use it when the ready-made software set lacks a package or a version you need.
How to build one:
mamba create -n myscience python=3.12 ipykernel -y
conda activate myscience
mamba install -c conda-forge xarray netcdf4 -y
Then pick it with Kernel → Change Kernel. It appears by itself — the platform discovers your environments for you — listed as Python [conda env:myscience].
Good to know.
- The platform keeps your environments in
~/users_conda_envs, inside your home folder, so they survive a restart. - Always include
ipykernelin the environment, or there is no kernel to pick. condaandmambaare both installed.mambais faster.- If a kernel does not show up, register it by hand:
python -m ipykernel install --user --name myscience --display-name "My science env"
4. Notebook Intelligence — AI help in the notebook
What it is. An AI assistant built into JupyterLab. It can chat, complete code as you type, and run small agent tasks such as editing a notebook, running cells, editing a Python file, reading and writing files in your workspace, and running commands.
Where. Inside JupyterLab, next to your notebook.
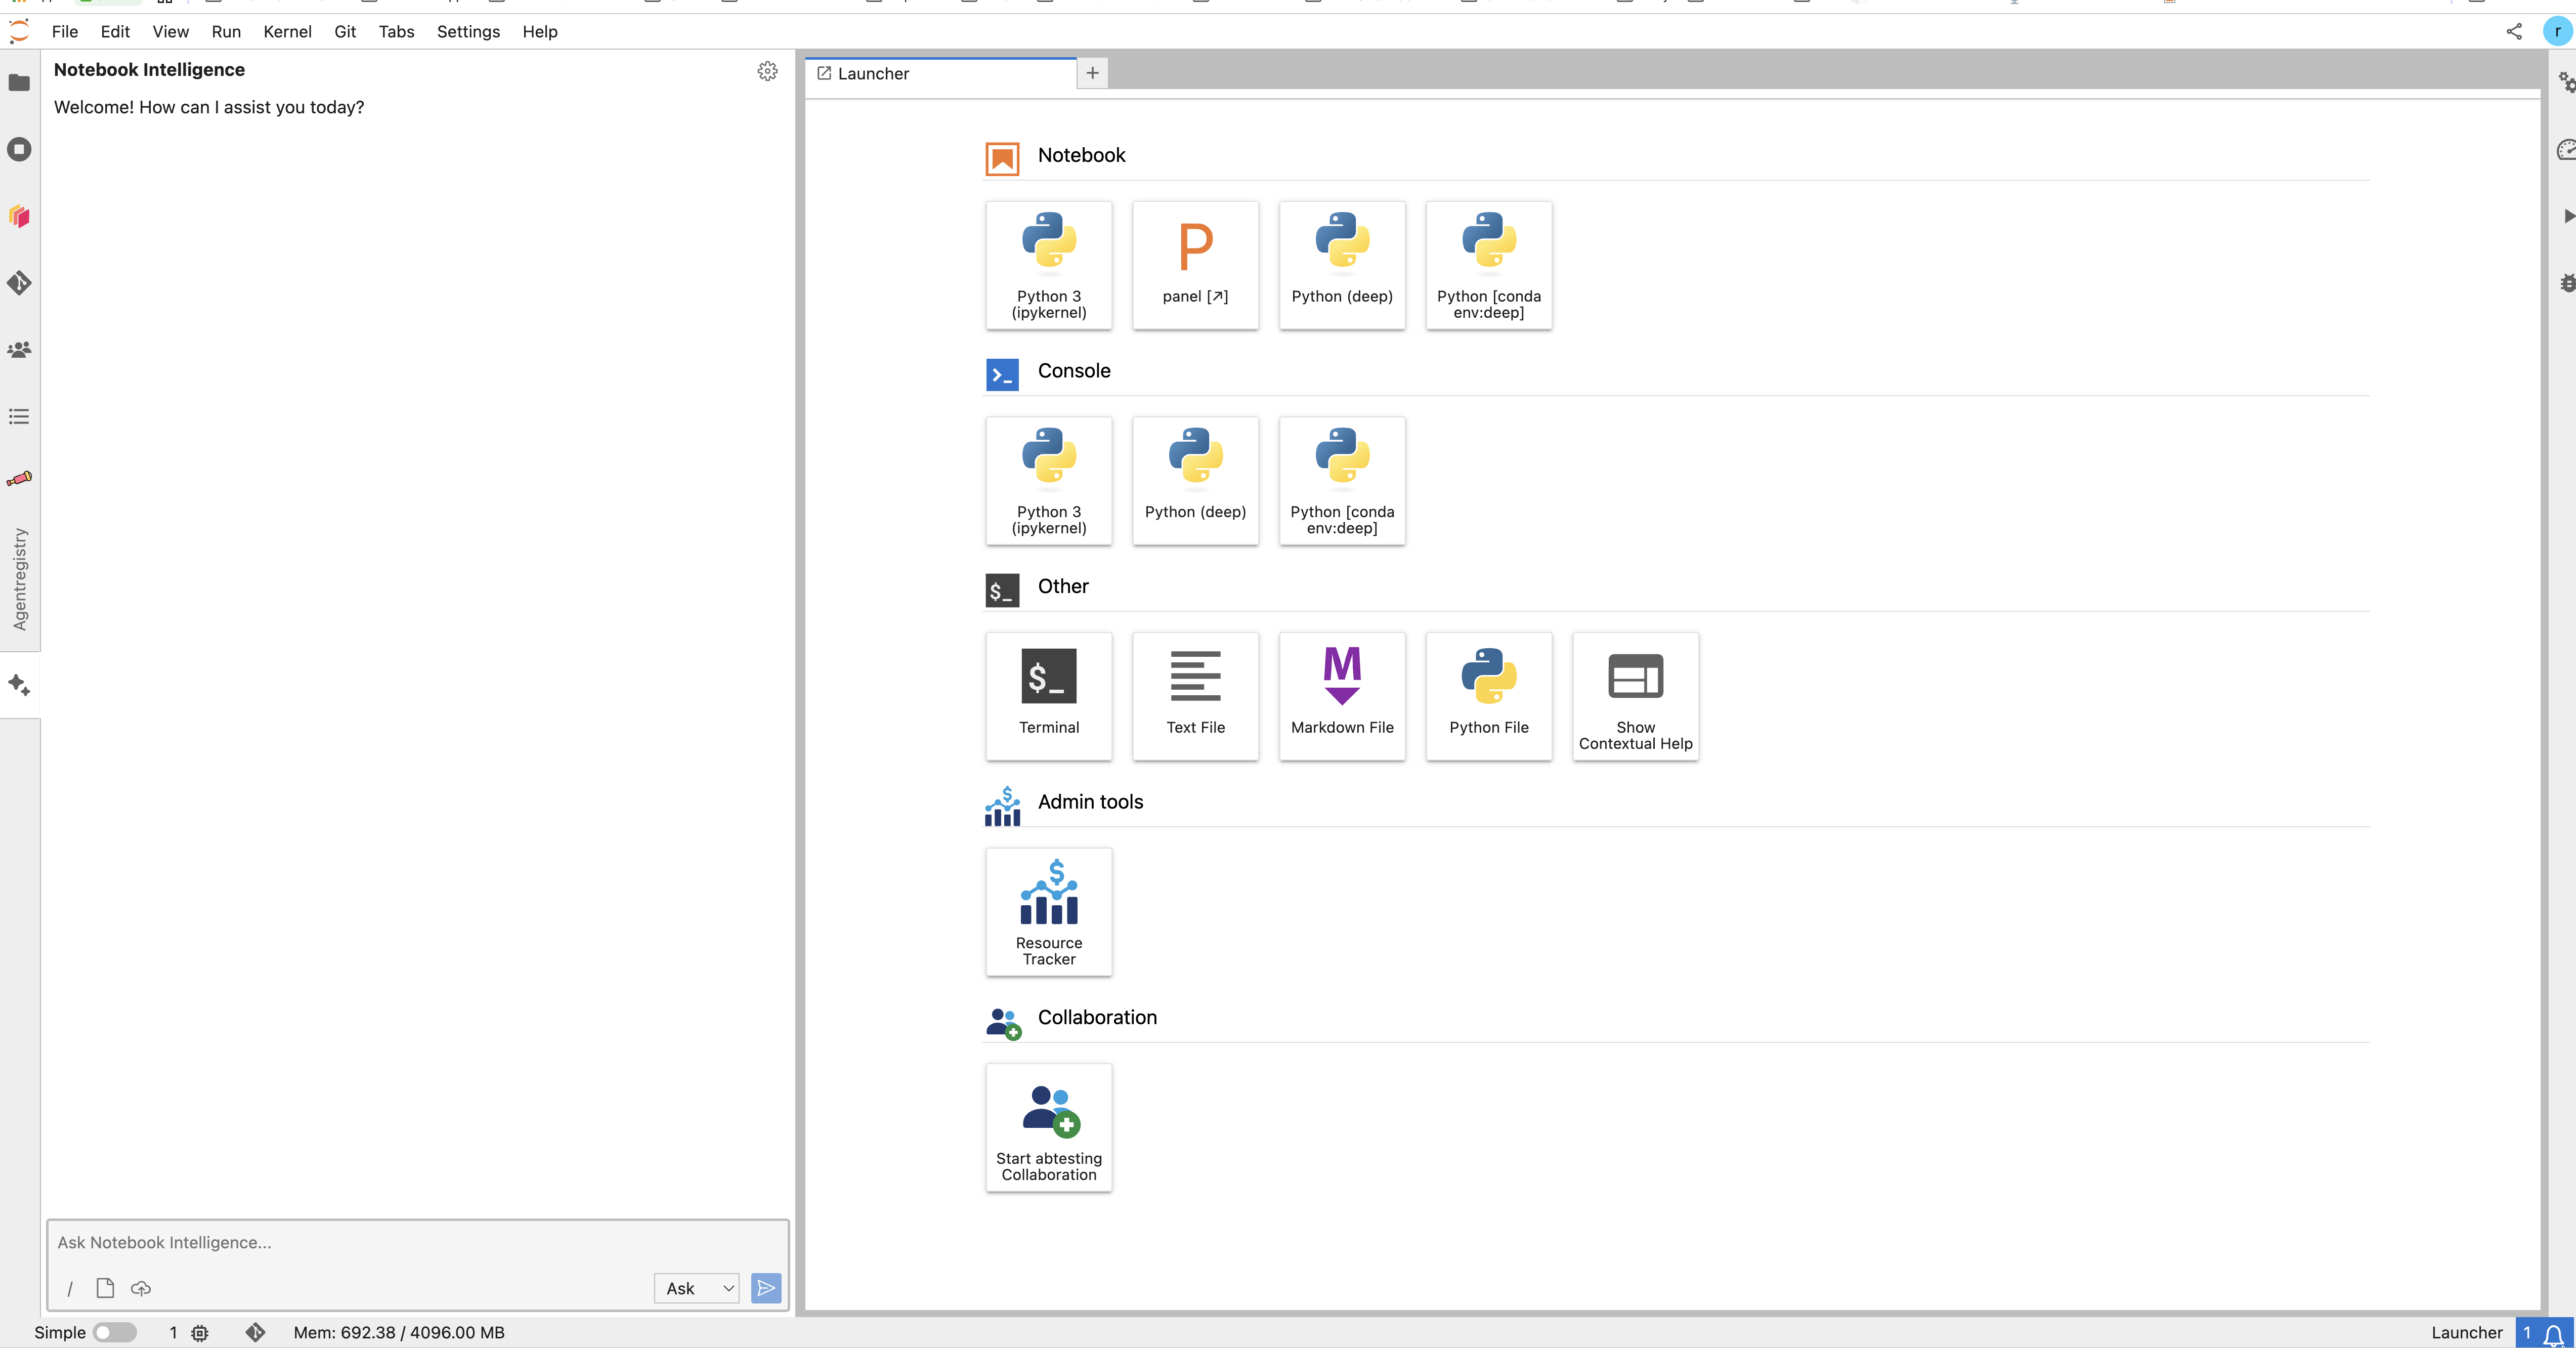
The Notebook Intelligence panel. Type your question at the bottom.
Example — explain. Select a cell you do not understand and ask for an explanation.
Example — write. In an empty cell, type what you want: "load this CSV, drop empty rows, plot the monthly mean". Read the code it writes, then run it.
Example — fix. A cell throws an error. Ask what the error means and let the assistant correct the cell.
Example — one notebook, one cell. You can point the assistant at a whole notebook, or at a single cell, instead of copying text into a separate chat window.
Example — learn something new. Type /lesson and say what you want to learn, or paste a link. In a few minutes you get a short course of notebooks, with exercises. See Create any lesson with Notebook Intelligence.
Models. Several providers are supported, including GitHub Copilot, OpenAI, Anthropic Claude, Ollama, and local or OpenAI-compatible models. Connecting your own is covered in Notebook Intelligence and your LLMs.
Watch out. The assistant can be wrong. Read the code before you run it, and check the science.
5. Data browser
What it is. A panel that shows cloud storage as folders, inside JupyterLab. You browse and download without a command line and without handling keys. (The extension behind it is jupyterlab-bxplorer; it opens from the File Manager tab in the left sidebar, with FAVORITES / PRIVATE / PUBLIC / DOWNLOAD HISTORY tabs.)
What you can reach. Your project's own buckets, and public AWS science datasets.
Download only. The browser brings files in. It does not upload or write back.
Example — your own data. Open the panel, pick your project bucket, open the folder for this year, and download one file into your notebook folder.
Example — public data. Pick a public AWS dataset, find the granule you need, and pull it straight in.
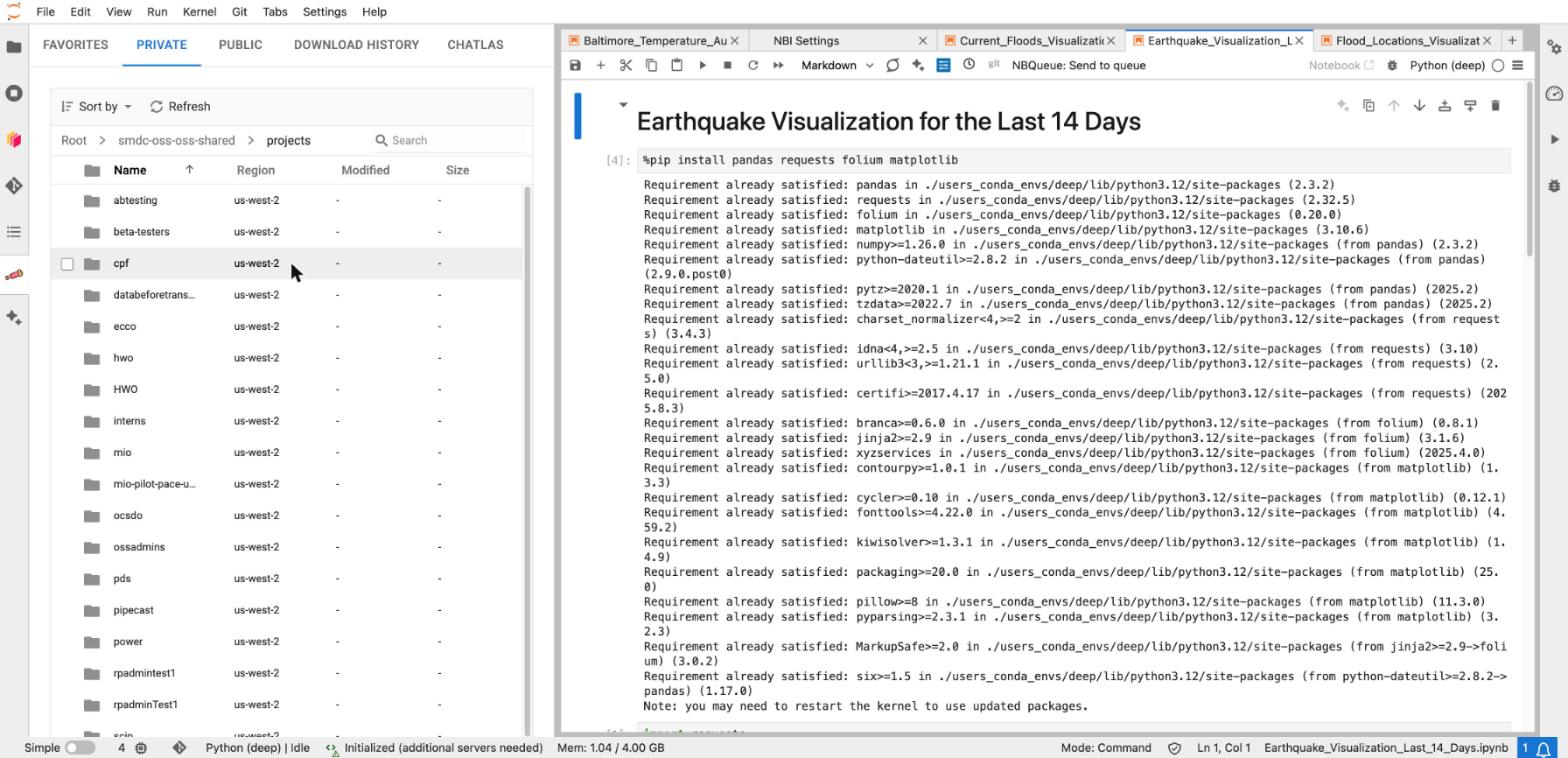
The PRIVATE tab: the platform bucket, opened to the shared projects folder.
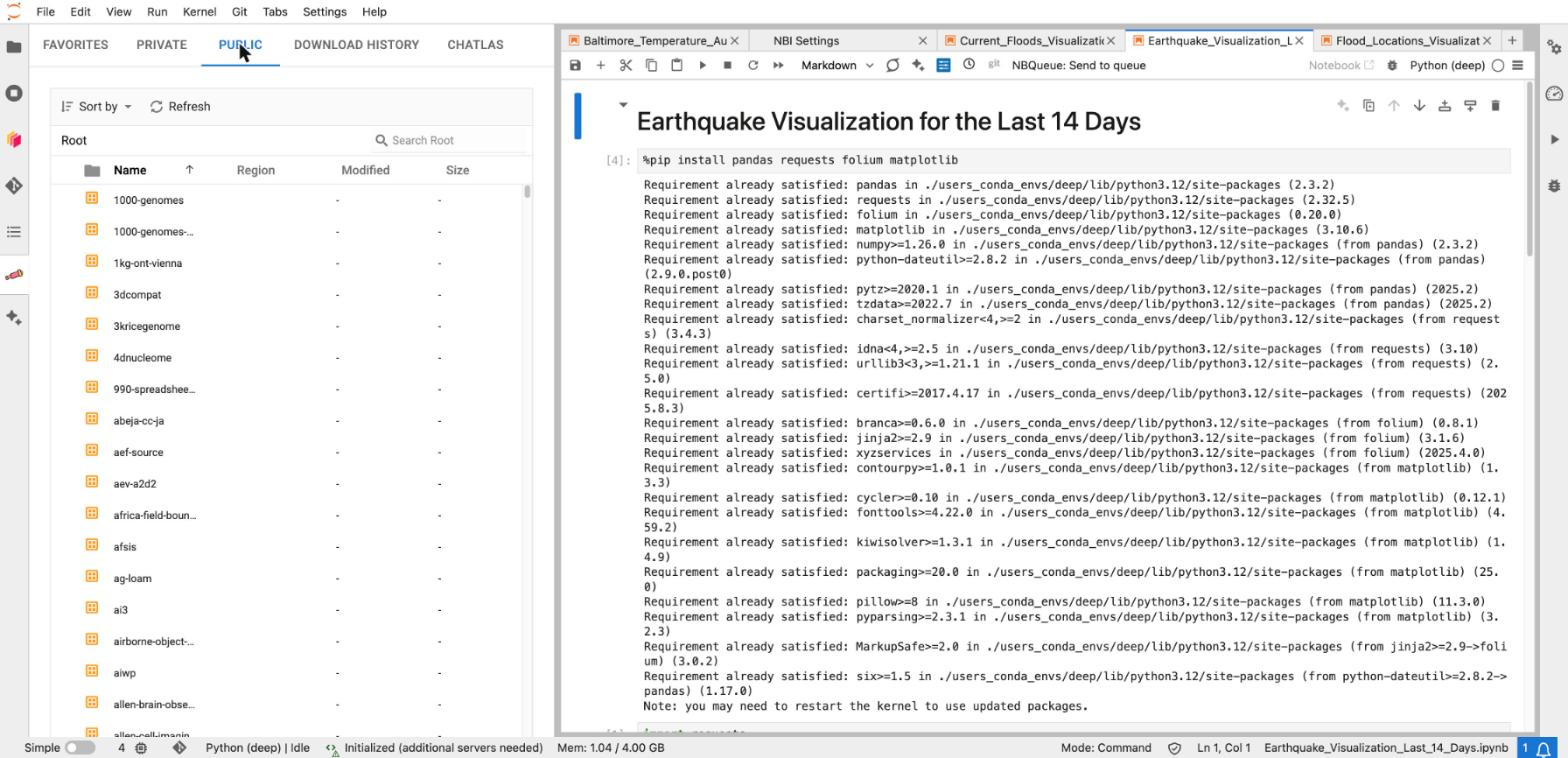
The PUBLIC tab: public AWS science datasets.
Coming later. Google Cloud and Microsoft Azure.
Watch out. Downloading a very large file into your home folder costs storage every month. For big data, read from object storage instead of copying it.
OPEN: whether buckets in remote AWS accounts appear in the PRIVATE tab.
6. Dask — many machines for one job
What it is. Dask splits one analysis across many machines and collects the answer. The platform runs it through Dask Gateway, so you ask for a cluster from your notebook.
Example. A year of daily files takes hours in one workspace. A 10-machine cluster finishes it in minutes. You start the cluster, run your code, read the answer, and shut the cluster down.
Watch out. The cluster costs money for every machine, for as long as it is up. Shut it down as soon as the job is done. A forgotten cluster is the most expensive mistake on the platform.
Example notebook — to be linked. The platform team will publish a notebook that starts a cluster, runs a job, and shuts it down. The link goes here.
7. NBQueue — background notebook runs
What it is. Send a whole notebook away to run on its own, on a machine you choose. Your interactive workspace stays free, and the job survives closing the browser.
How you use it. Open the notebook and press NBQueue: Send to queue in the toolbar. Choose the machine. Send it. Watch the status in the NBQueue panel. When it finishes, you get the finished notebook, with its output.
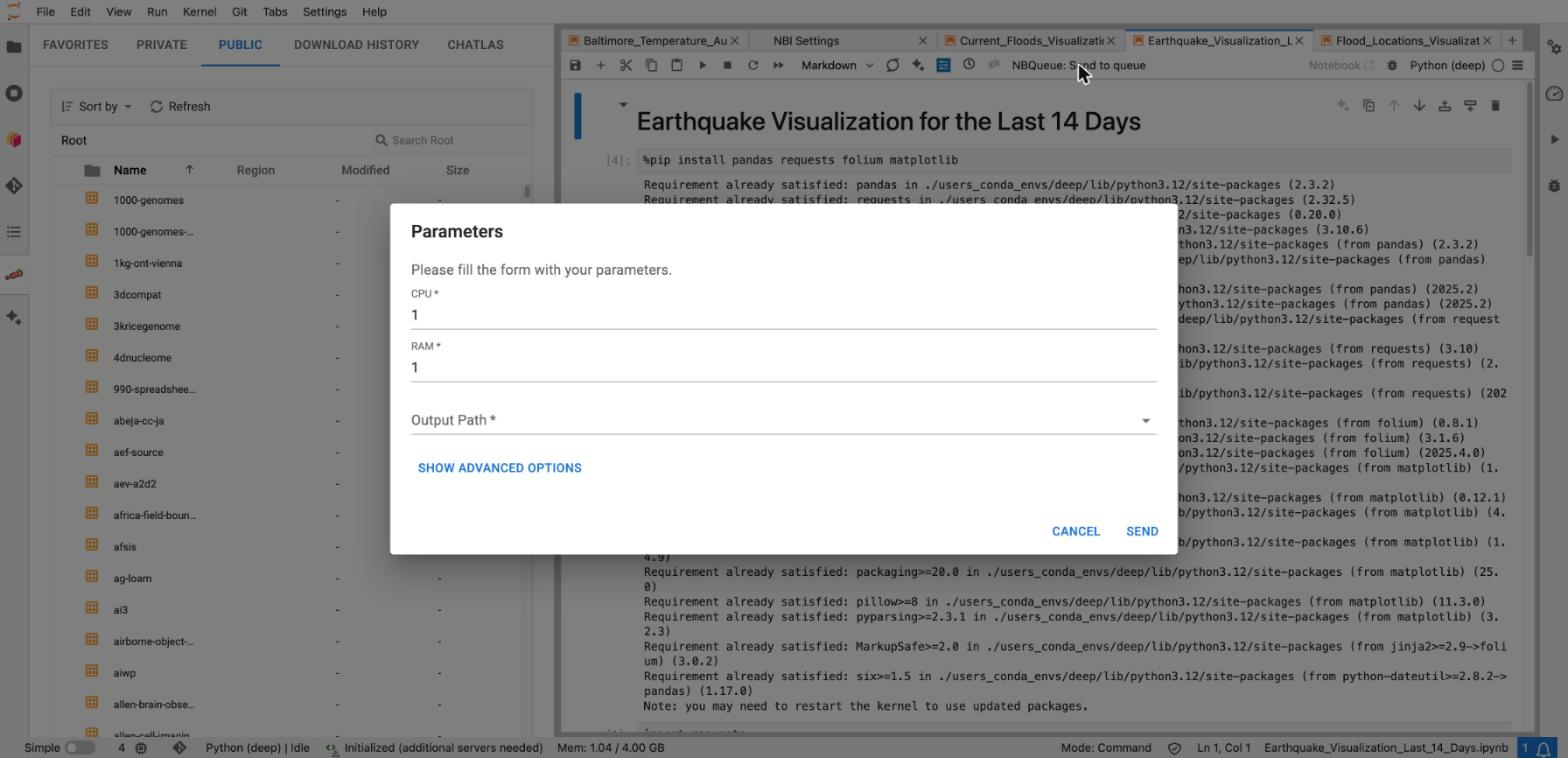
The NBQueue form: CPU, memory, and the output path.
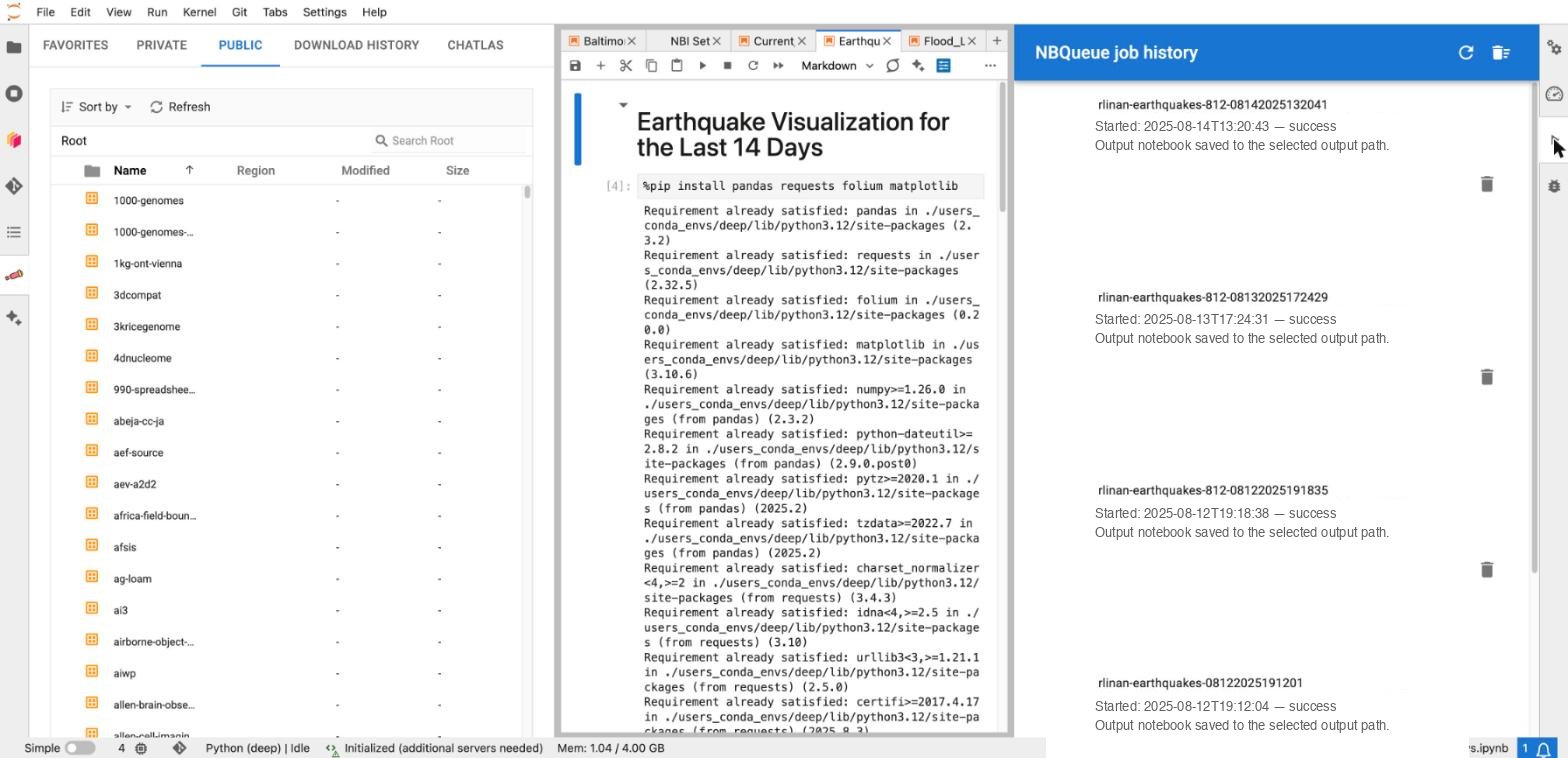
The NBQueue job history panel, in the right sidebar.
Example. A 6-hour job needing 40 GB. Keep a small workspace for yourself, and send the job to a big machine in the background. Go home. Read the output tomorrow.
Watch out. The background machine costs money while it runs, exactly like an interactive one.
8. RTC Launcher — the collaboration tile
What it is. A tile in your Launcher, under Collaboration, named "Start <project> Collaboration" — where <project> is the project you chose on the launch screen. It opens a shared session for the project, where several people edit the same file at the same time.
Why a shared session, and not "share my screen". Nobody gets into your private workspace, and nobody runs code as you. Everyone works in a separate shared account, and the files land in the shared project space.
Example. Three people must finish one notebook. Everyone clicks the tile and lands in the same session. You all type in the same notebook, and markers show who is online.
Stopping it. Click the tile again to stop the shared session. The tile reads Start when the session is down, and Join and Stop while it is up.
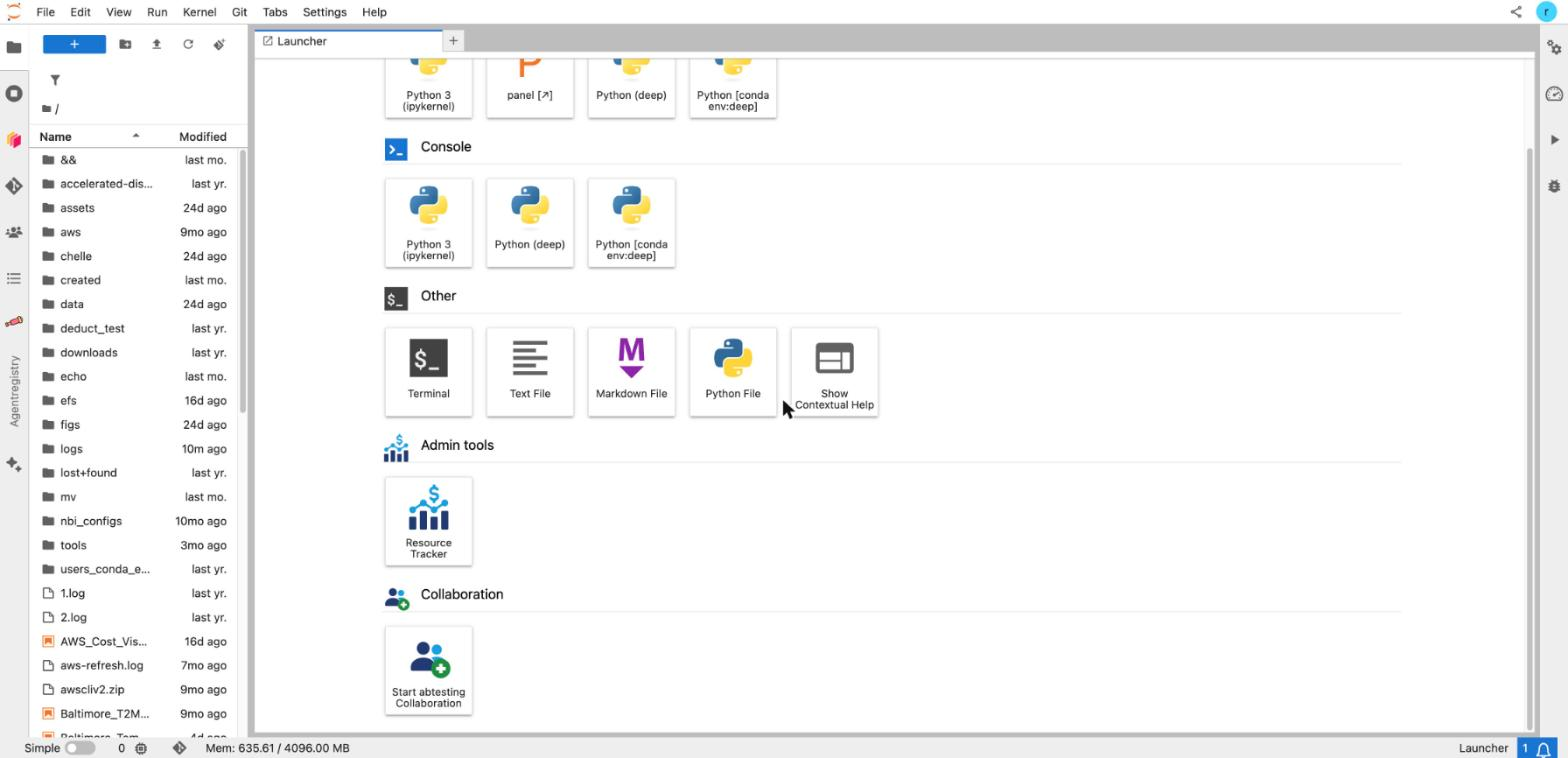
Before the session starts: one tile, "Start abtesting Collaboration".
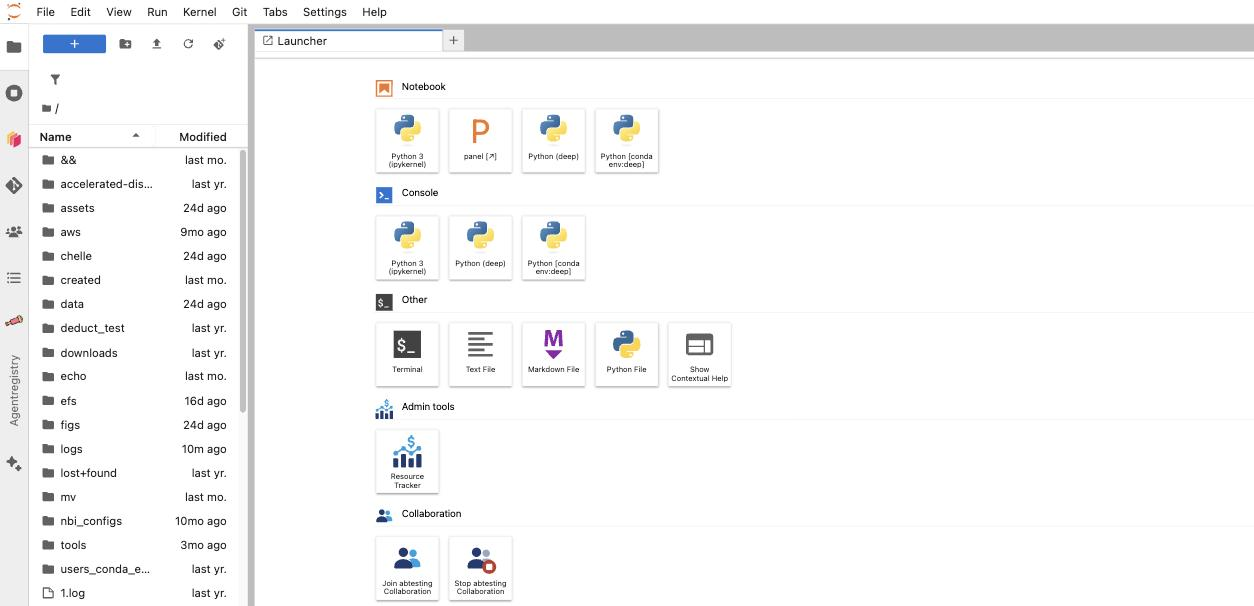
While the session runs: "Join abtesting Collaboration" and "Stop abtesting Collaboration".
Watch out. The shared session bills the project, not you, for as long as it runs. An idle session is closed automatically after about an hour, but an open browser tab can keep it alive. So stop it on purpose.
Availability. Only projects with collaboration turned on see the tile. See Working together.
9. Resource Tracker — my usage and budget
What it is. A panel showing your own numbers. Open it from the Resource Tracker tile, under Admin tools in the Launcher.
- This month — hours used, compute cost, and storage cost split into shared filesystem, workspace disk, and object storage.
- Funding period to date — used, allocated, and remaining. (The funding block is hidden if you have no allocation.)
- Last updated — when the numbers were prepared.
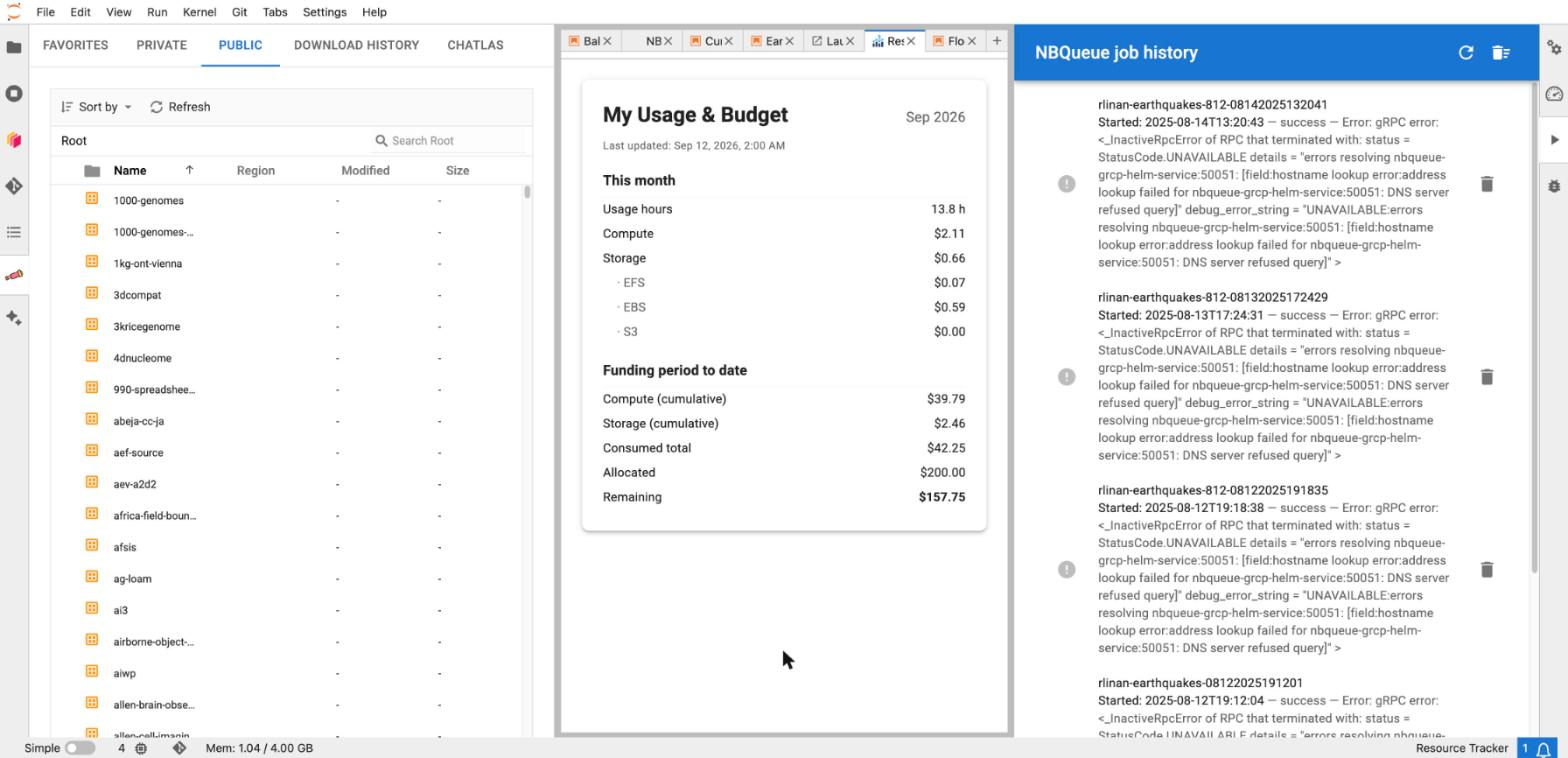
The Resource Tracker panel: This month, and Funding period to date.
Example. Before running a large machine for a week, open the panel and check what is left of your allocation.
Watch out. The numbers are read when your workspace starts, and the cost data is prepared once a day. The panel does not tick up while you work. To get fresher numbers, stop your workspace and start it again.
10. AI Registry — shared, NASA-validated AI building blocks
What it is. A hub of AI building blocks that NASA colleagues have shared and NASA has validated. Instead of every team building the same AI plumbing, you take a piece that already works and has passed review.
What it holds.
| Block | In plain words |
|---|---|
| MCP servers | A small service that gives an AI assistant a new skill — for example, search a data catalog, or query a database |
| Skills | A packaged way of doing one job well |
| Agents | An AI worker that carries out a task with several steps |
| Models | A trained model you can call |
| Prompts | A tested instruction that gets a good answer |
| Harnesses | The scaffolding that holds the pieces together |
Where. The AgentRegistry panel in the left sidebar of JupyterLab.
What you see. The panel has two tabs:
- Registry — the catalog. Every entry is a card showing its type, whether it is active, how many deployments exist, whether it is published, whether it is deployed, and when it was last updated. There is a link to its repository.
- Deployments — the ones that are running.
You can search by name or by version. Turn on Semantic search to describe what you need in plain words instead of guessing the name.
The three buttons on each card.
| Button | What it does |
|---|---|
| Add to NBI | Hands the tool to your AI assistant (Notebook Intelligence), so it can use it in your next question |
| Deploy | Starts the tool for you |
| Undeploy | Stops it again |
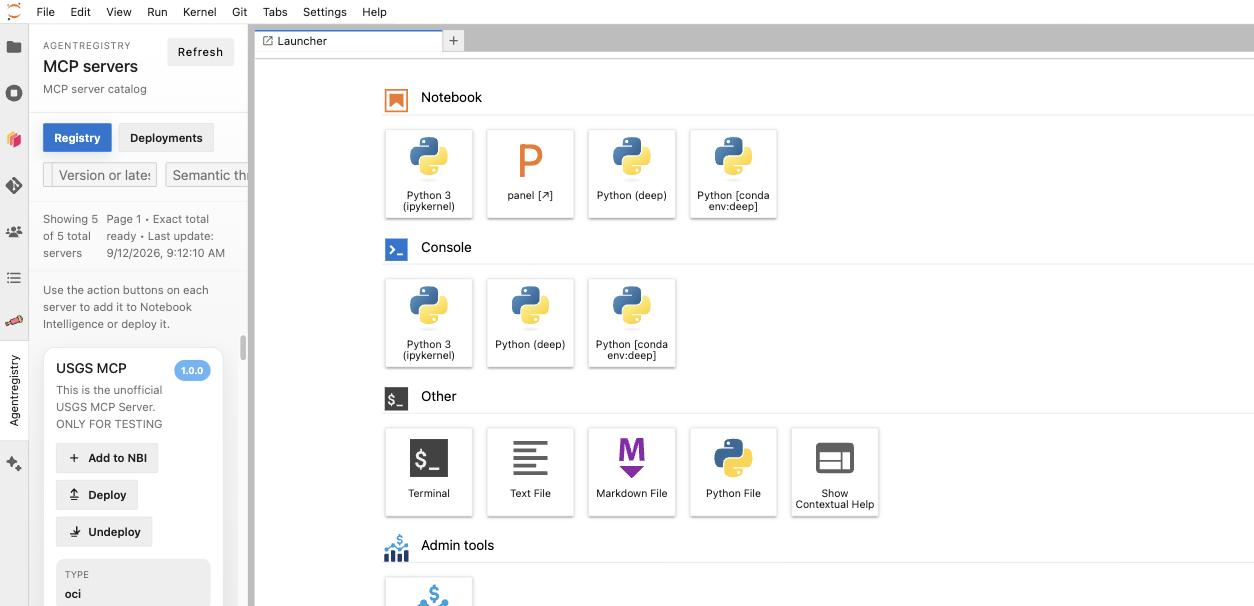
The AgentRegistry panel: the MCP server catalog, with the Add to NBI, Deploy, and Undeploy buttons on a card.
Example. You want your assistant to answer questions from a USGS data service. Open AgentRegistry → Registry, find the USGS MCP server, press Deploy, then press Add to NBI. Now ask your assistant a question about that data, and it uses the tool.
Why it matters. Every item was shared by a NASA peer and validated by NASA. You are not picking an unknown tool off the internet.
Availability. The panel is in the software image used by projects on the platform's newer image today, and it is being rolled out to every project. If you do not see the AgentRegistry icon, ask the platform team.
Watch out. A deployed tool uses resources while it runs. Press Undeploy when you have finished with it.
11. Git
What it is. The standard JupyterLab Git panel, for code versions.
Example. Clone your team's repository, commit your notebook changes, and push them.
Watch out. Do not commit data or secrets into a repository. Data belongs in the shared folder or in object storage.
What you cannot do
- Install your own JupyterLab extensions. The Extension Manager is switched off. Ask the platform team if you need a new extension in the image.