
This document will provide detailed instructions and a step-by-step process to configure your EC2 instances appropriately to have a functioning Systems Manager (SSM) agent. To enable SSM, you must configure a custom IAM Role and include the requisite AWS Permissions Policies in order for the SSM agent to function properly. Descriptions of these underlying policies as well as the steps for using them are included below.
Requirements
- AWS Console Access with elevated privileges
- Access to create a custom IAM Role for your specific project and region
- Sufficient space on the attached EBS volume to allow the SSM agent to operate properly
Instructions - Overview
1) Determine if your EC2 has an IAM Role attached
2) Create a custom IAM Role
3) Attach the IAM Role to EC2 instance
3) Review underlying Permissions Policies
Instructions - Detailed
1) Determine IAM Role Status
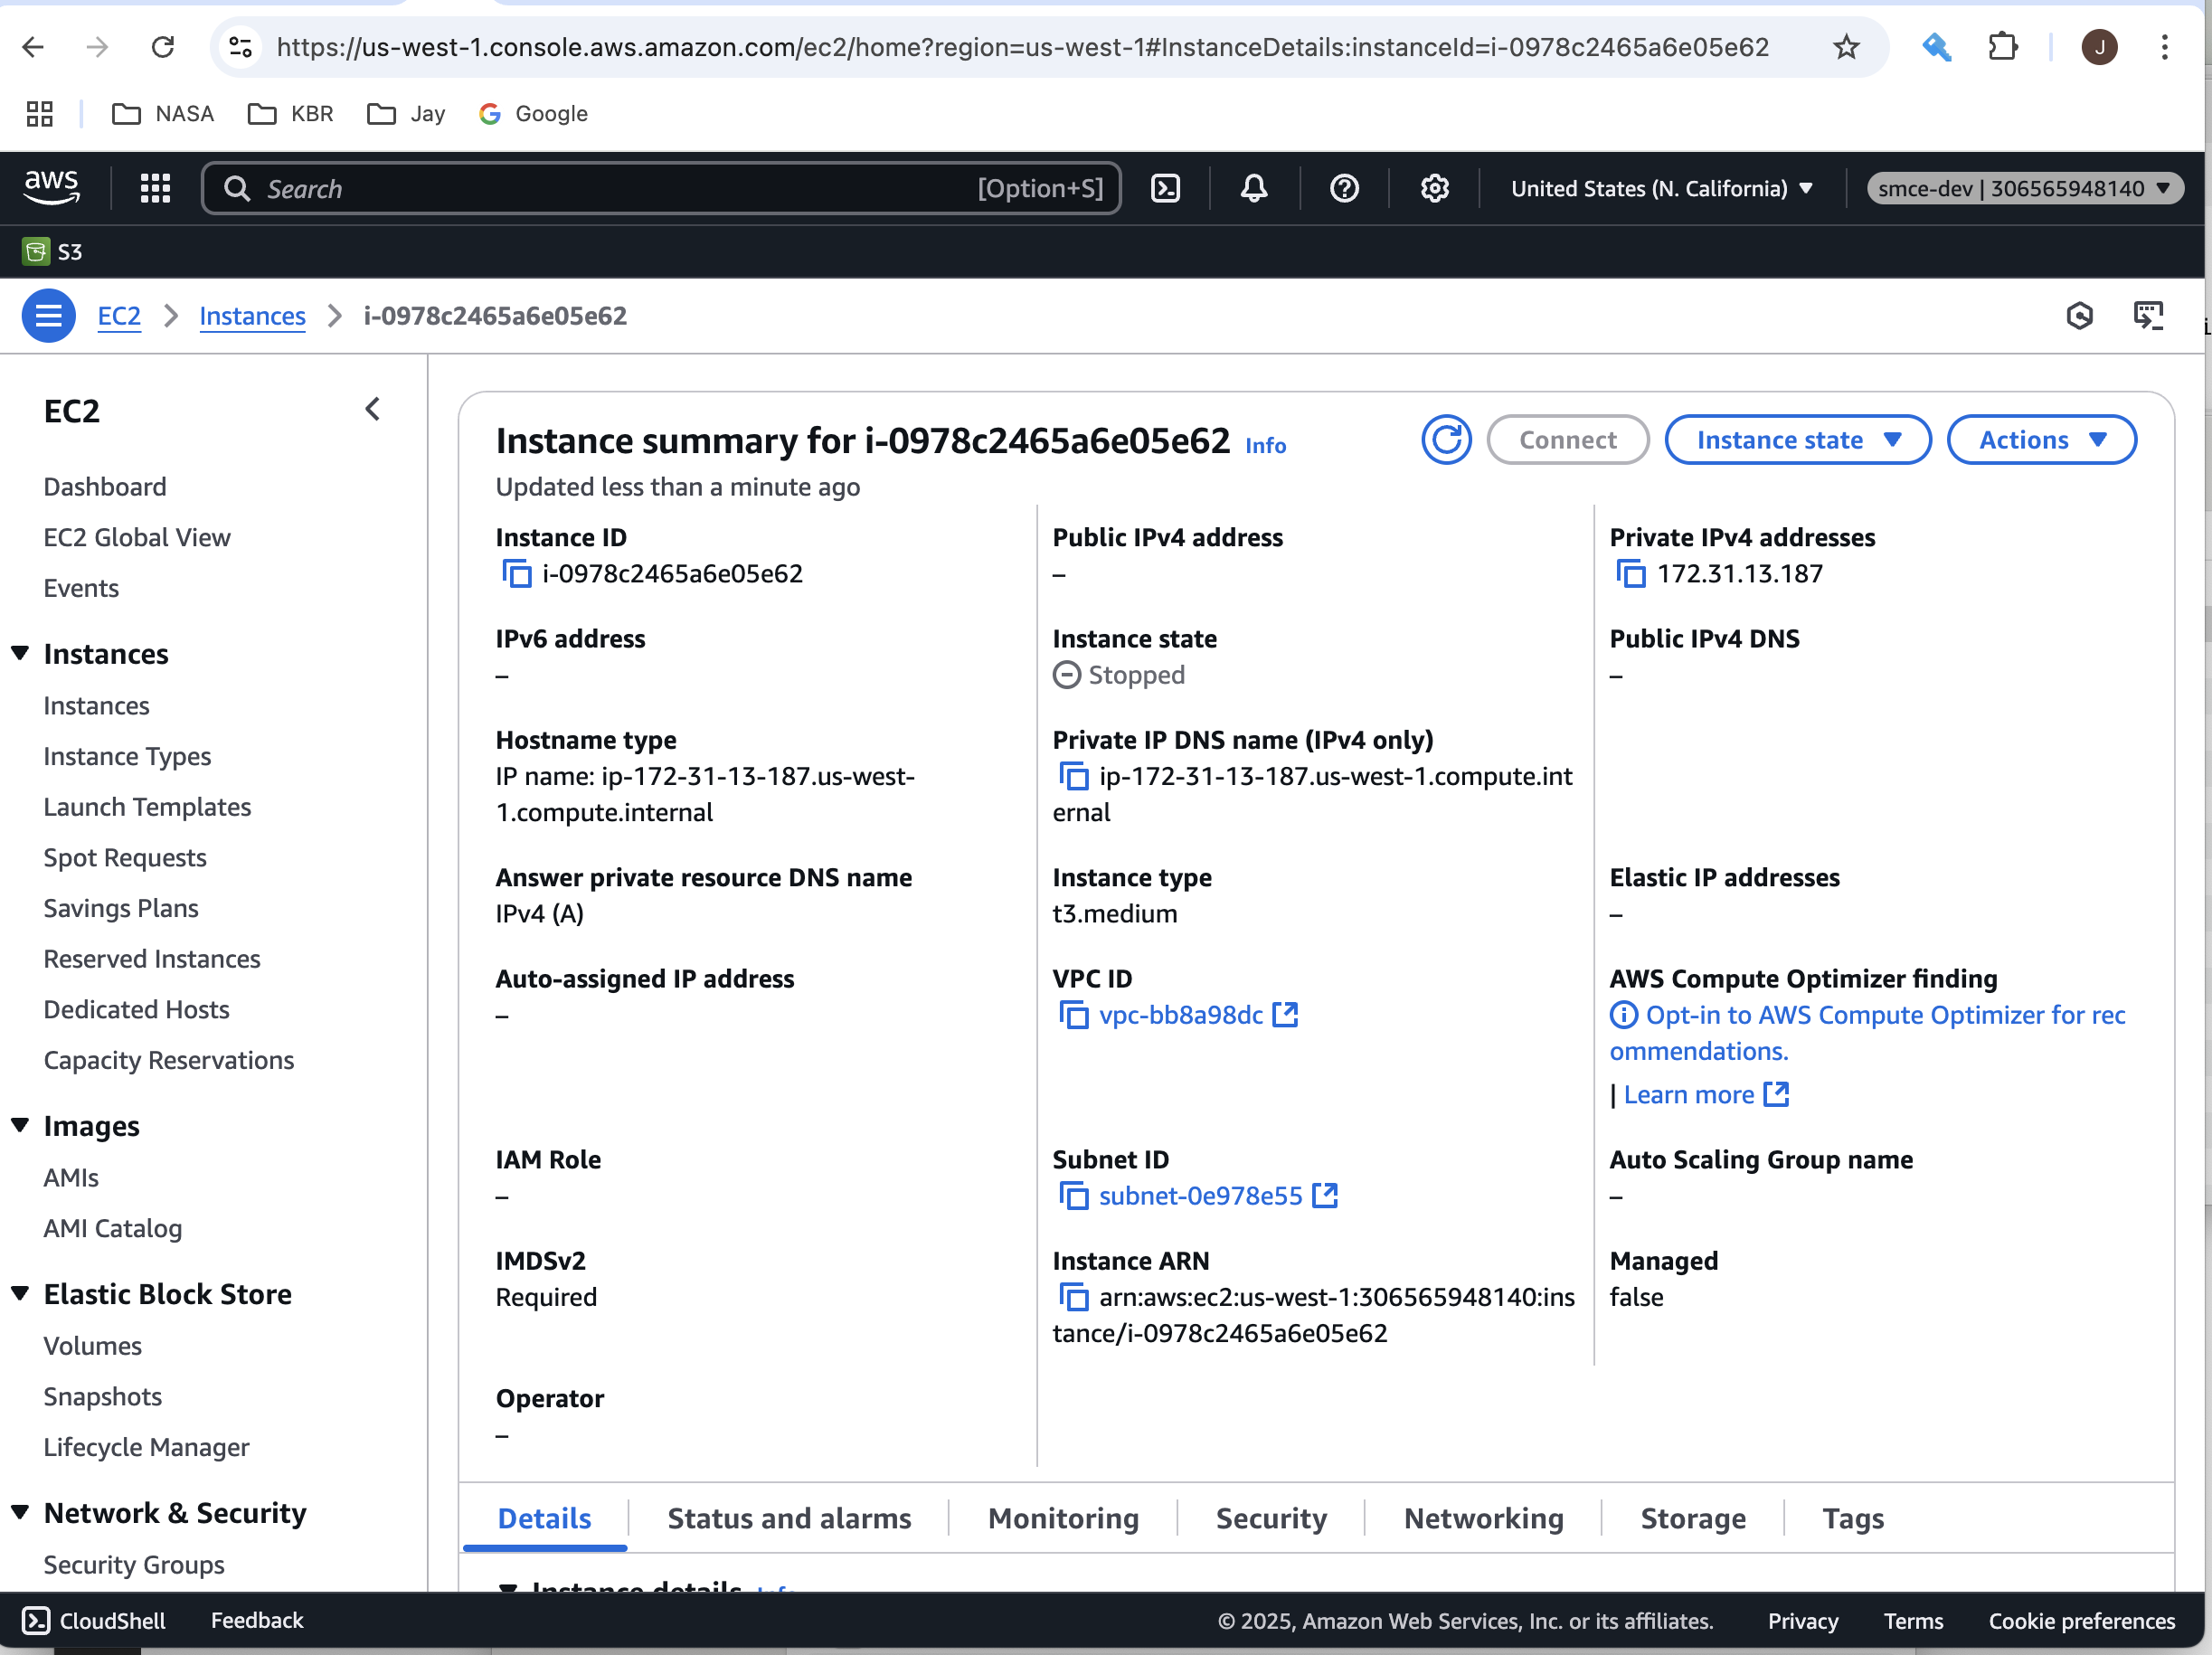
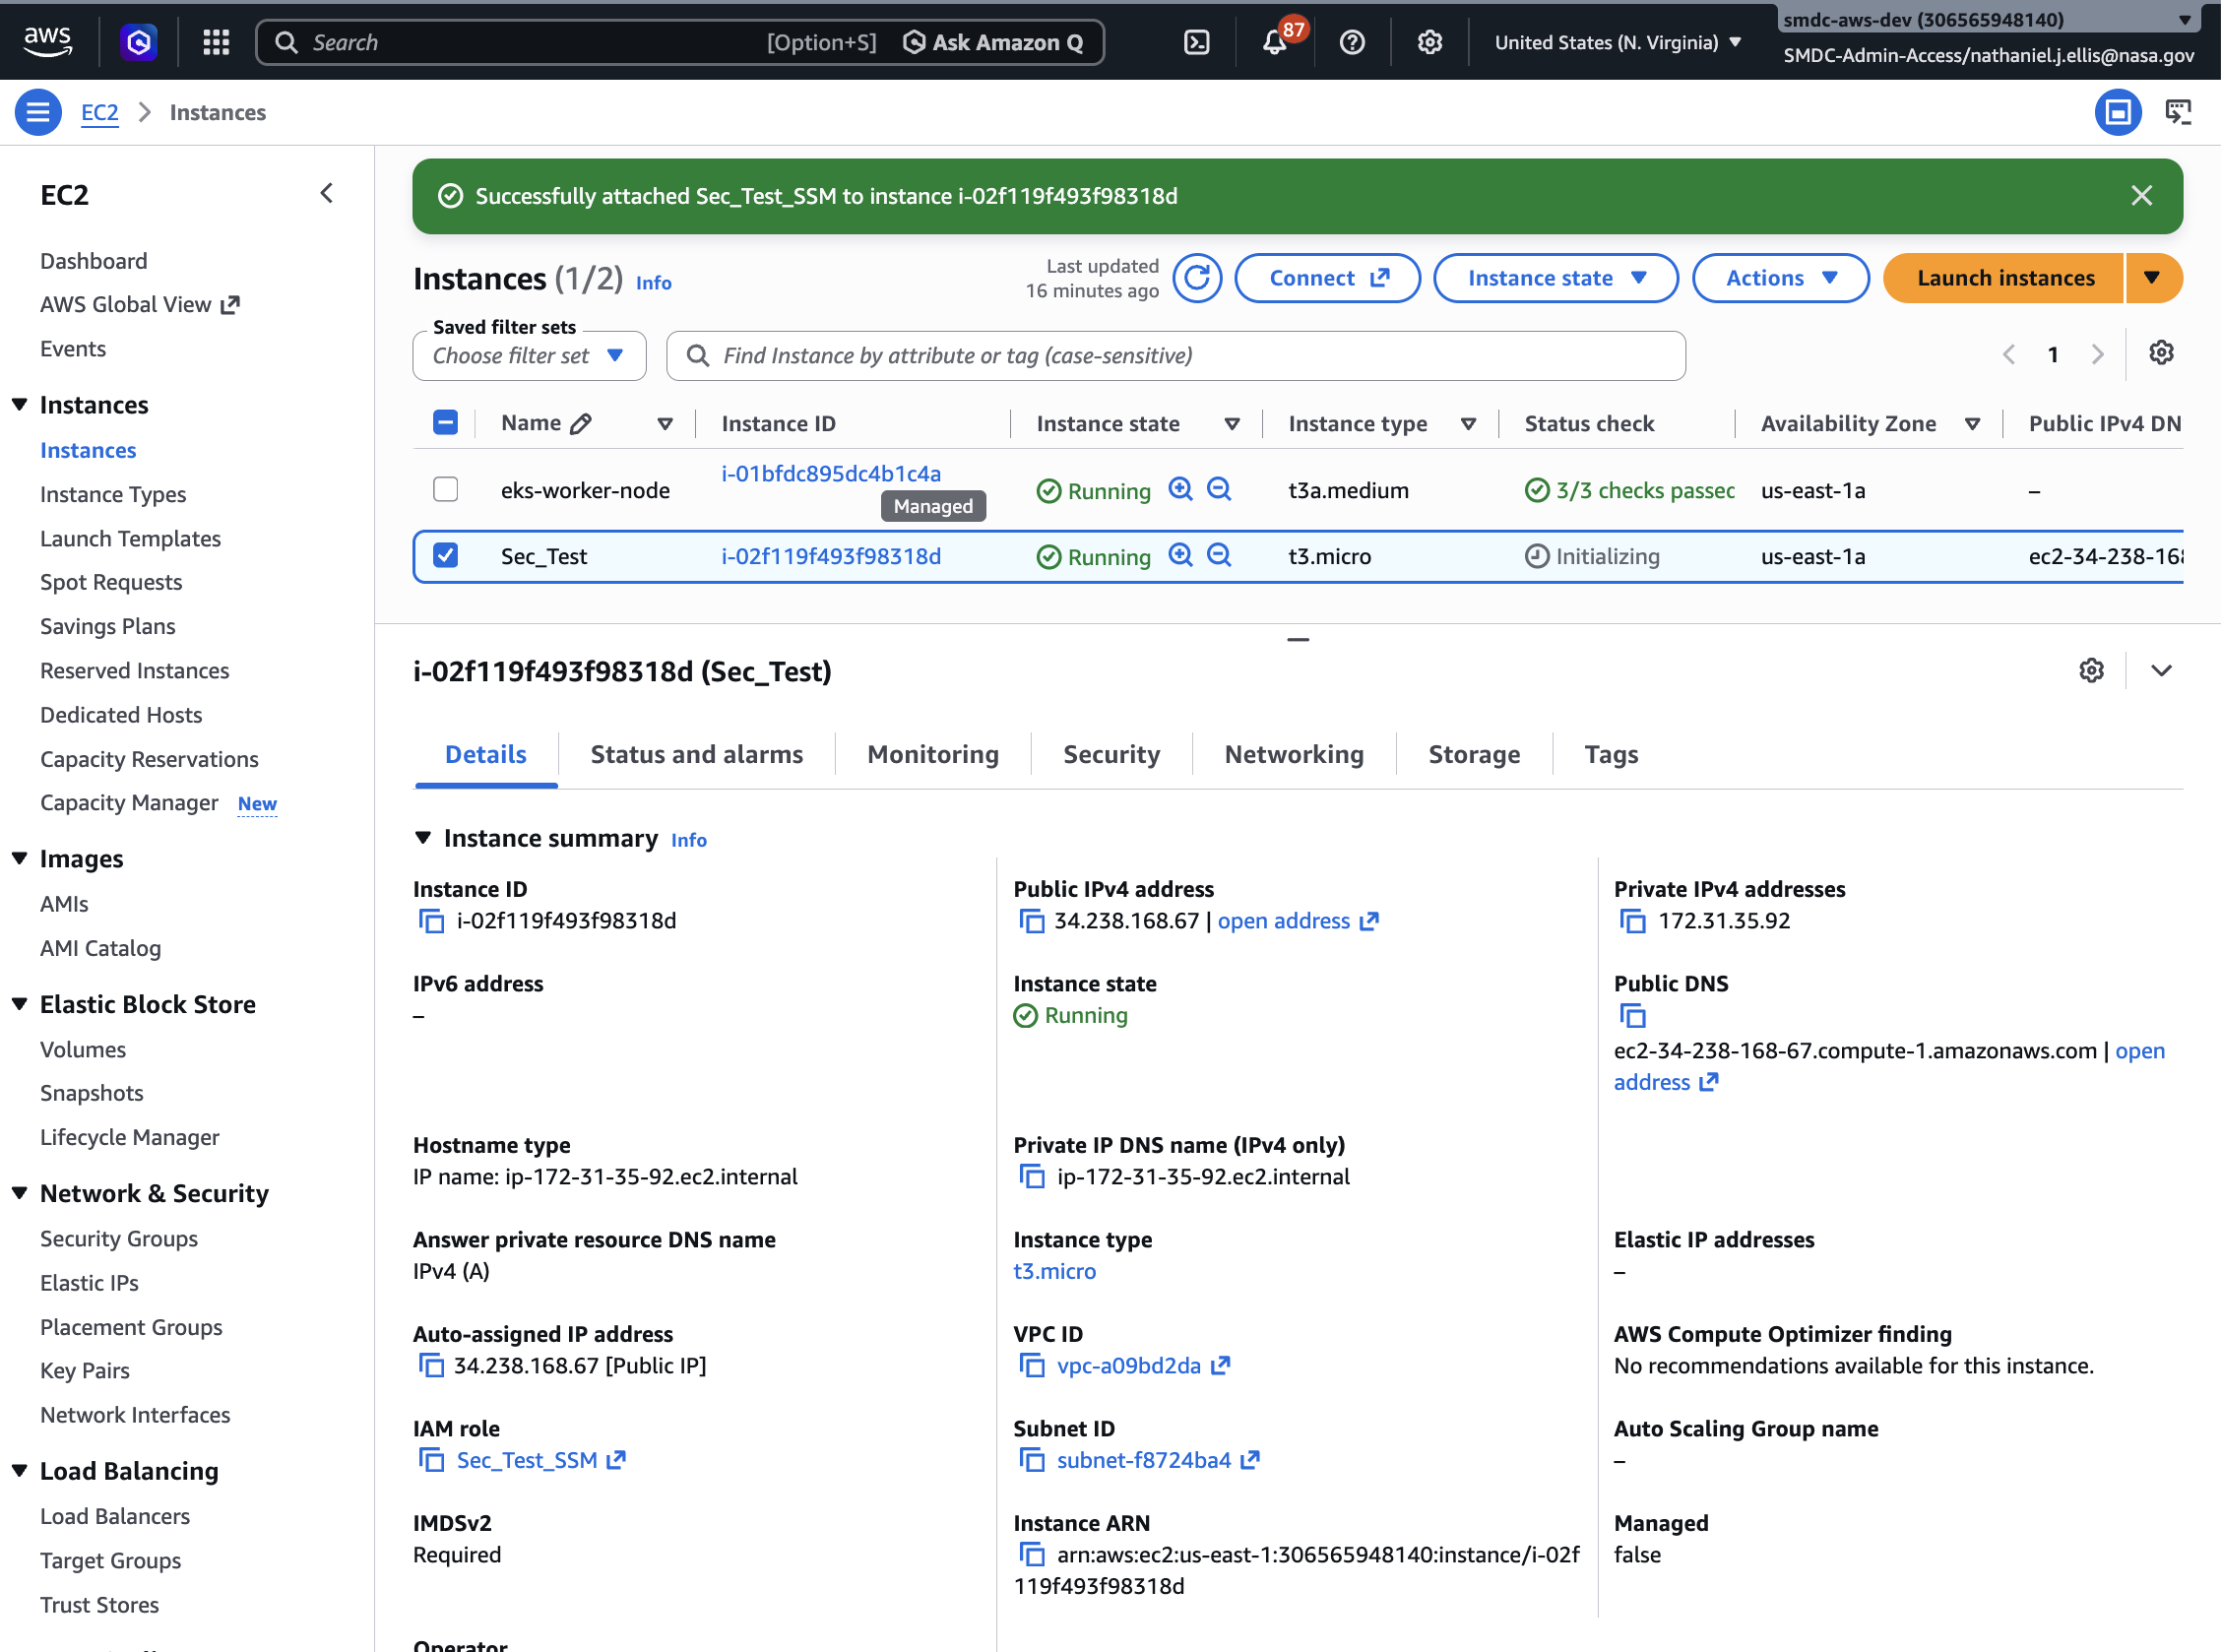
Using the AWS Console, navigate to the EC2 Instance Summary page. You can do this by entering "EC2" in the search box at top of the console, and then selecting the ID for one of your instances. Once there, the IAM Role will be shown at the bottom left of the Instance Summary page. If IAM Role is blank, follow step 3) "Attach IAM Role" instructions to attach a custom role to your instance. If an IAM role is not yet created, proceed to step 2) "Create New IAM Role".
2) Create New IAM Role
On the EC2 Instance summary page, use the Actions->Security menu at the upper right and choose Modify IAM Role.
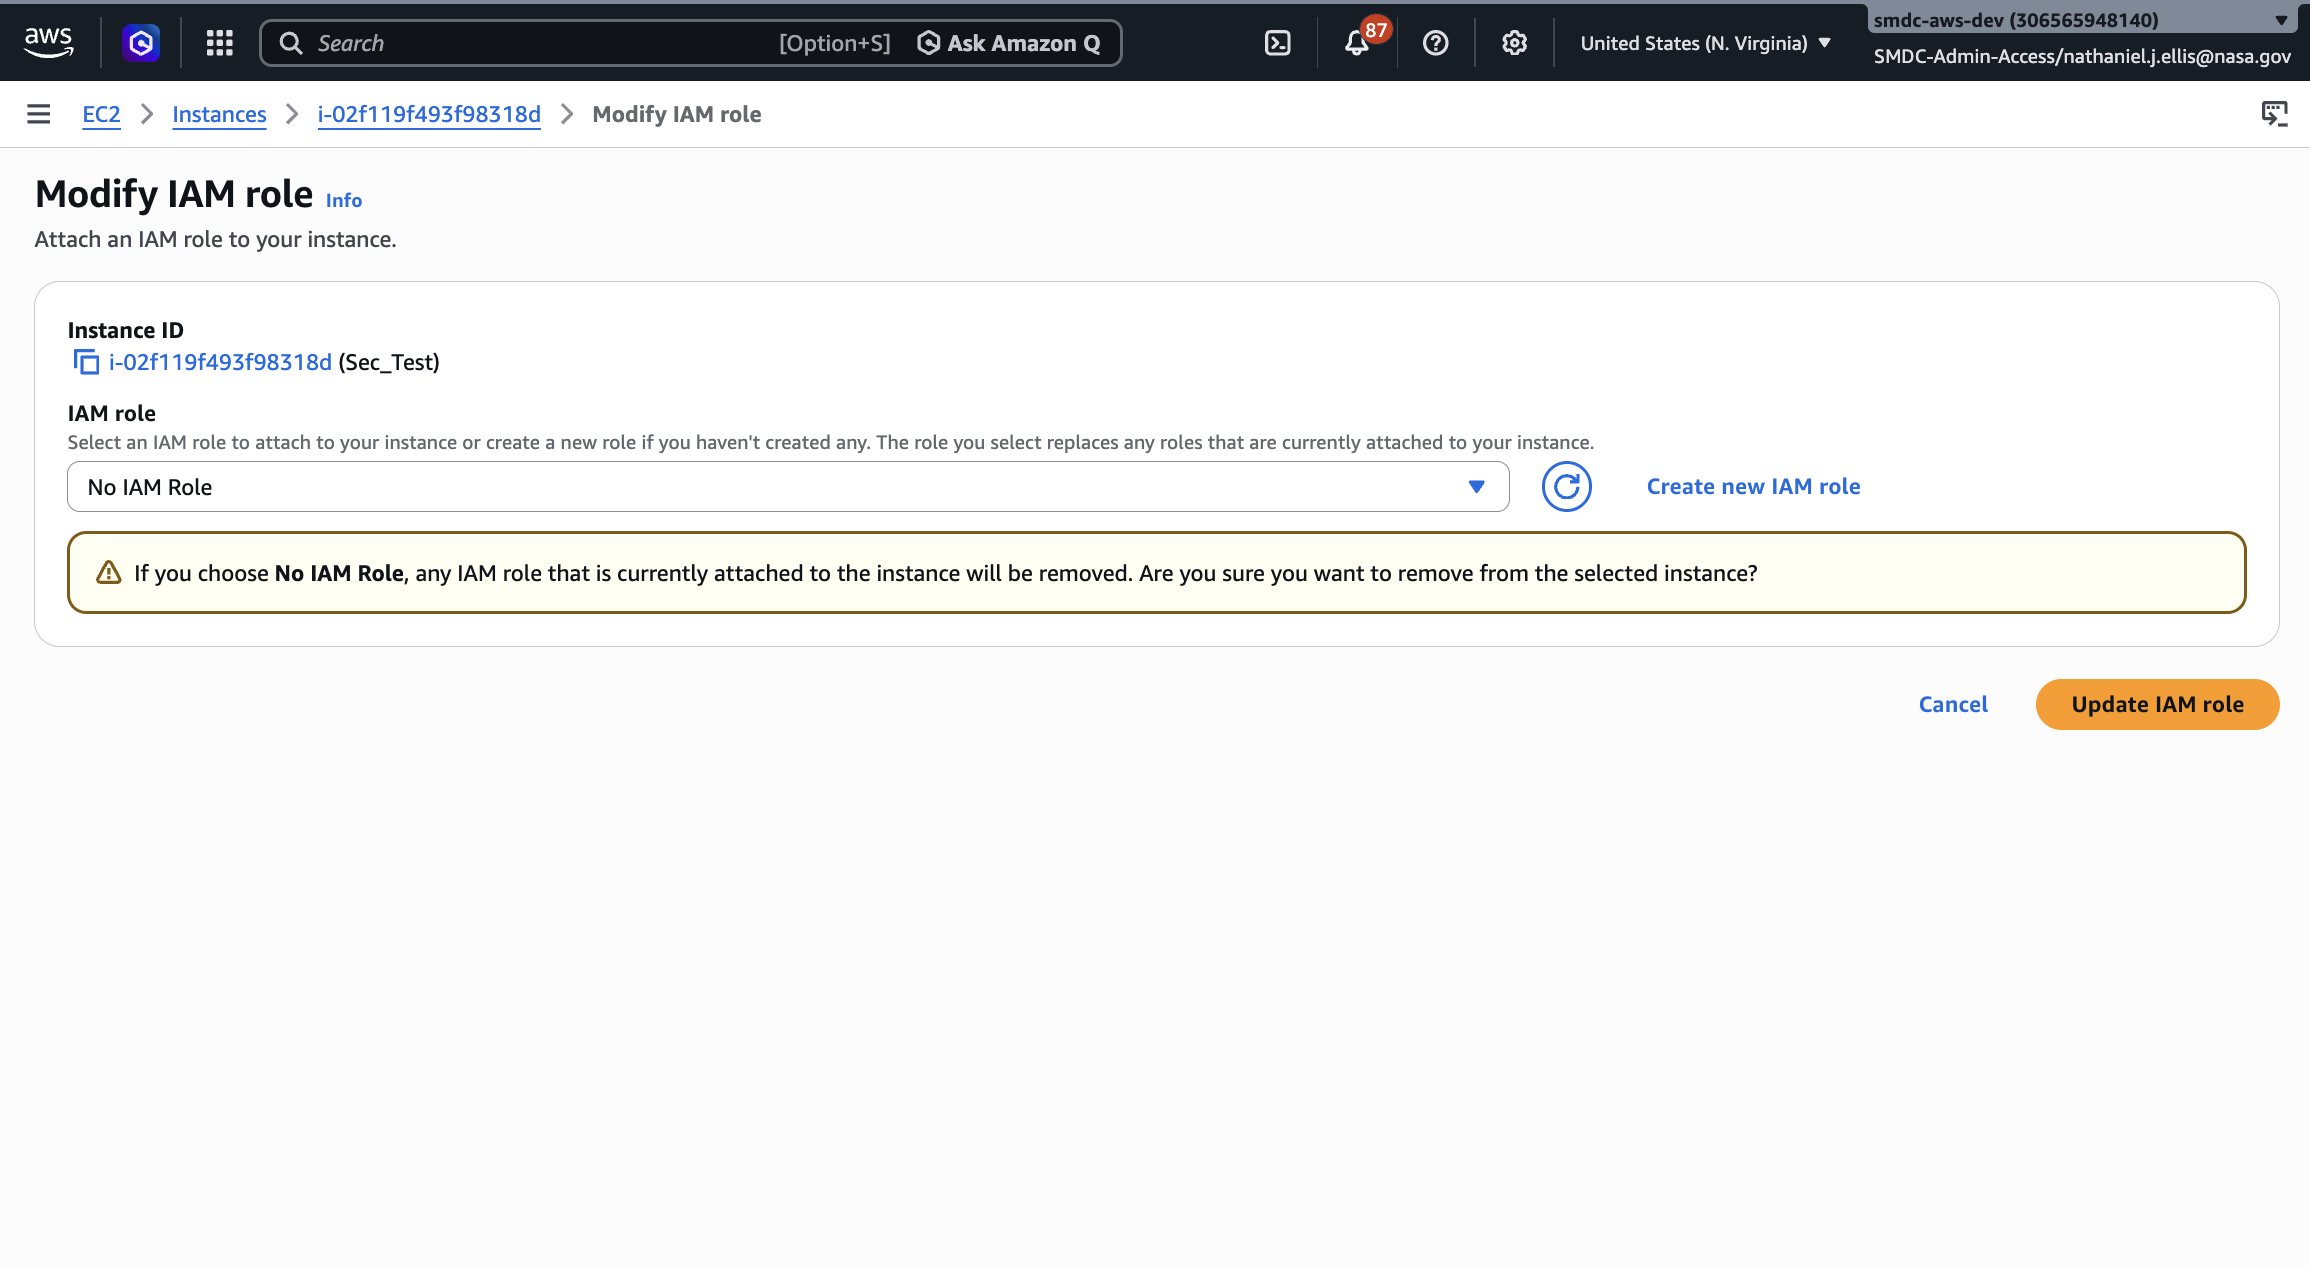
This will display the Modify IAM Role page. Choose the Create new IAM Role link to establish a new IAM Role for your instance.
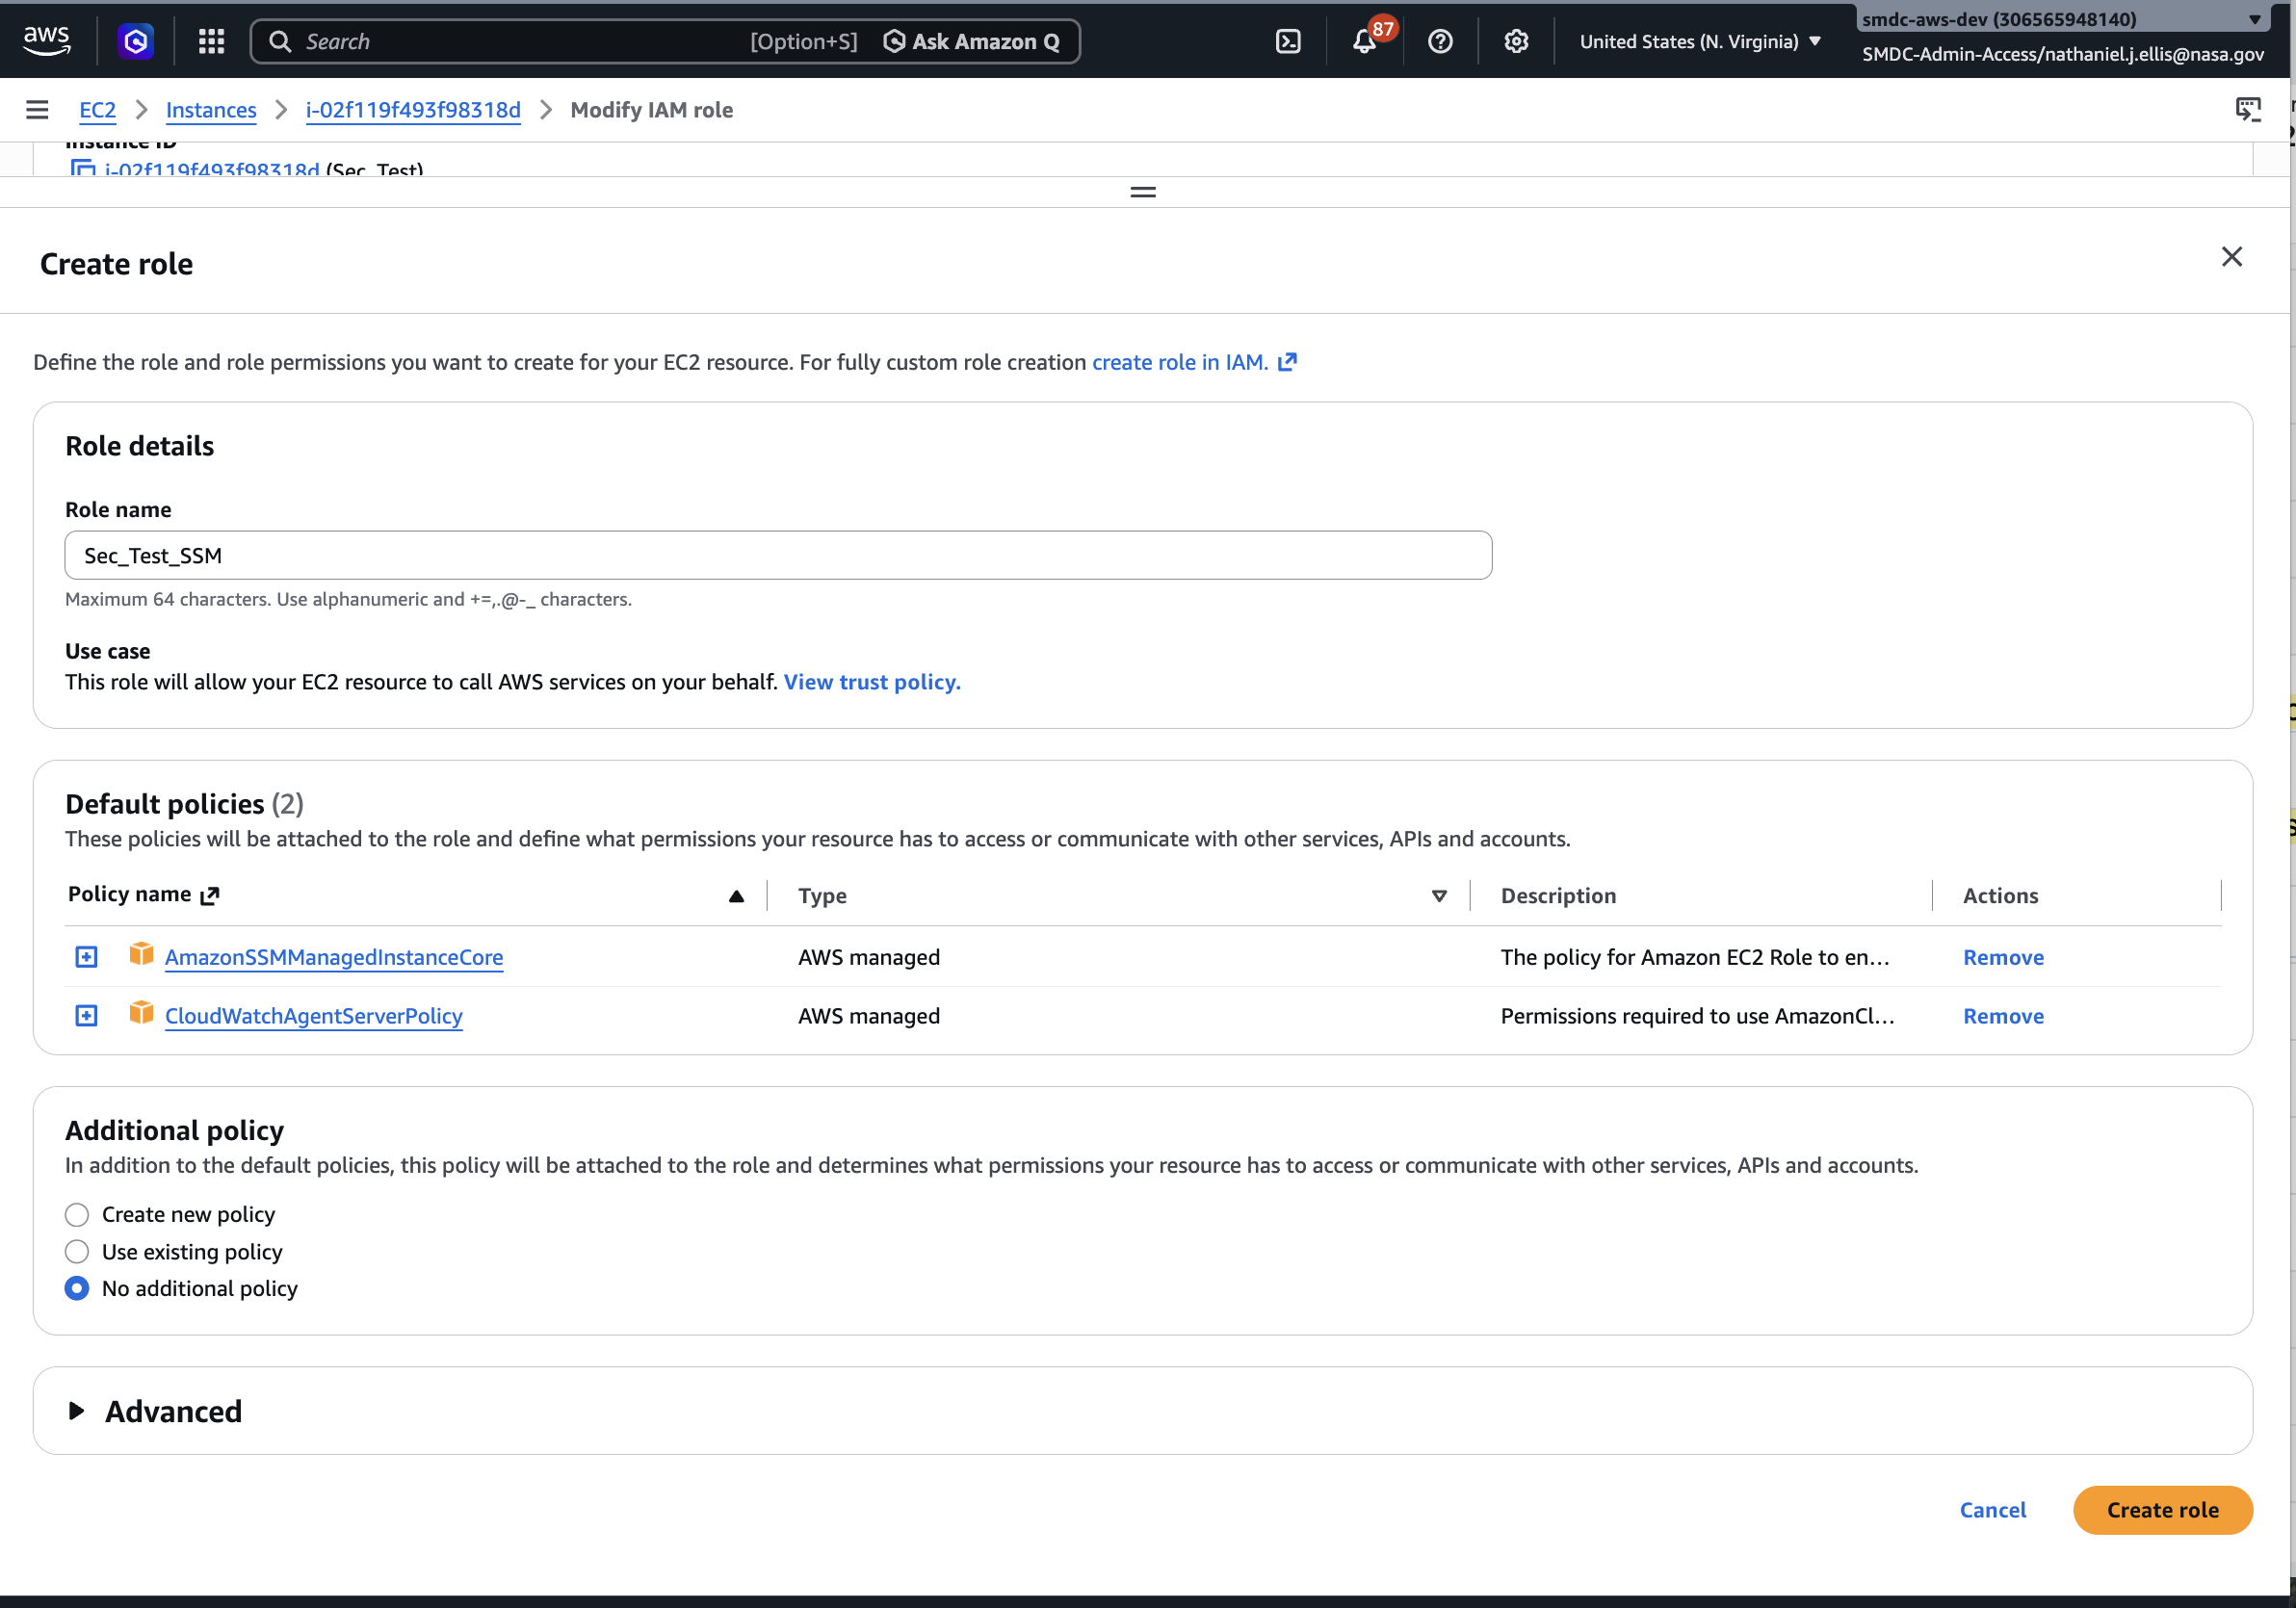
On the Create Role page, enter a new Role name, accept the default Permissions Policies of AmazonSSMManagedInstanceCore and CloudWatchAgentServerPolicy, and select the Create Role link at the bottom right to create the new role.
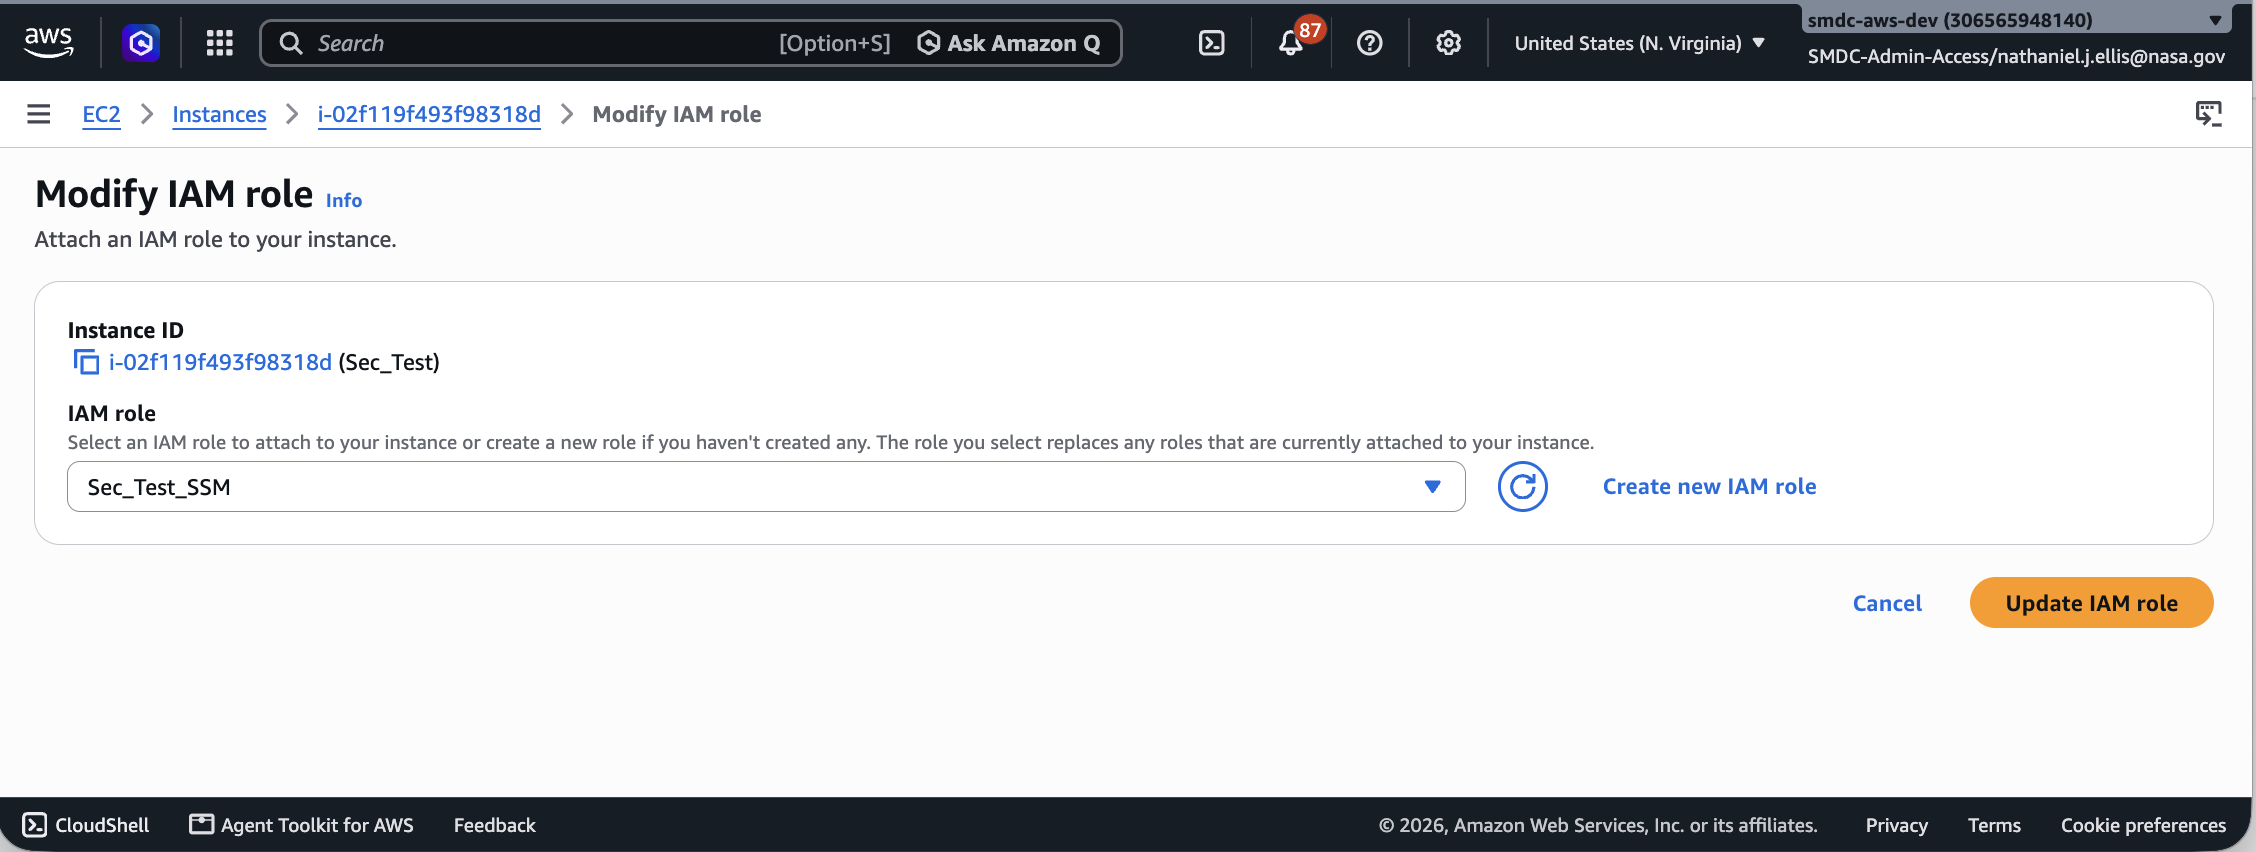
The new role will appear as the selected IAM Role on the Modify IAM Role page. Select the Update IAM Role link to modify the EC2 instance and select your new IAM role.
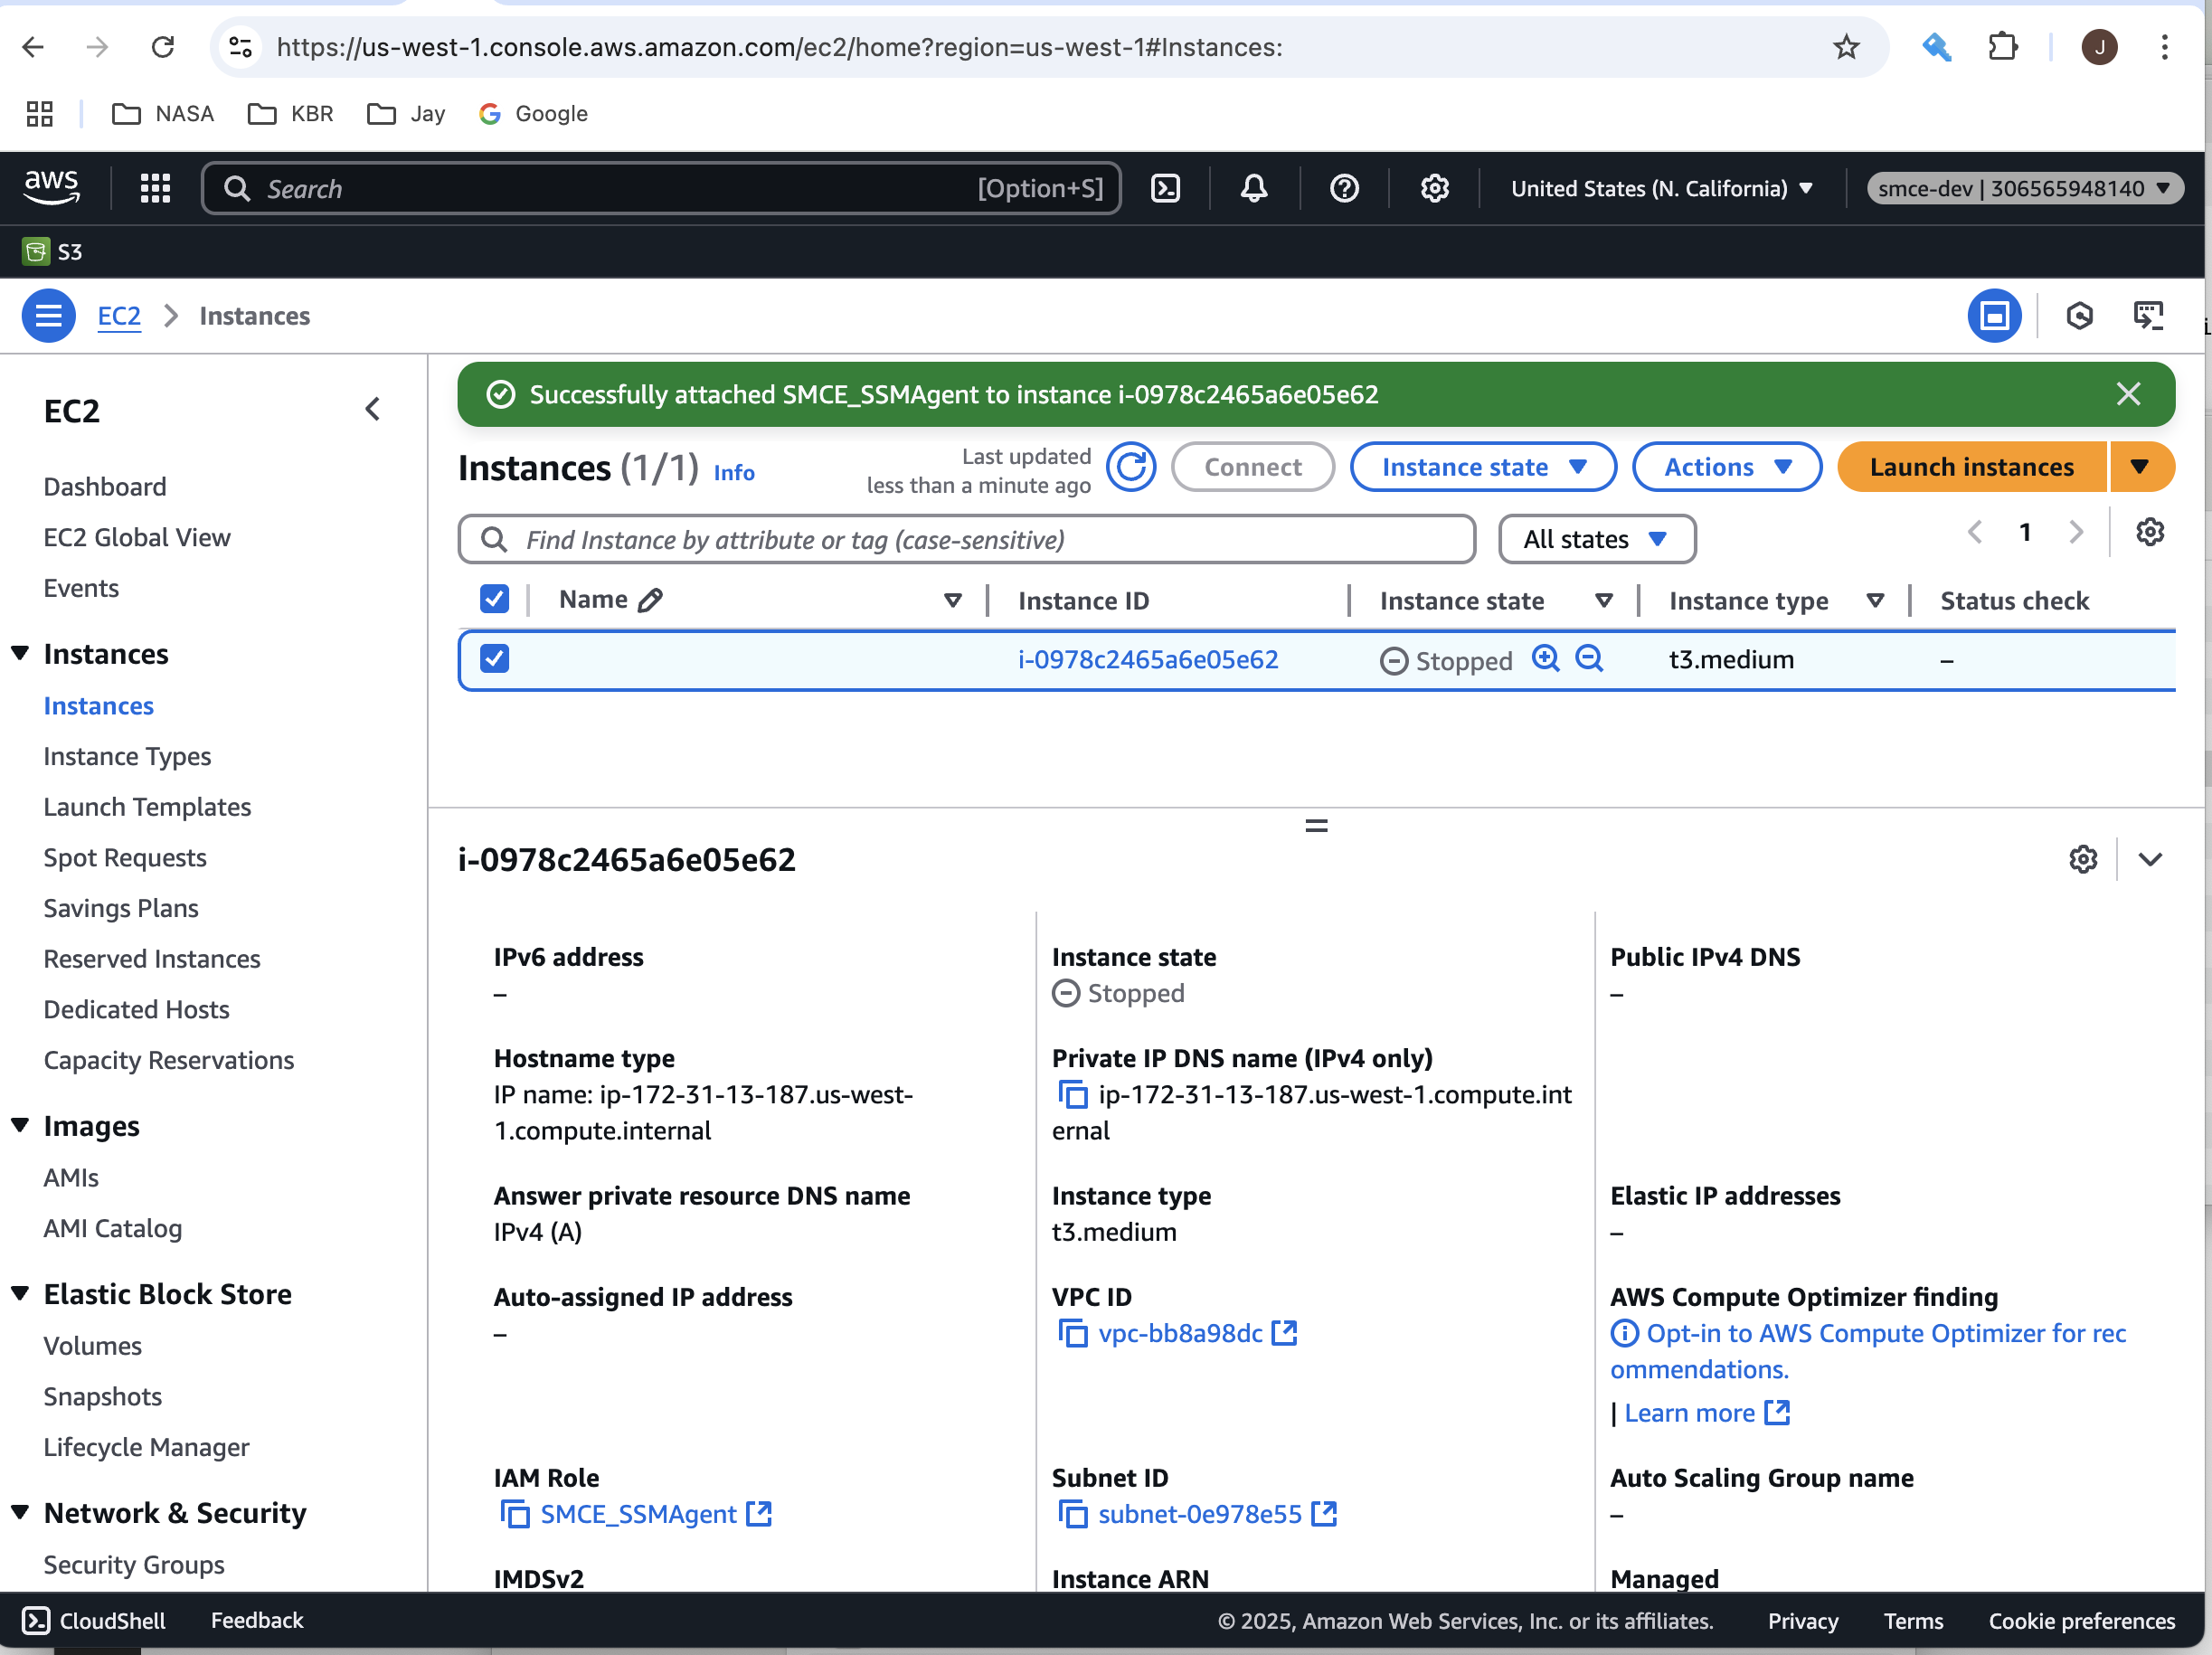
The EC2 Instance Details page will again appear with the new IAM Role shown as the selected IAM Role for the current instance.
3) Attach IAM Role
On the EC2 Instance summary page, use the Actions->Security menu at the upper right and choose Modify IAM Role.
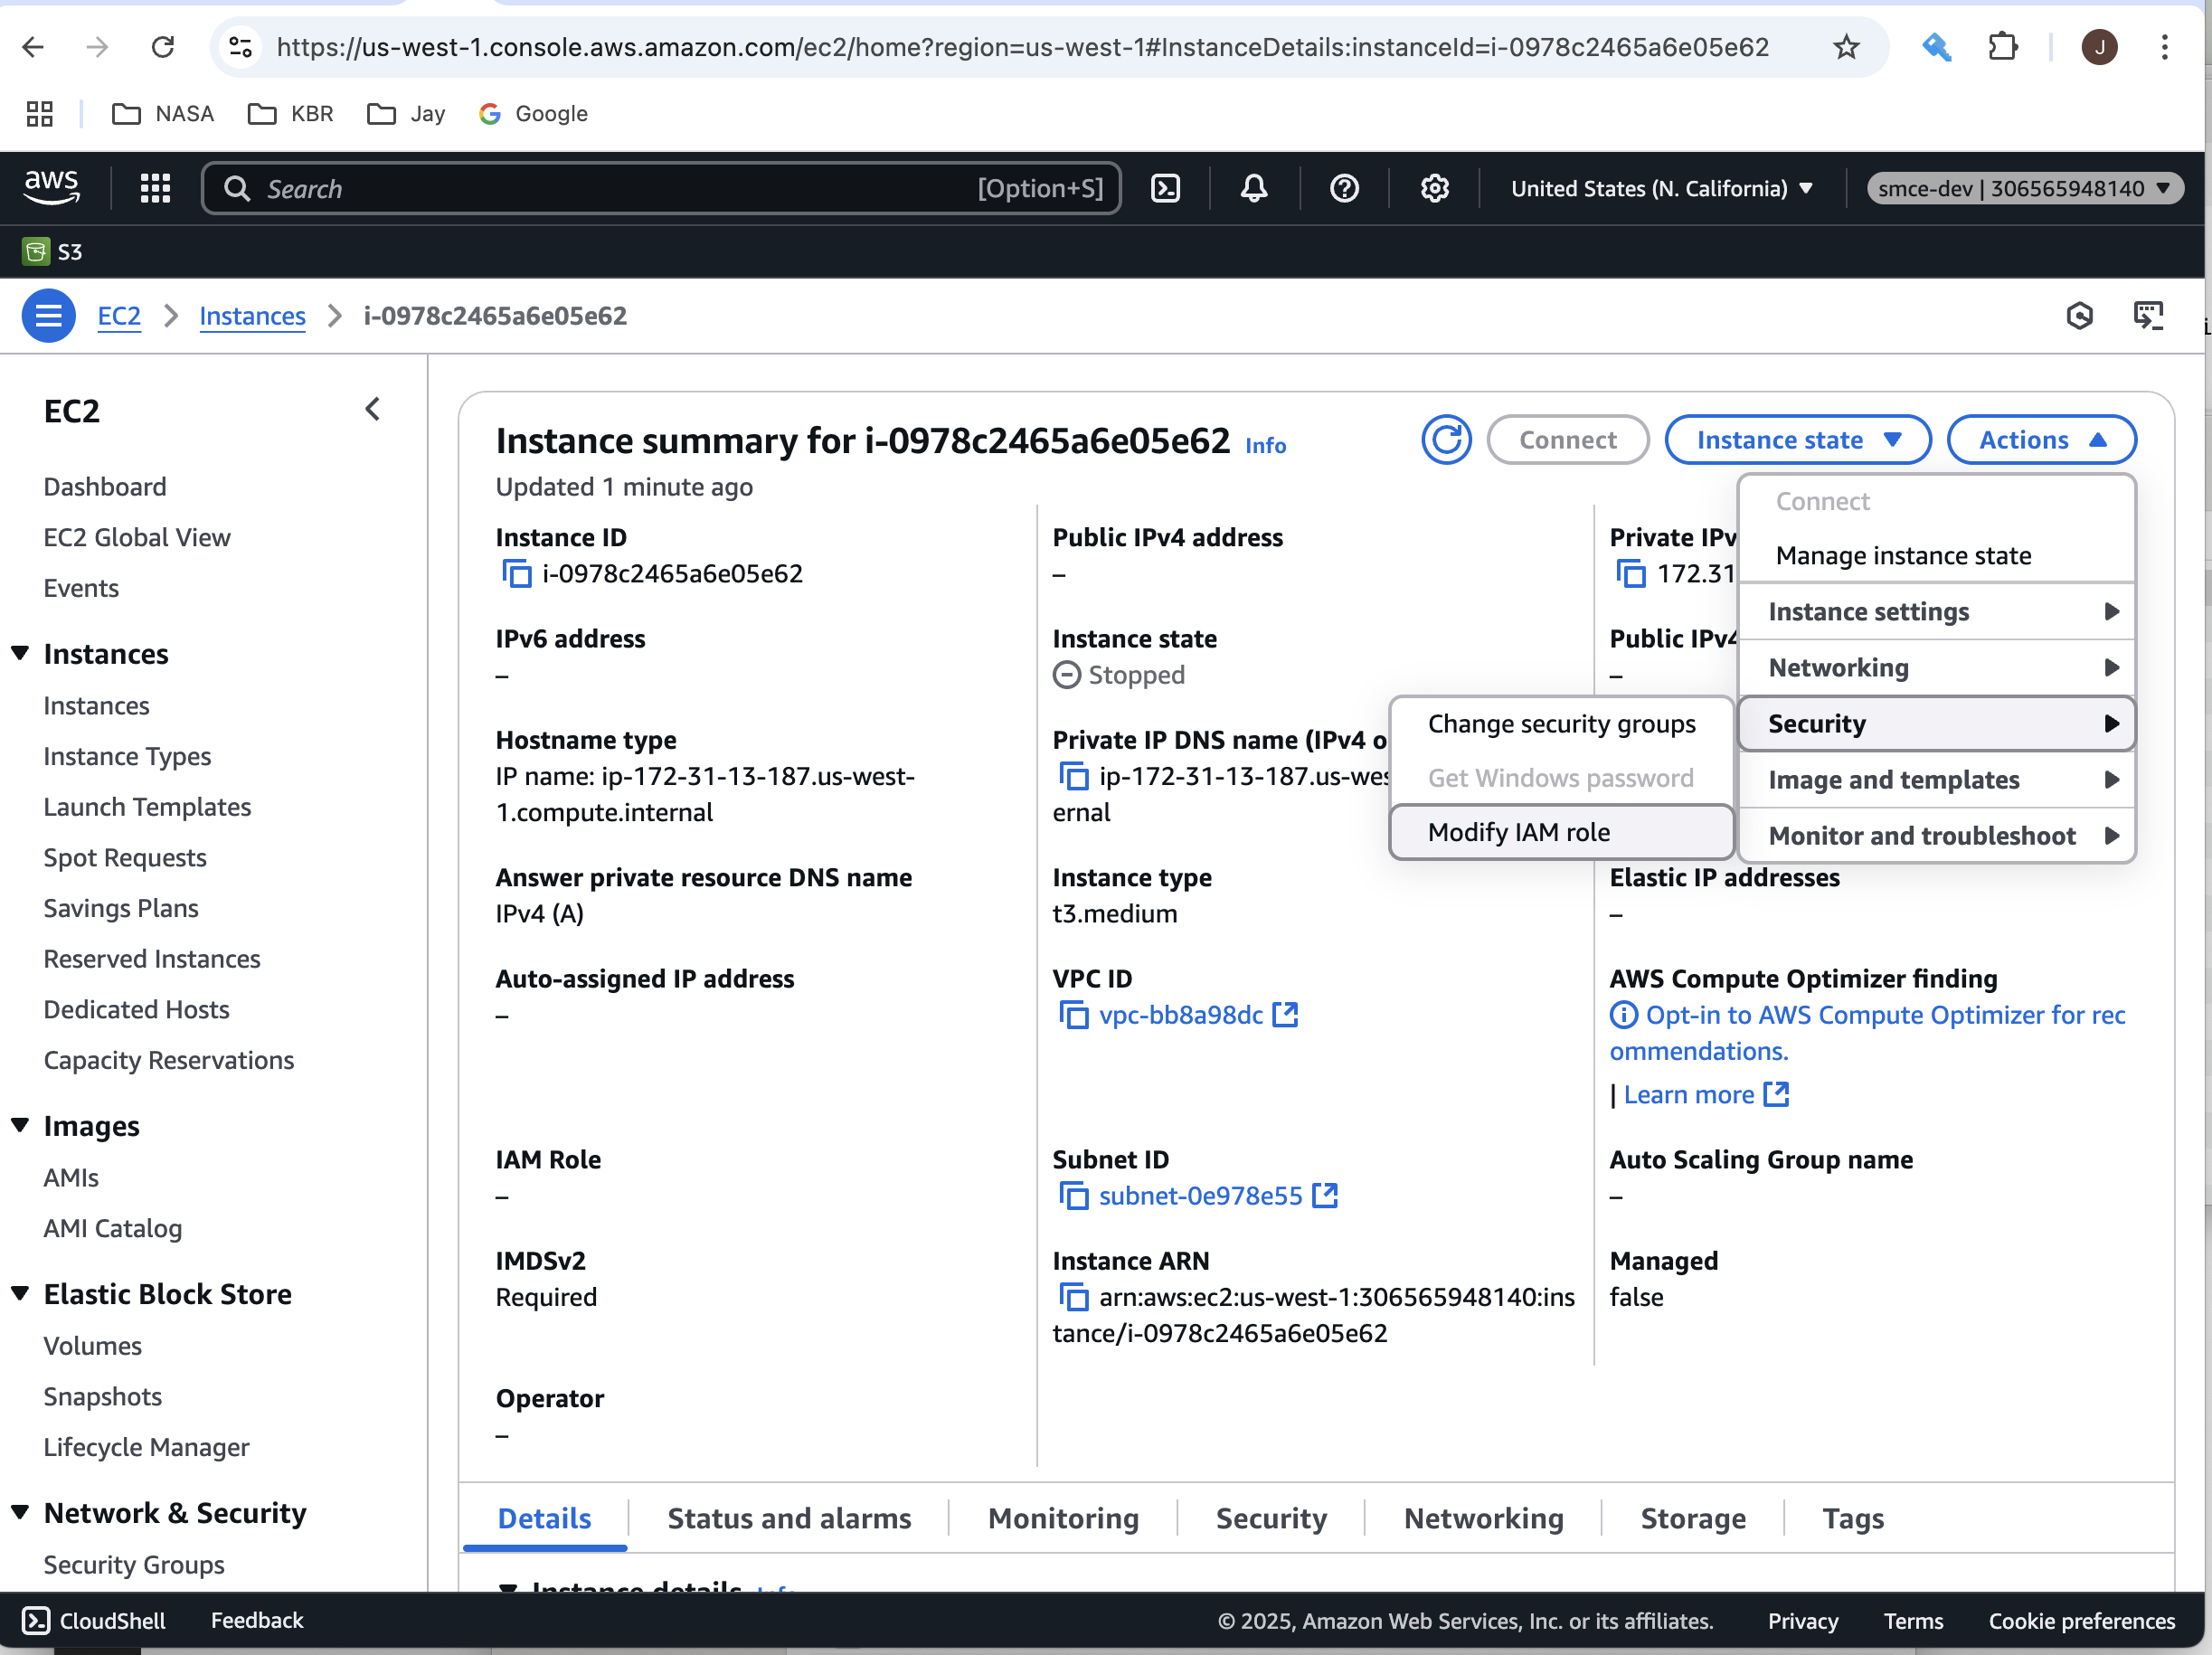
This will display the Modify IAM Role page where you'll be able to choose a role to attach to your instance.
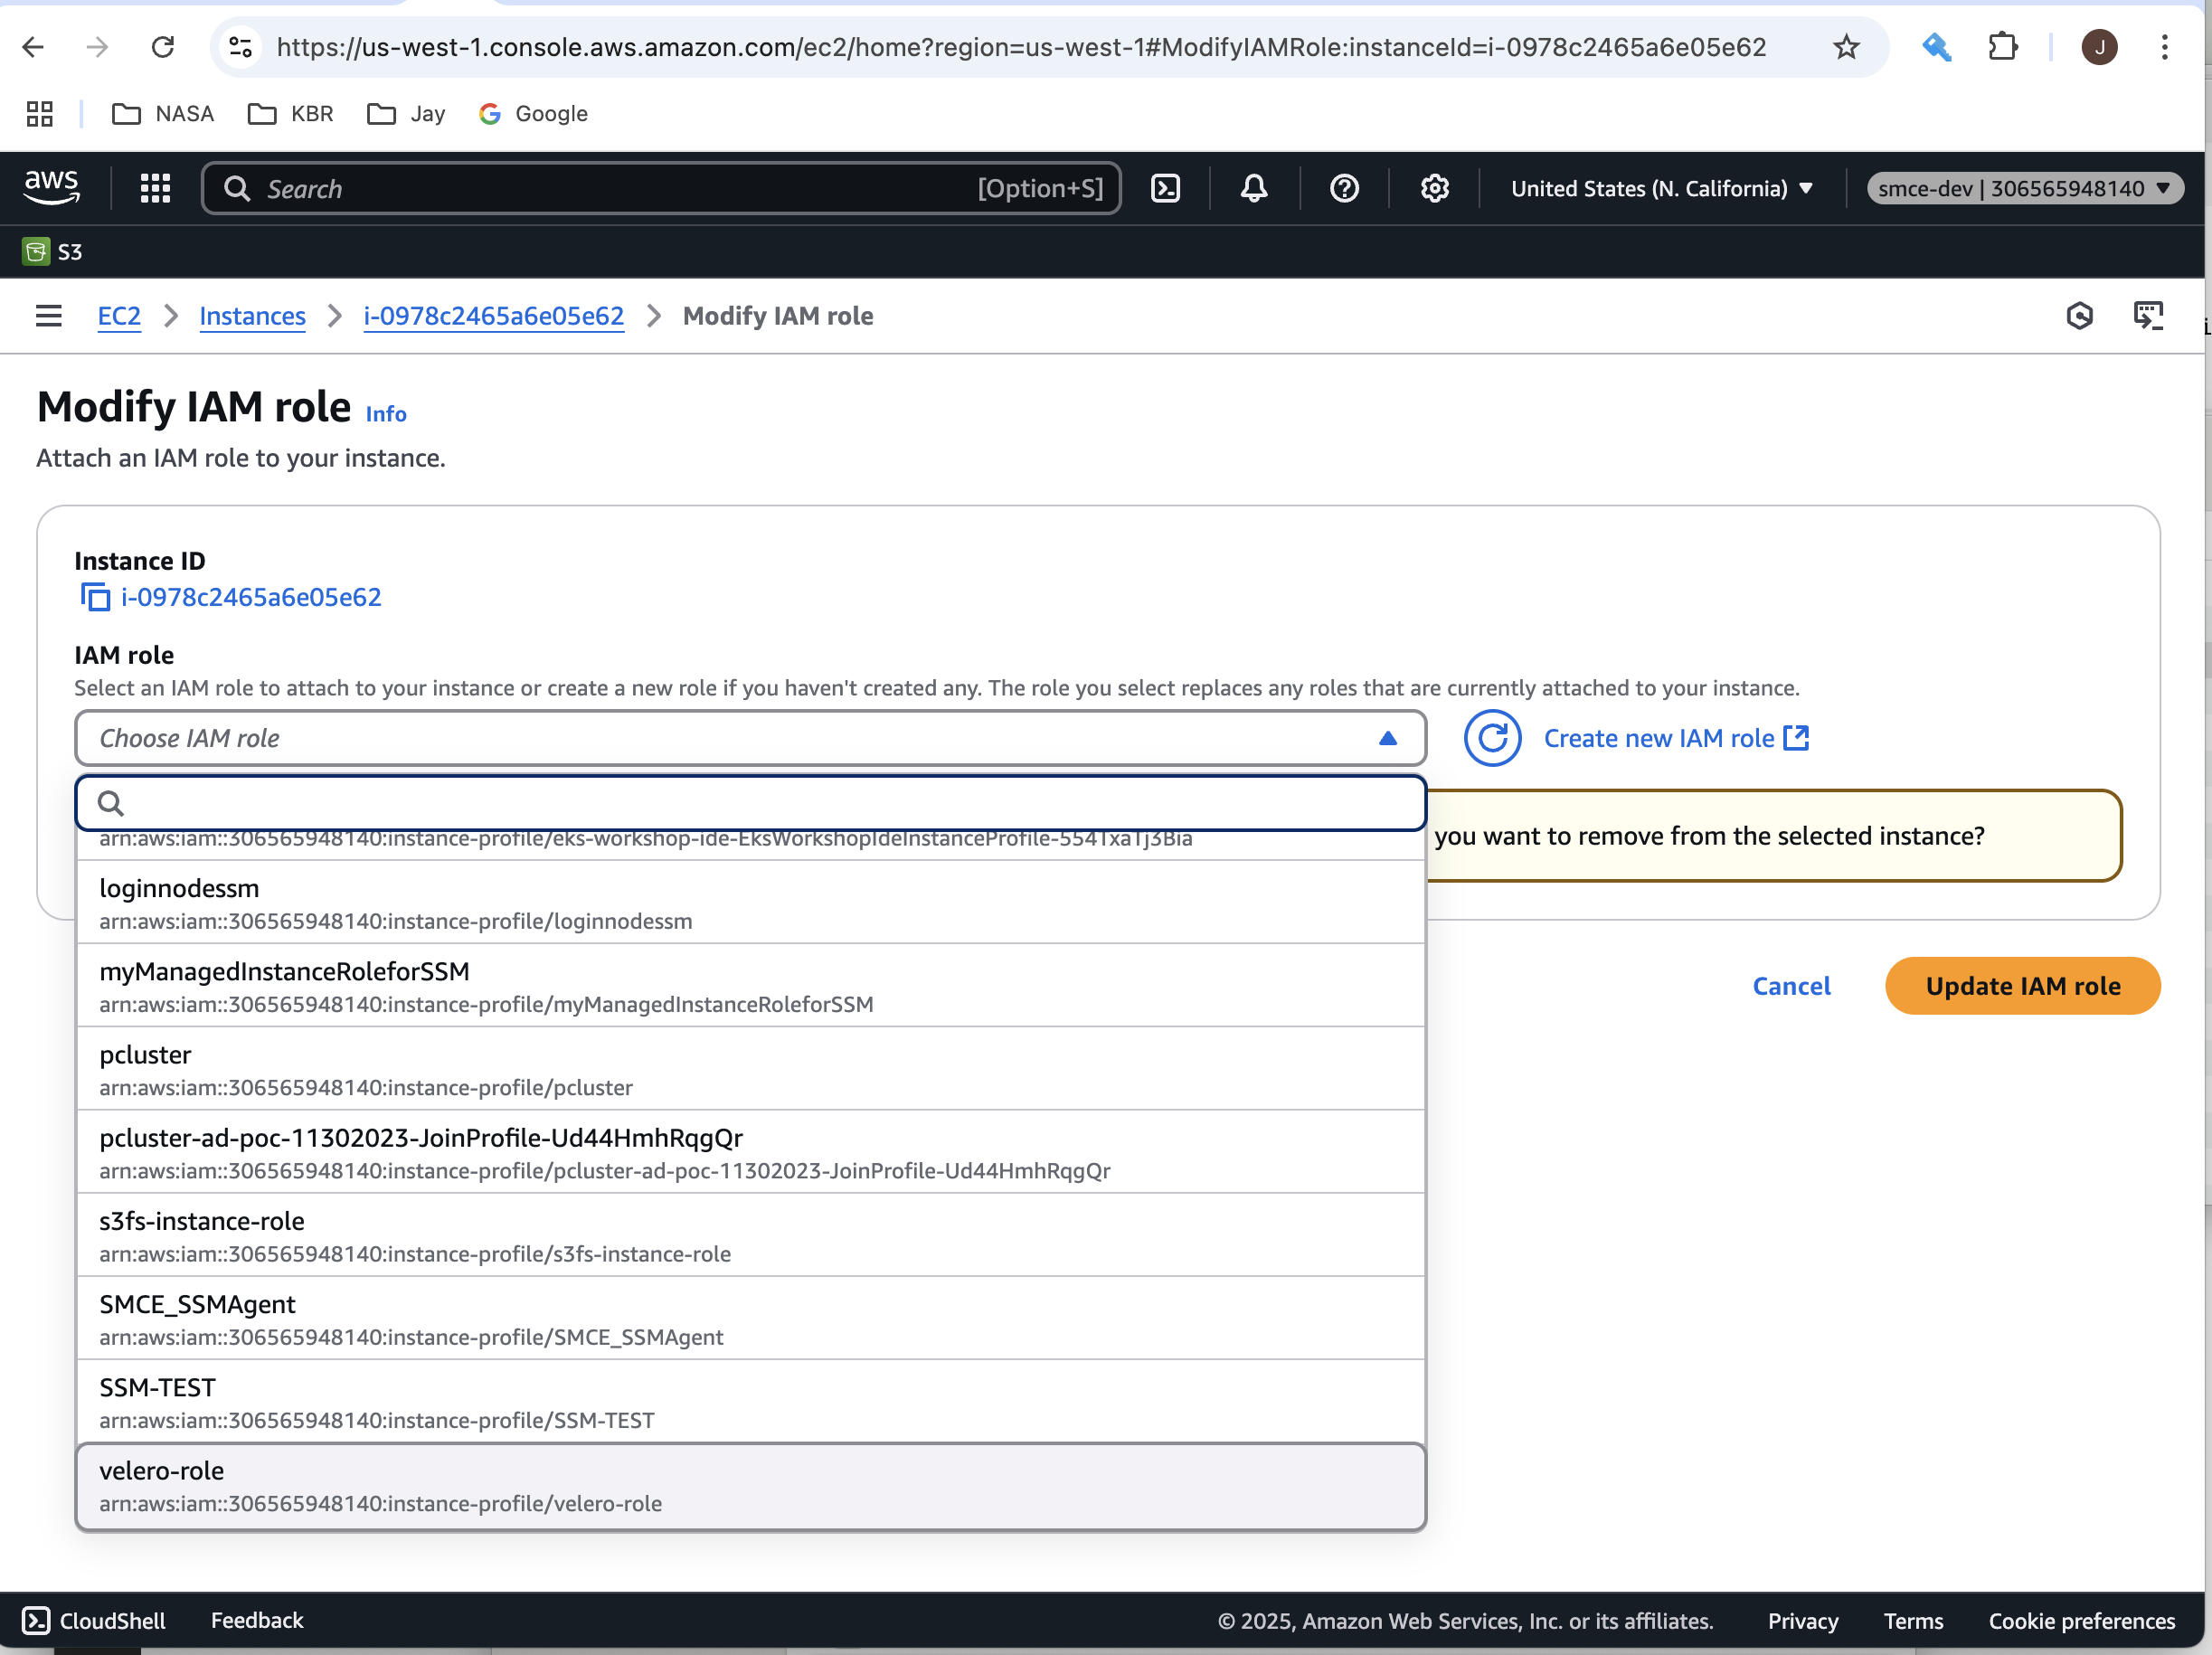
From the IAM Role dropdown, choose a custom, and then select the Update IAM role button to save the changes. The EC2 Instance Summary page will be re-displayed with the newly selected IAM role shown, along with a confirmation message about the changes.
4) Review Permissions Policies
To view the underlying Permissions Policies that are required in your custom IAM Role, click on the link on the EC2 Instance summary page.
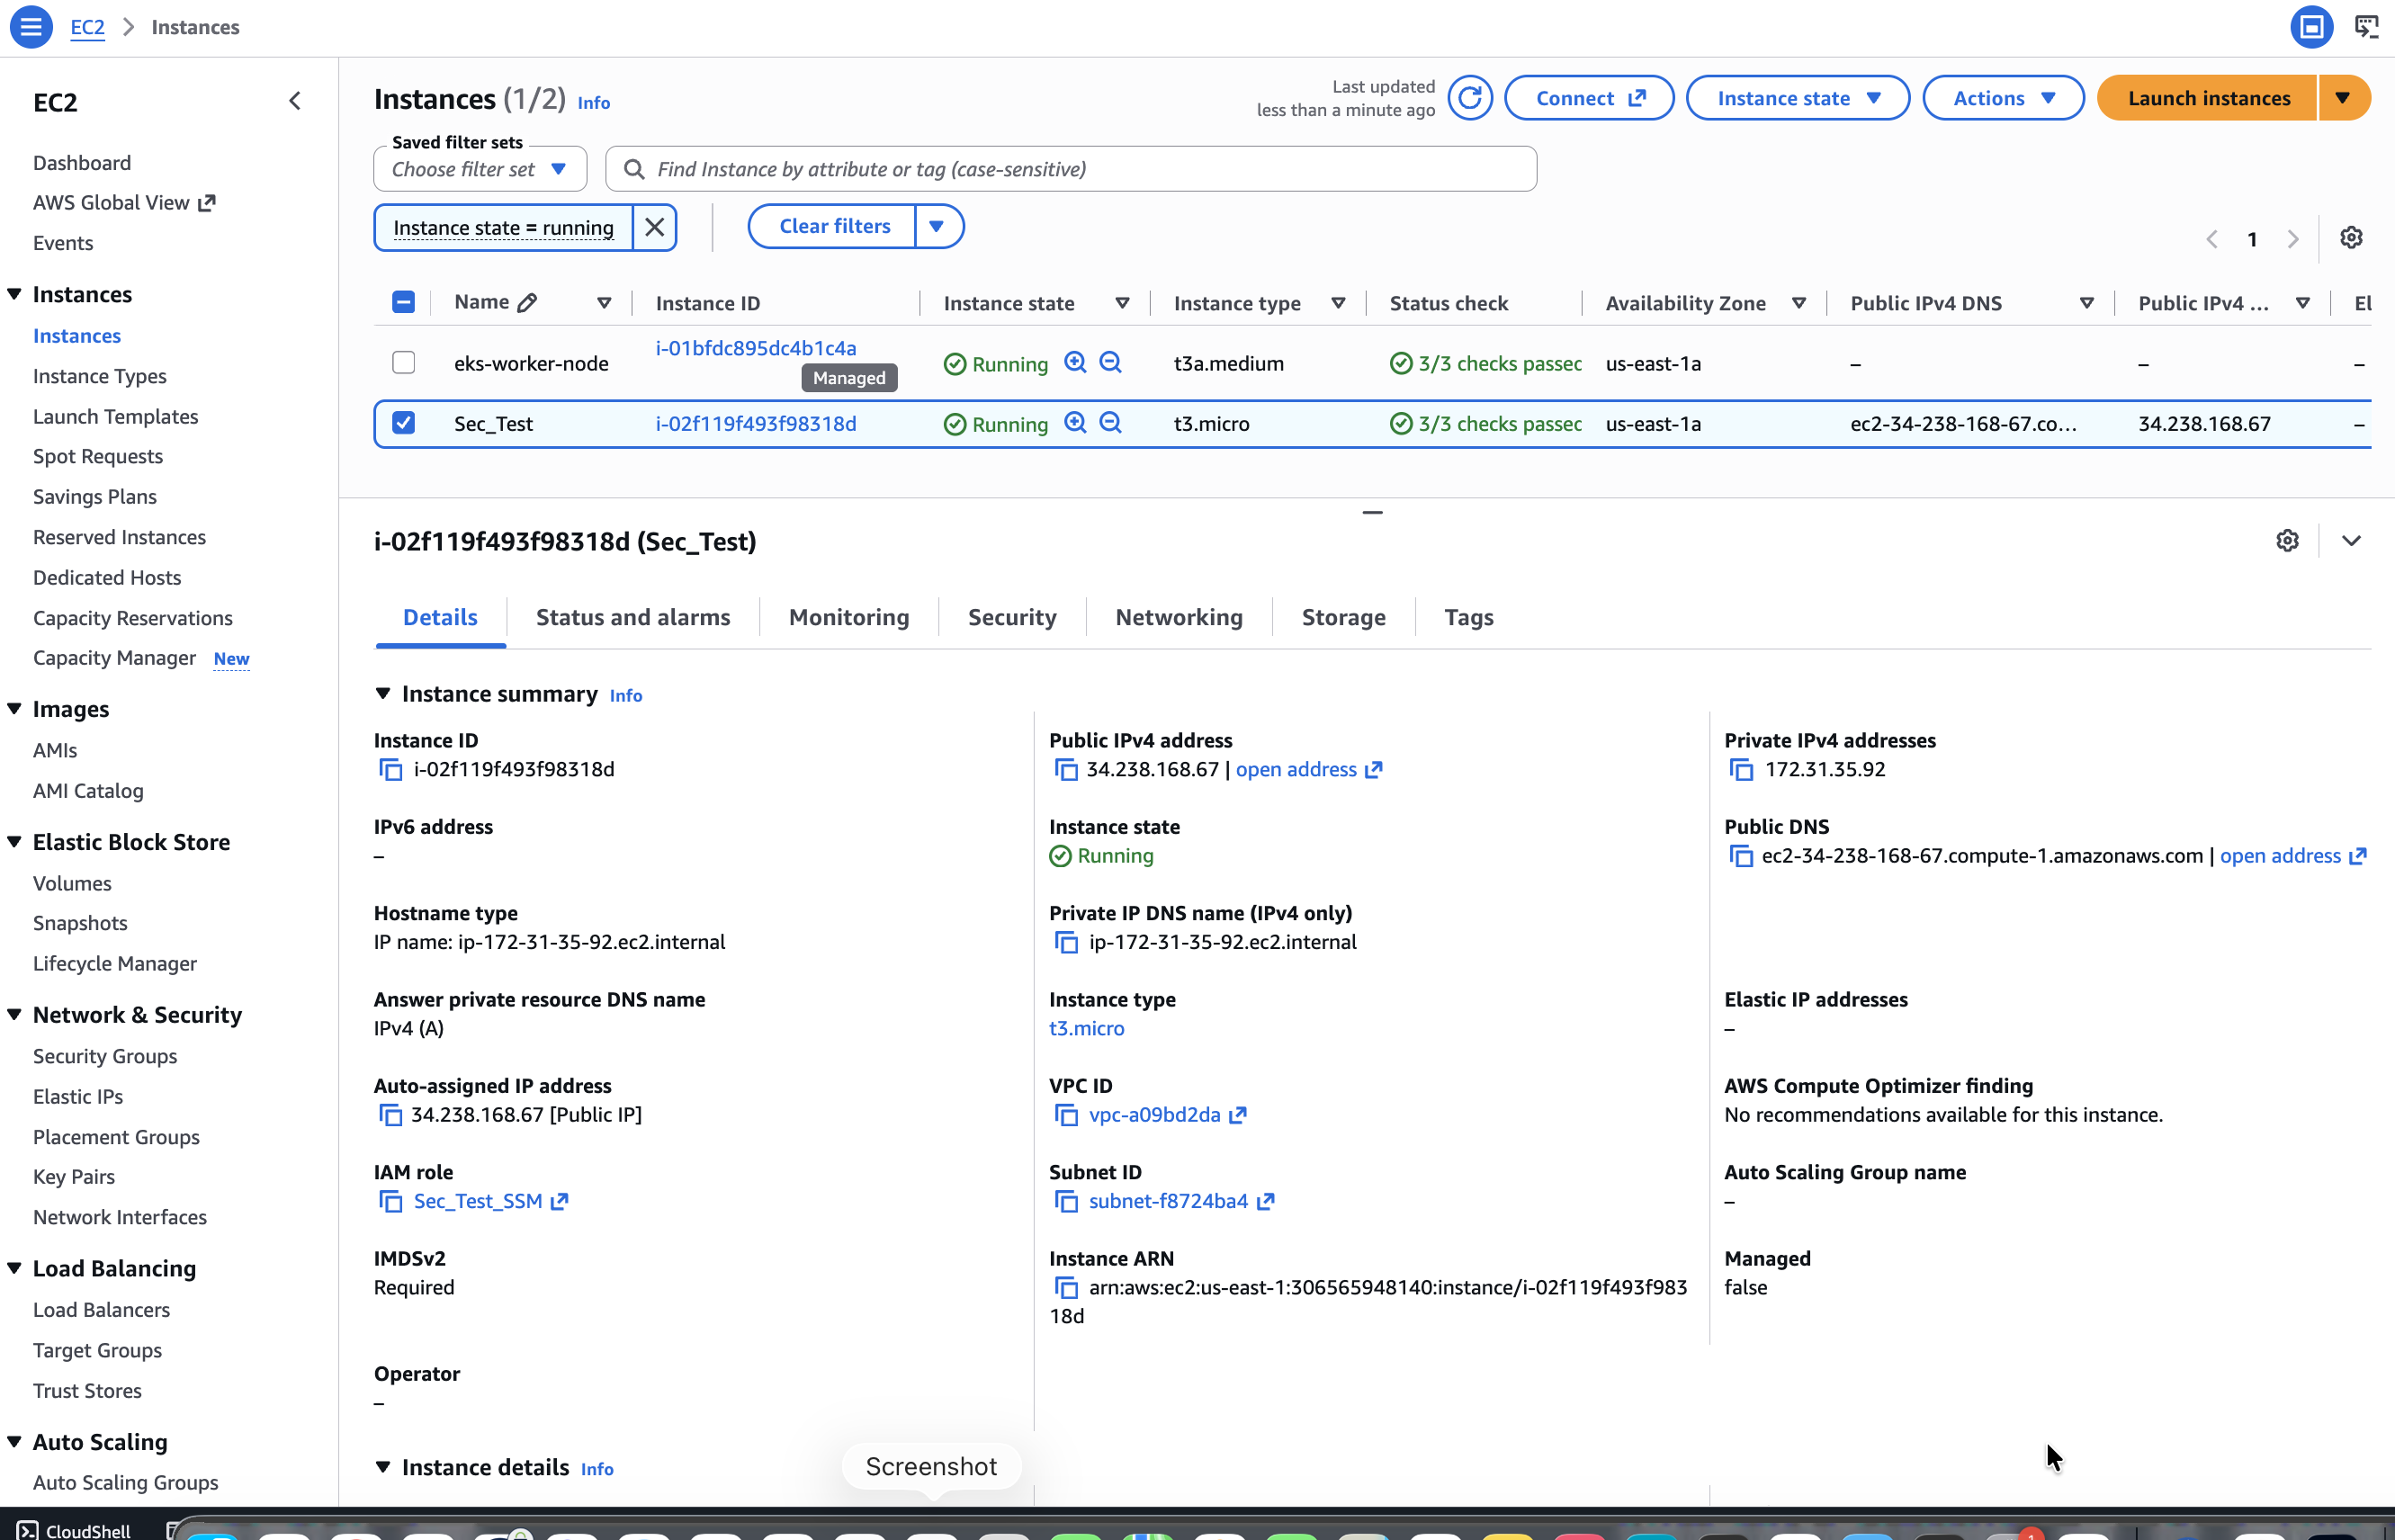
To display the Permissions Policies, select the IAM Role, and the IAM Role Edit page will be shown.
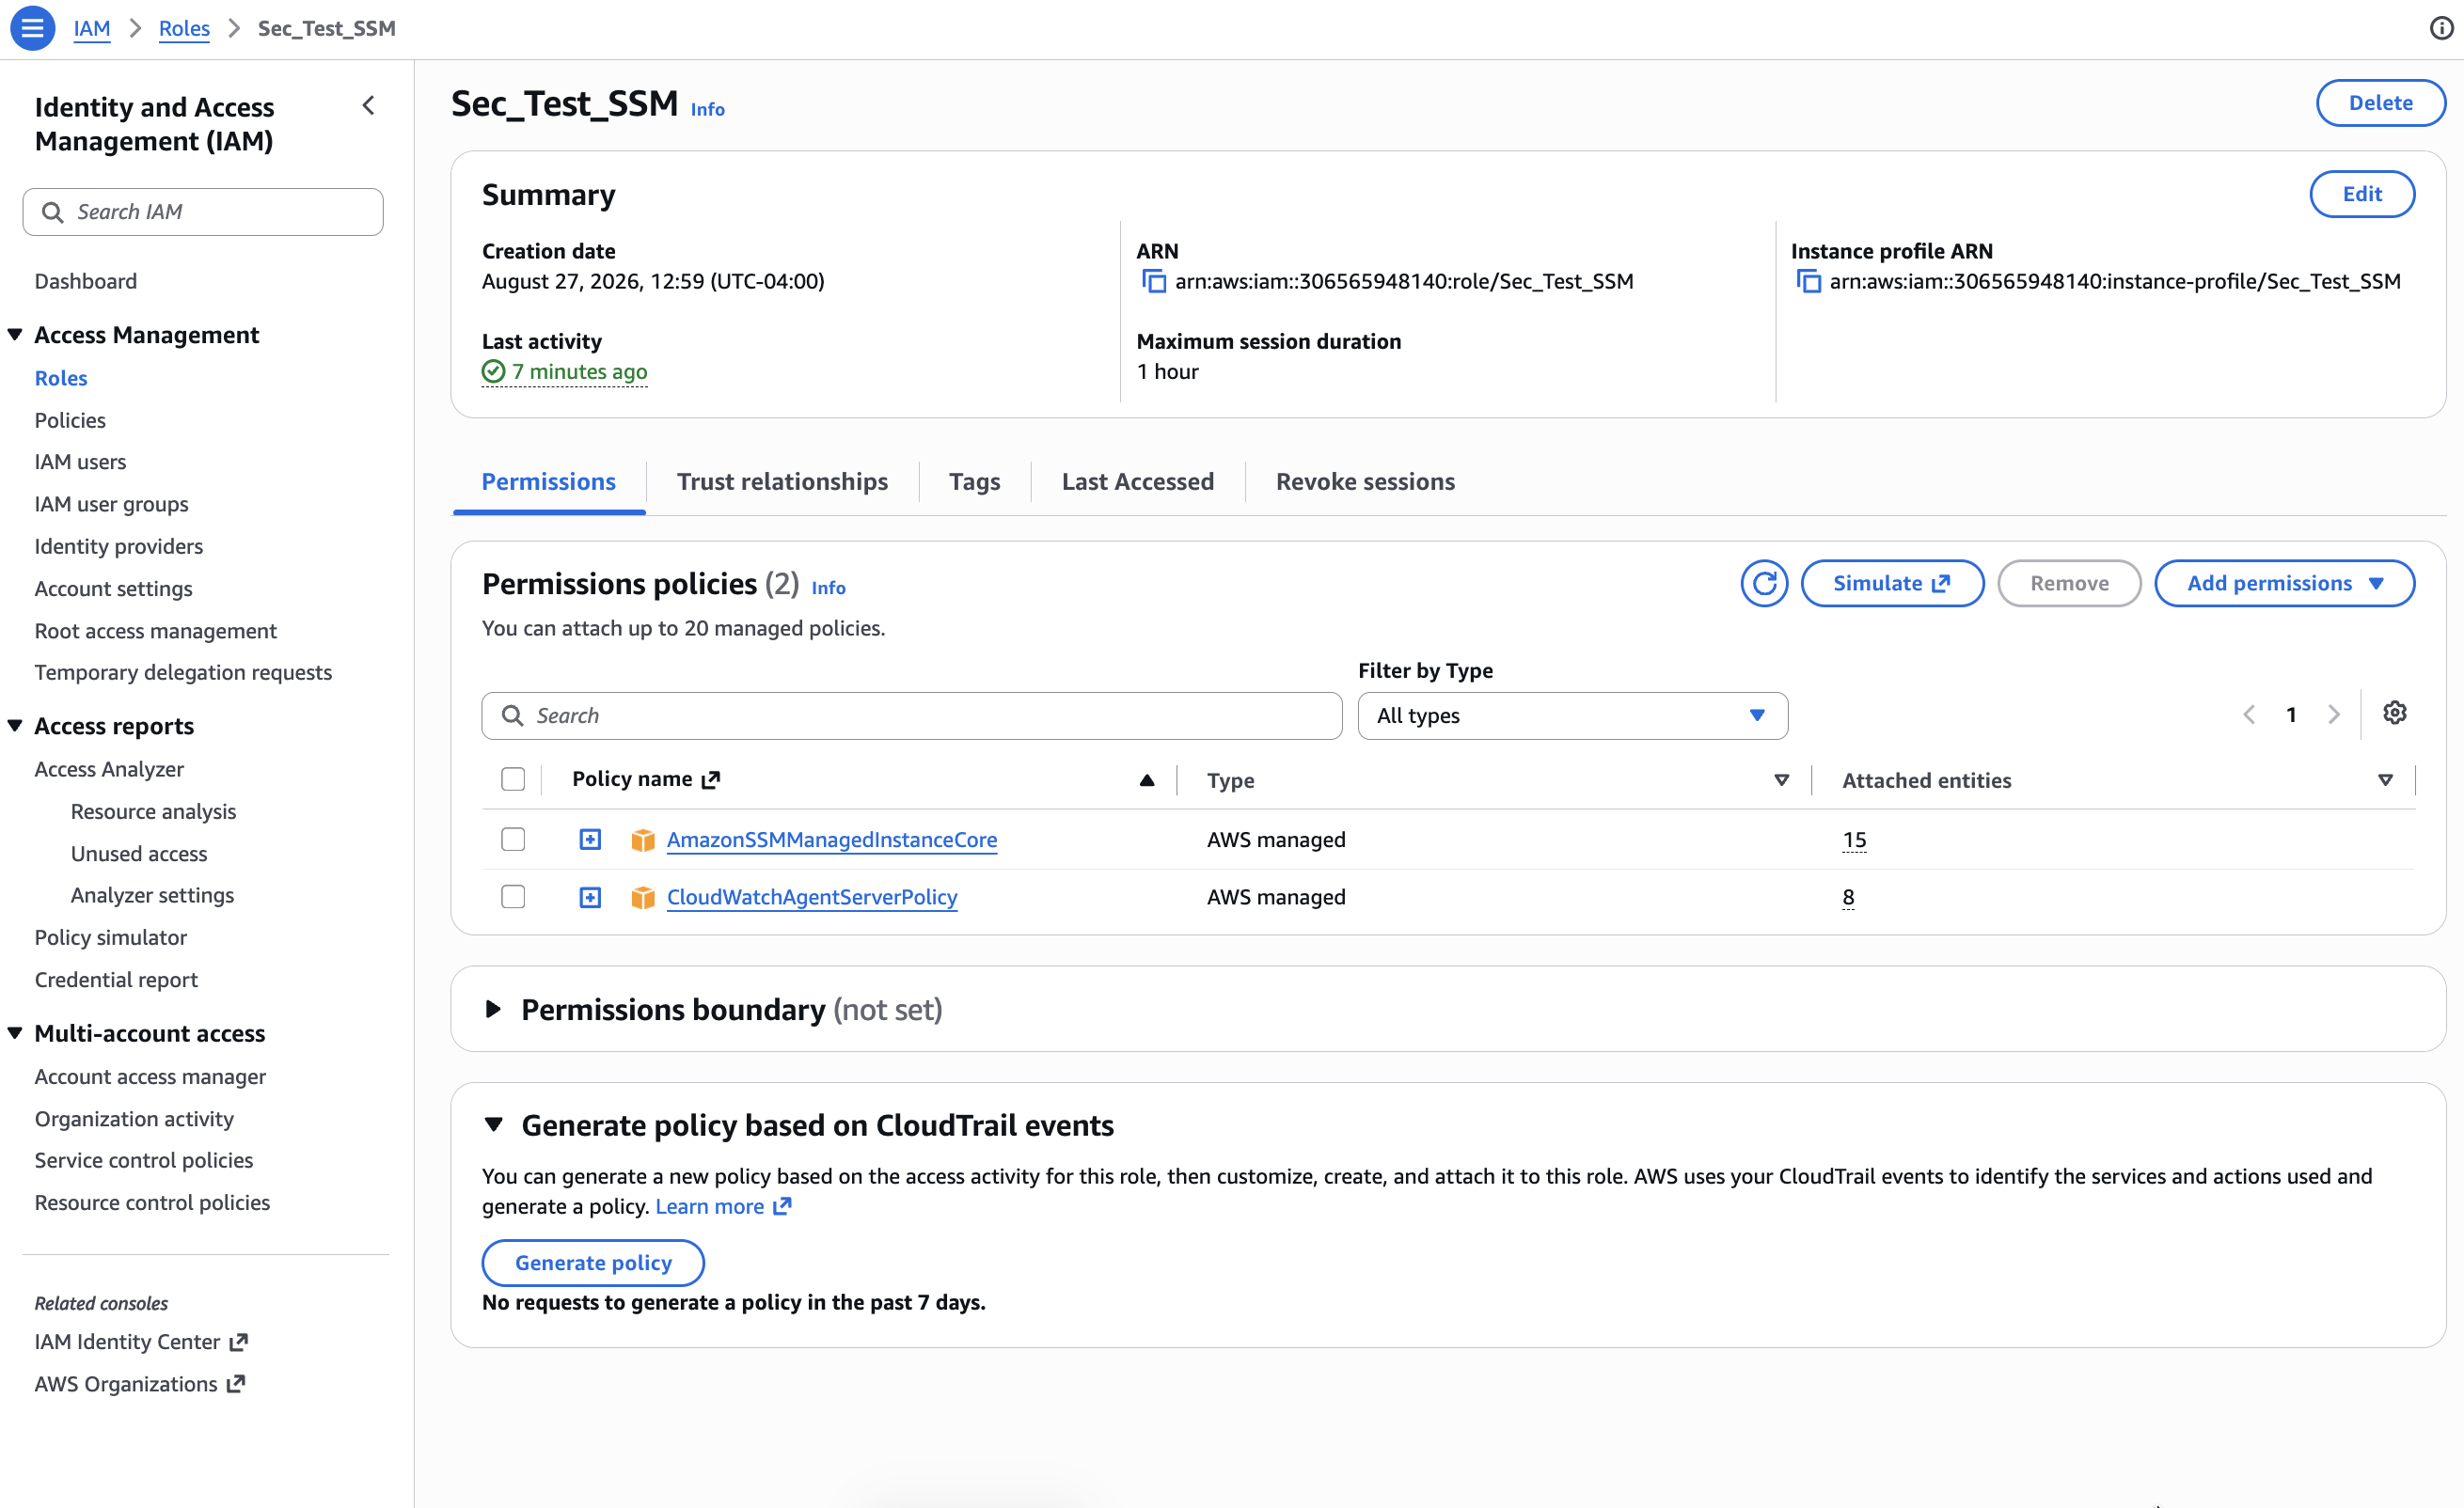
Note: The following policies listed are required in order for SSM to function properly.
AmazonSSMManagedInstanceCore
CloudWatchAgentServerPolicy
AmazonSSMFullAccess (Optional - Includes all possible permissions. Not recommended for least privilege.)
To view more detailed information about each Permissions Policy, use the link next to each Policy to display the JSON definition.
Recommendations
Use the AmazonSSMManagedInstanceCore managed policy for the minimum required permissions. Add additional permissions based on your use case (e.g., Session Manager, Patch Manager). Follow the principle of least privilege to restrict permissions to only what is necessary.