
This document will provide detailed instructions and a step-by-step process to upgrade an existing Ubuntu non-Pro instance to Ubuntu Pro. This will ensure the complete universe of patches will be available to download and install when overdue CVEs are attempted to be patched.
Necessary Ubuntu Upgrade for Science Cloud Users
...
The intention of this document is to detail the step-by-step process for upgrading all
...
EC2 instances managed by Science Cloud users that currently run Ubuntu platform versions 18.04, 20.04, and 22.04 to Ubuntu Pro.
...
...
Ubuntu Pro offers critical security patching
...
and upgrades
...
, which are
...
detailed in the
...
Canonical-provided AWS Documentation
...
.
...
Note: All resources used in the following instructions are listed under the Resources section.
Requirements
...
- AWS Console Access with elevated privileges
...
- Ubuntu
...
- EC2 instances installed with the SSM agent
...
- AWS CLI
...
Instructions: Overview
- Validate the Ubuntu EC2
...
- instances are managed by SSM.
...
- Confirm
...
ubuntu-advantage-toolsis up to date.
...
- Stop and
...
- create a backup of
...
- the EC2 instance.
...
- Create the License Conversion.
...
- Start
...
- instances and
...
- validate.
...
Instructions
...
: Detailed
1
...
. Validate the Ubuntu
...
EC2 instances are managed by SSM
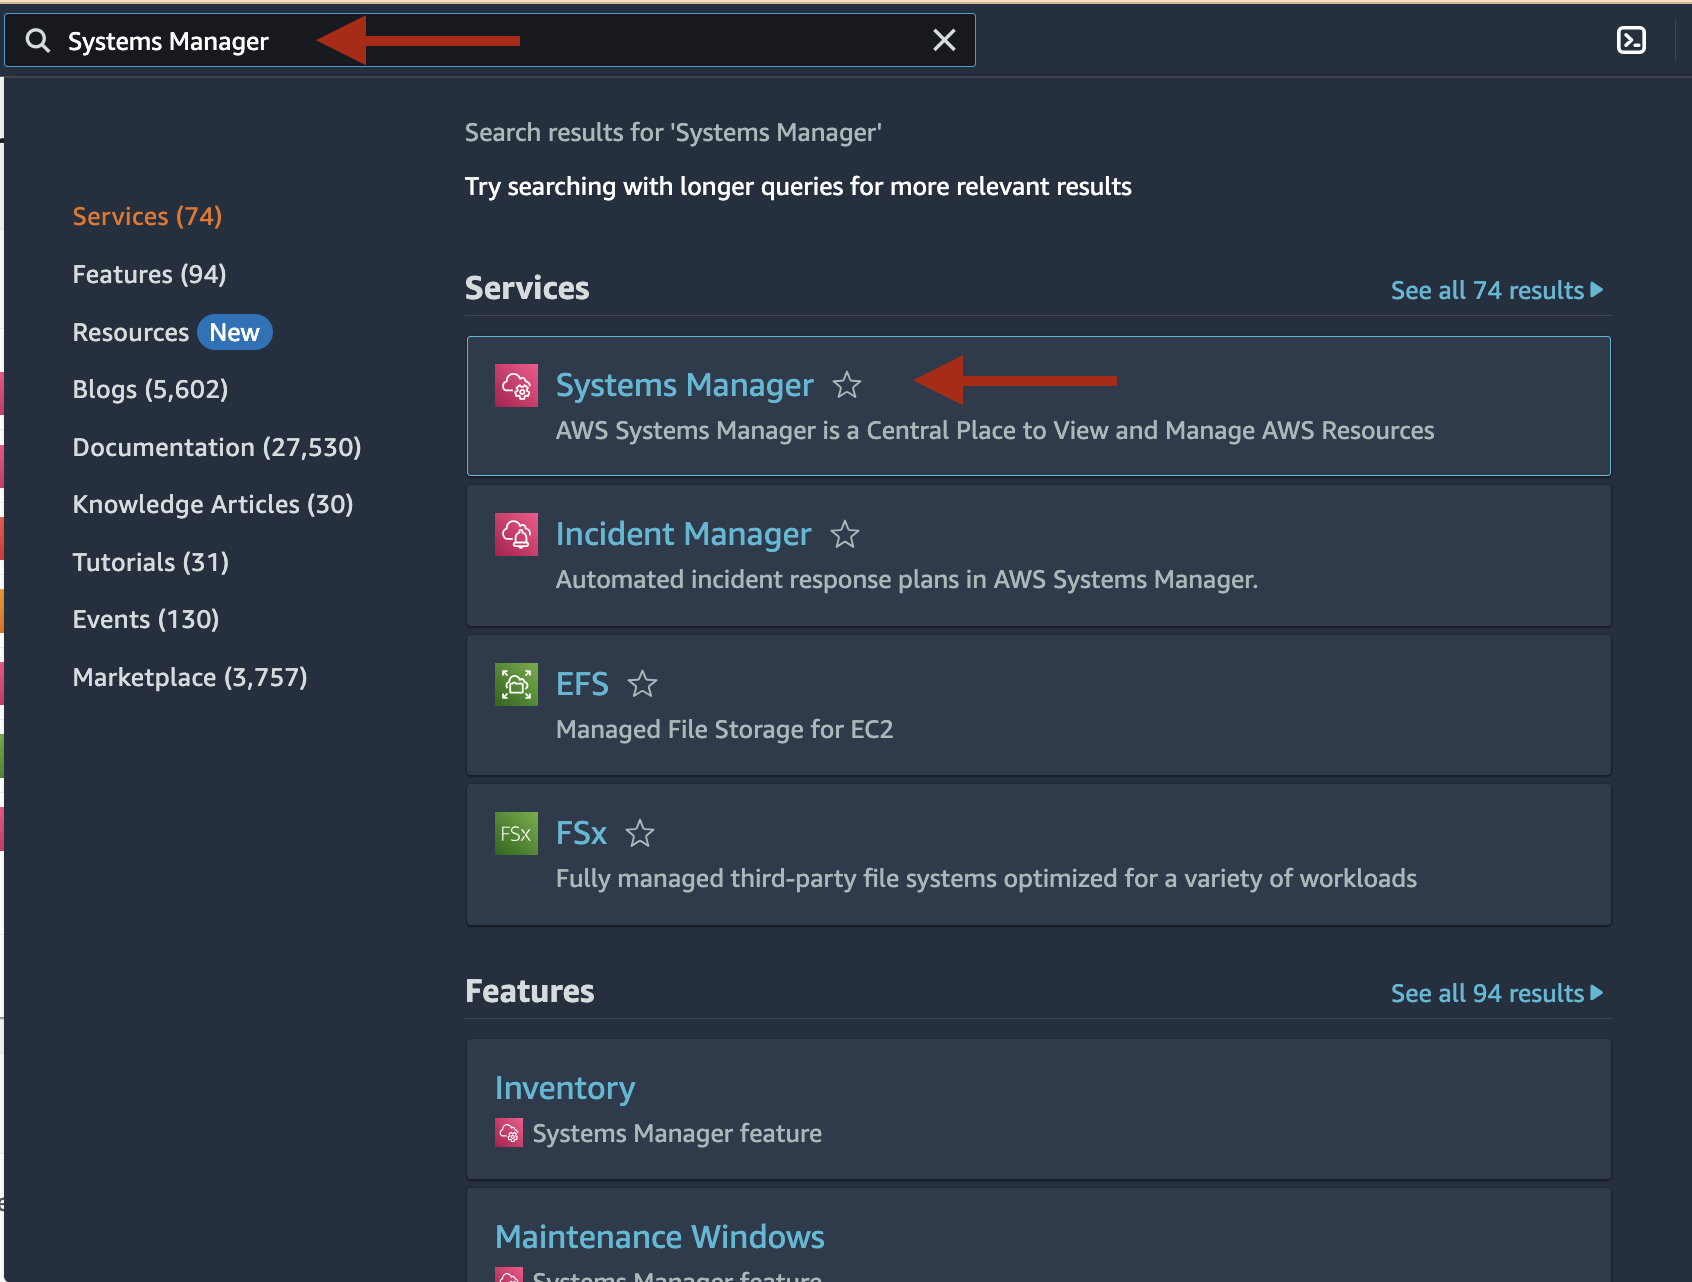
Using the AWS Console, navigate to the AWS Systems Manager landing page. You can do this by entering "Systems Manager" in the search box at the top of the console.
...
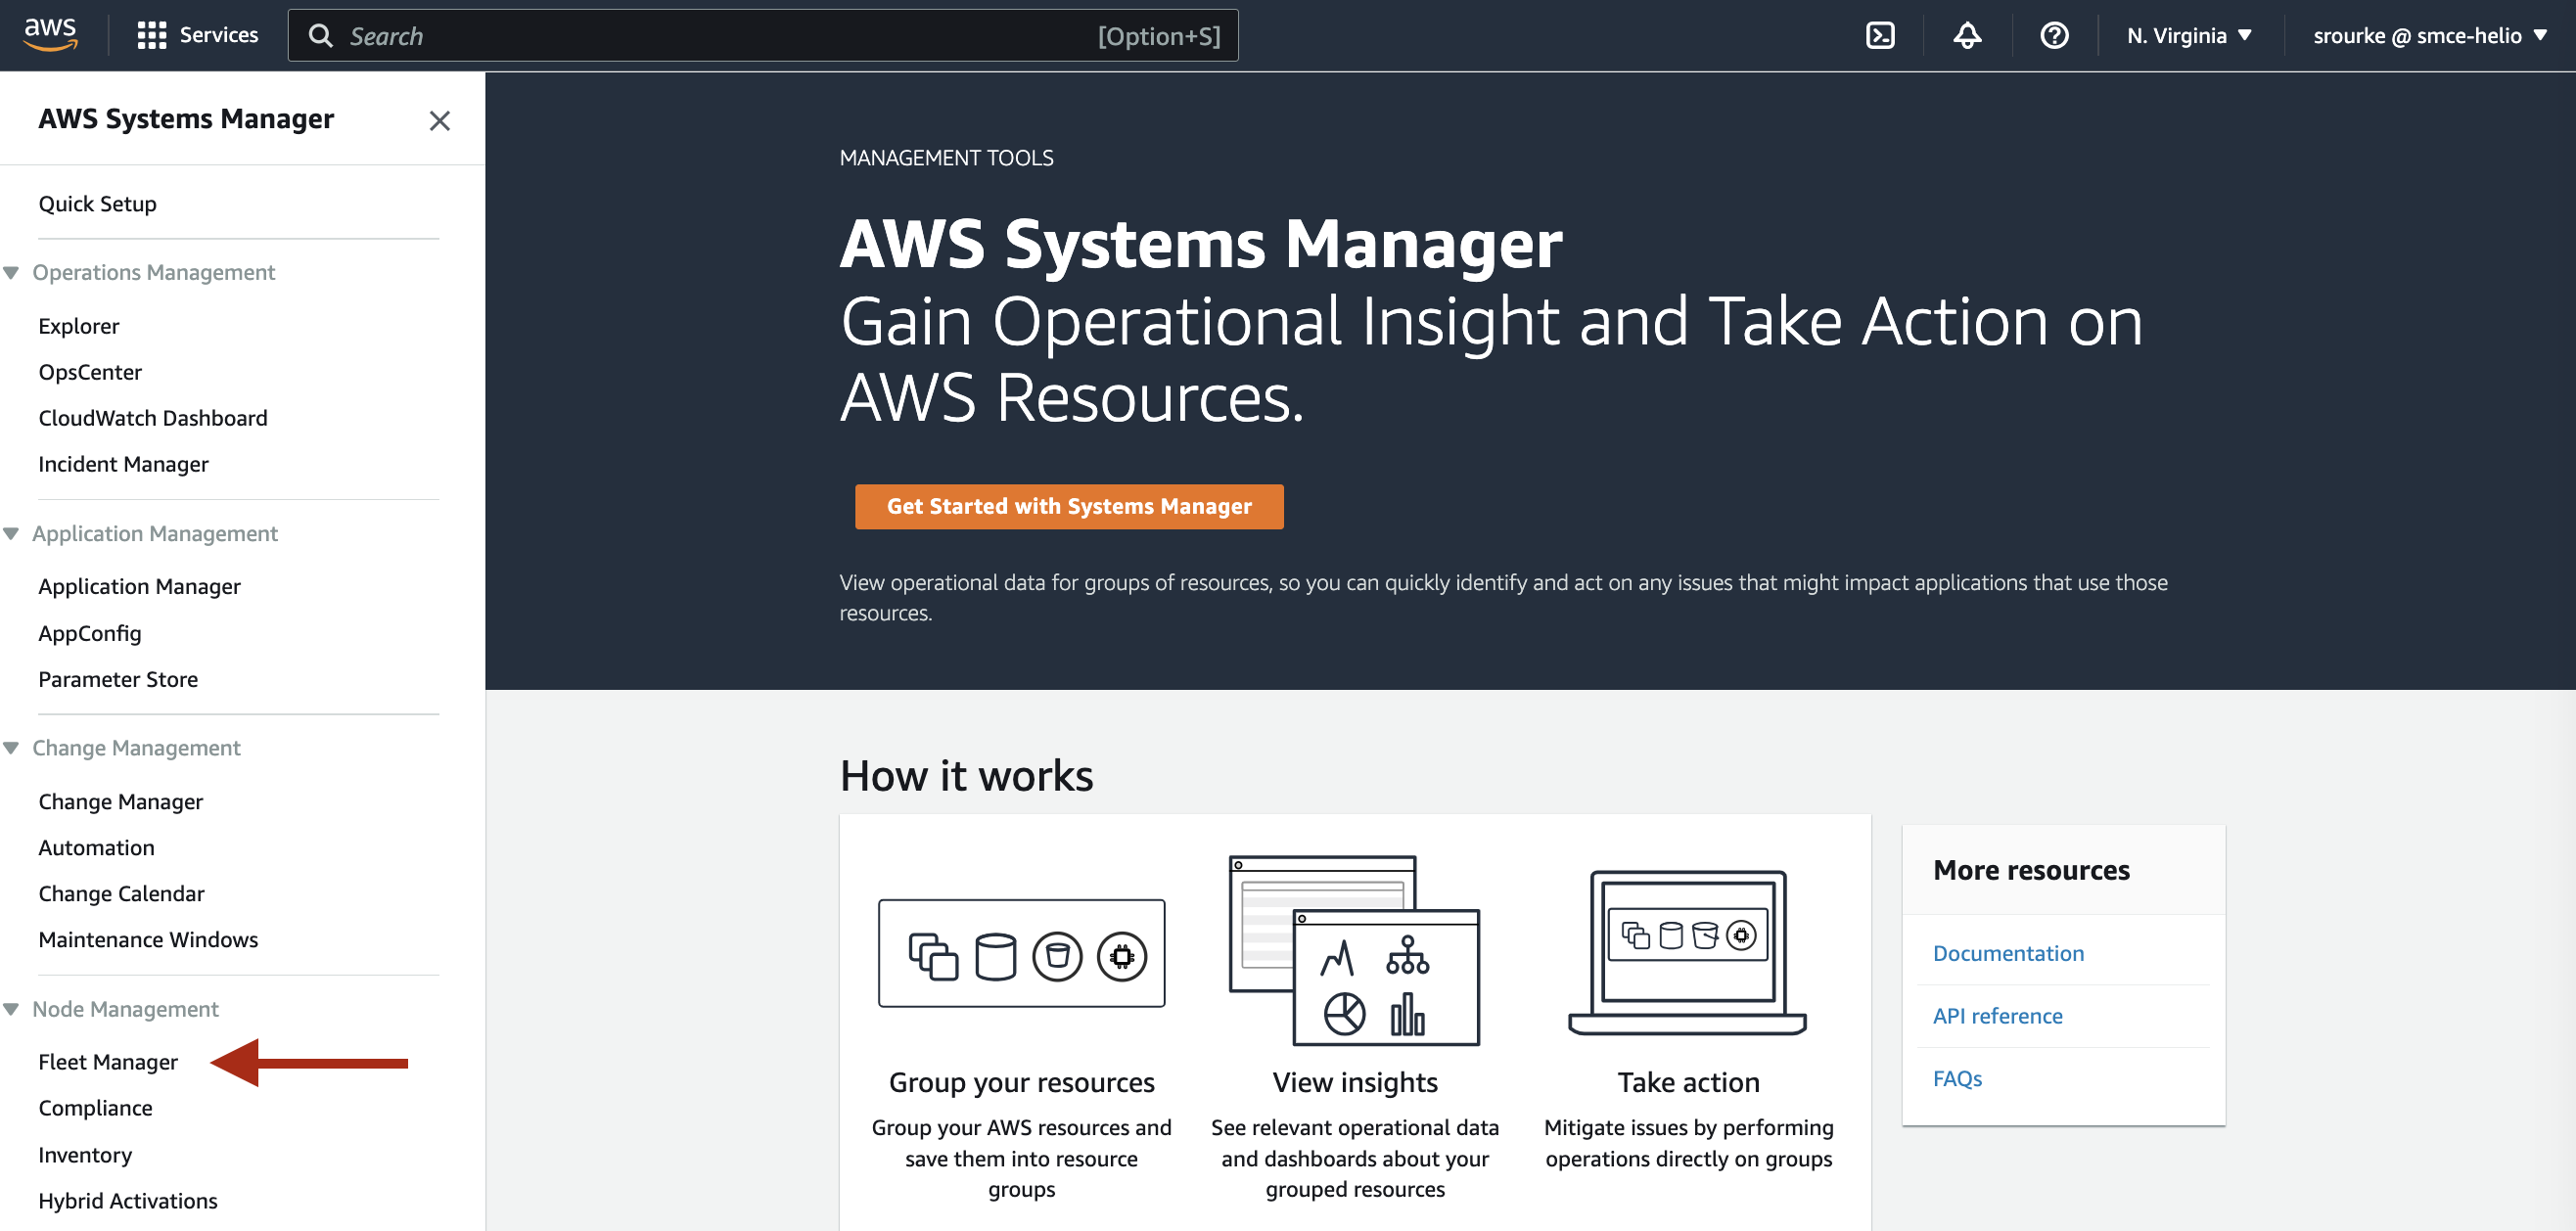
Once there, along the left side menu select "Fleet Manager"
You will then be redirected and should see a list of all ec2 instances in your AWS account that are managed by SSM:
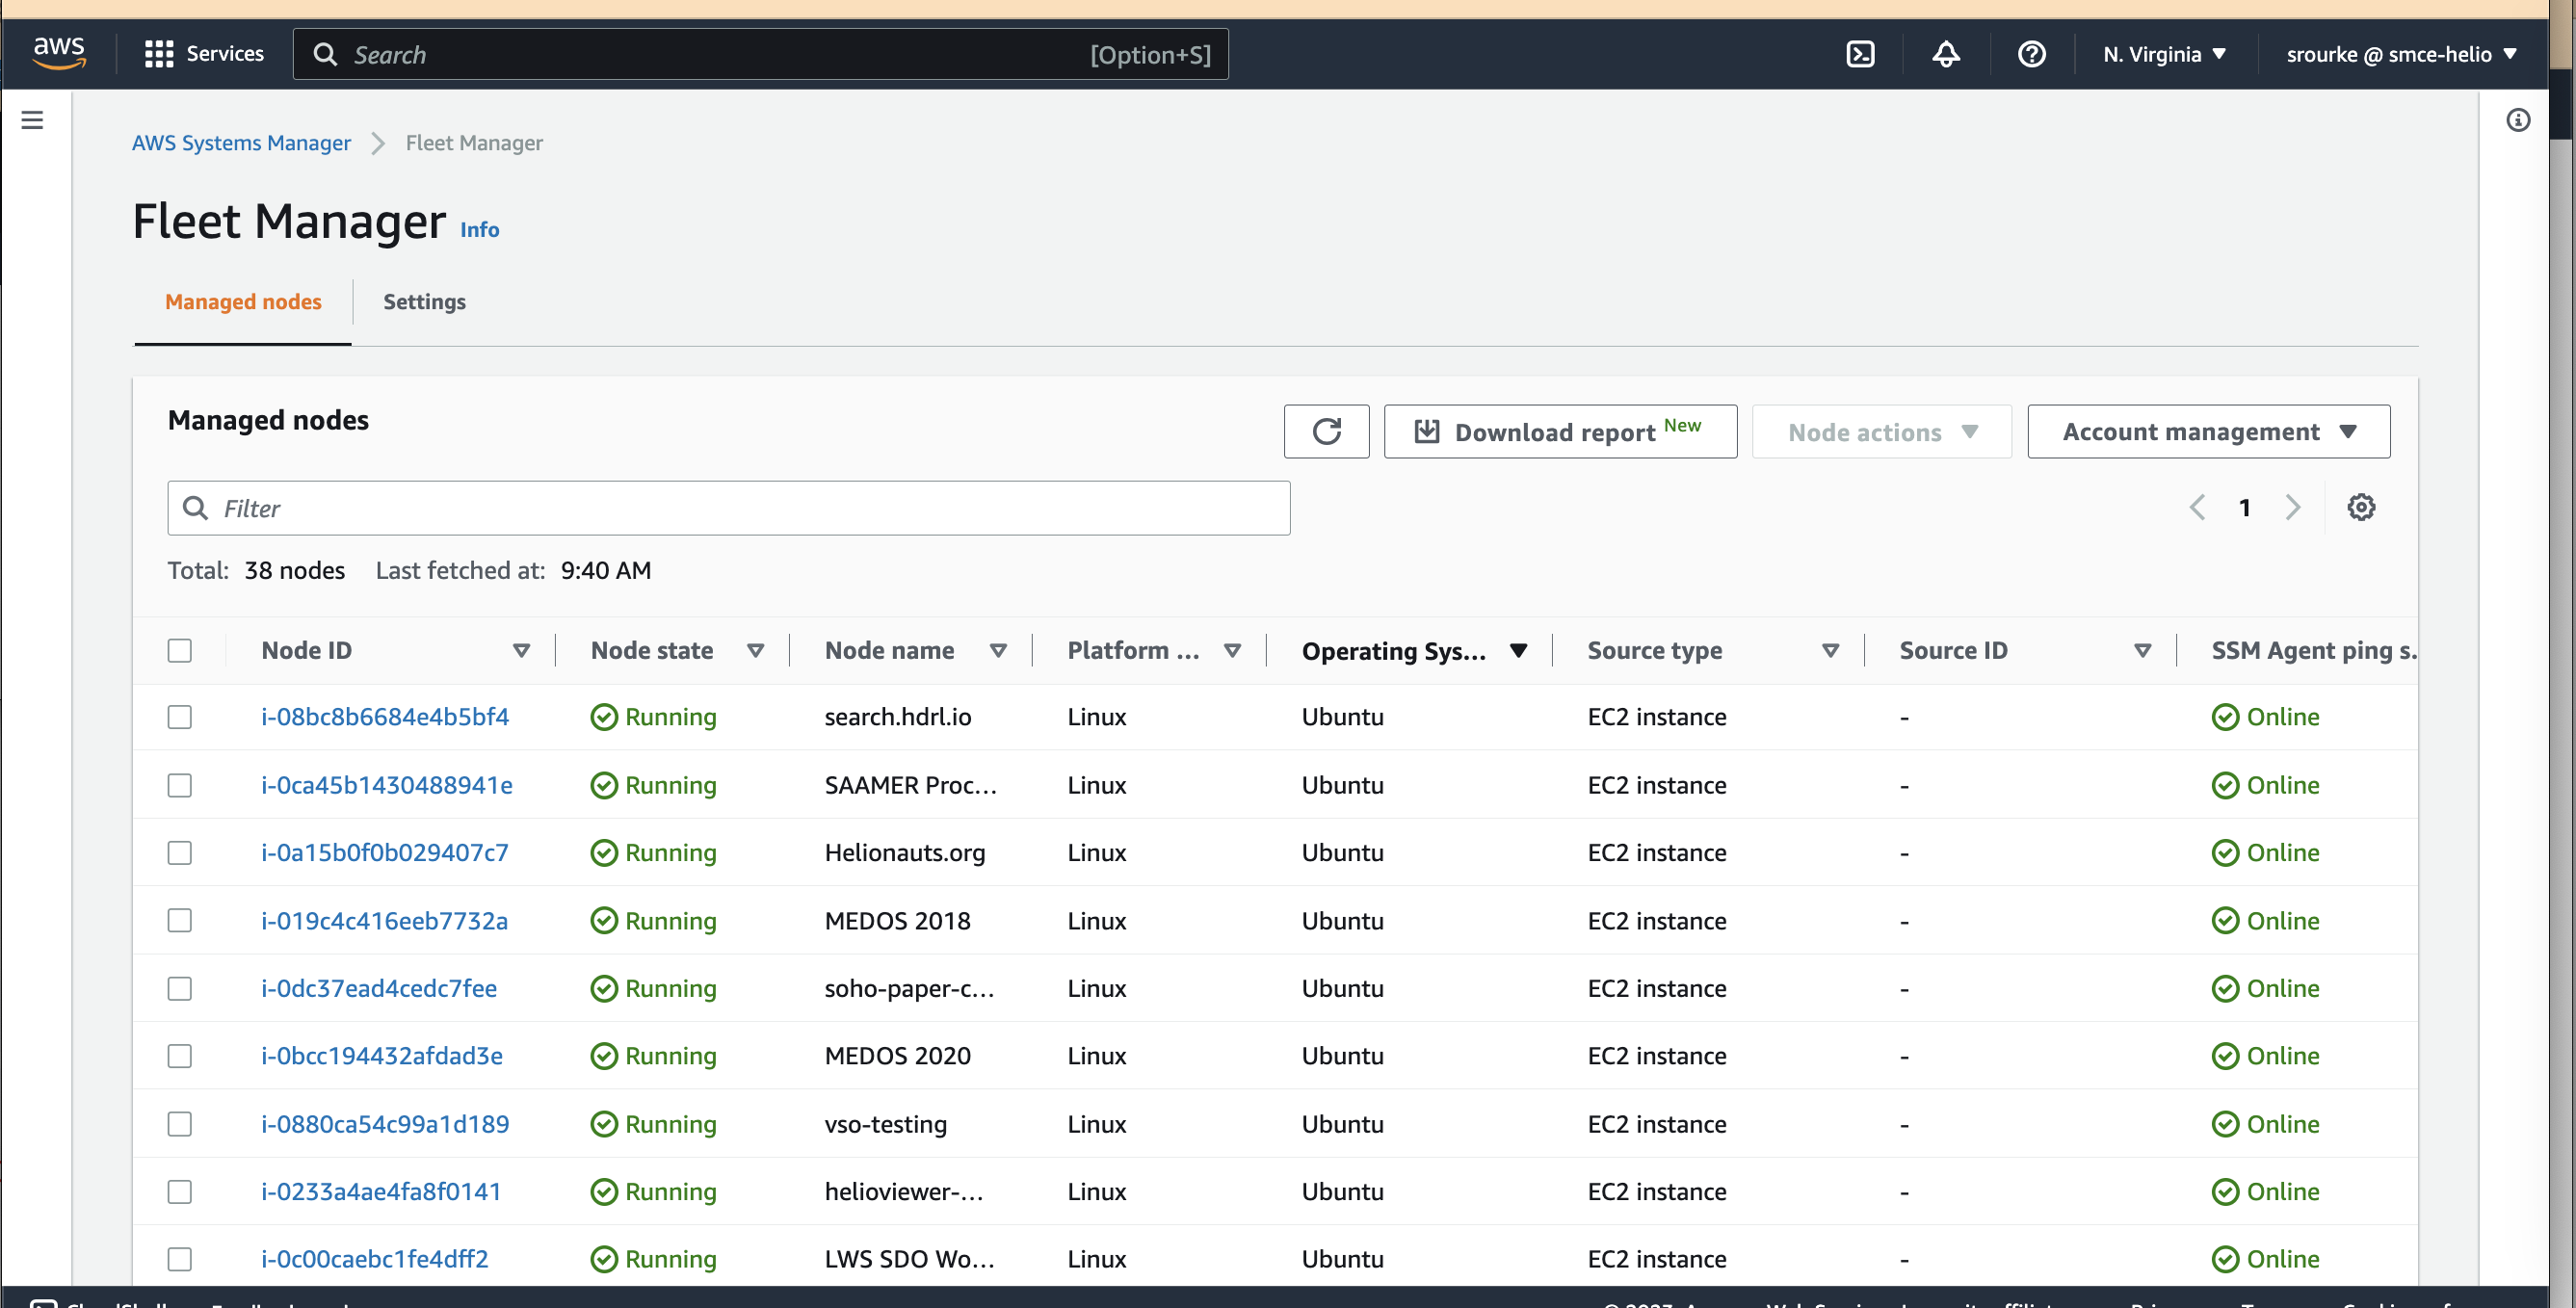
If your instance is not listed, you will not be able to use this process to update to Ubuntu to Ubuntu Pro. Ensure SSM is installed and functioning correctly and the instance is running, otherwise you won't be able to continue with this process.
2) Confirm ubuntu-advantage-tools is up to date
Doing Doing this one instance at a time, connect to the instance using session manager and run the command below to confirm that ubuntu-advantage-tools is up to date.
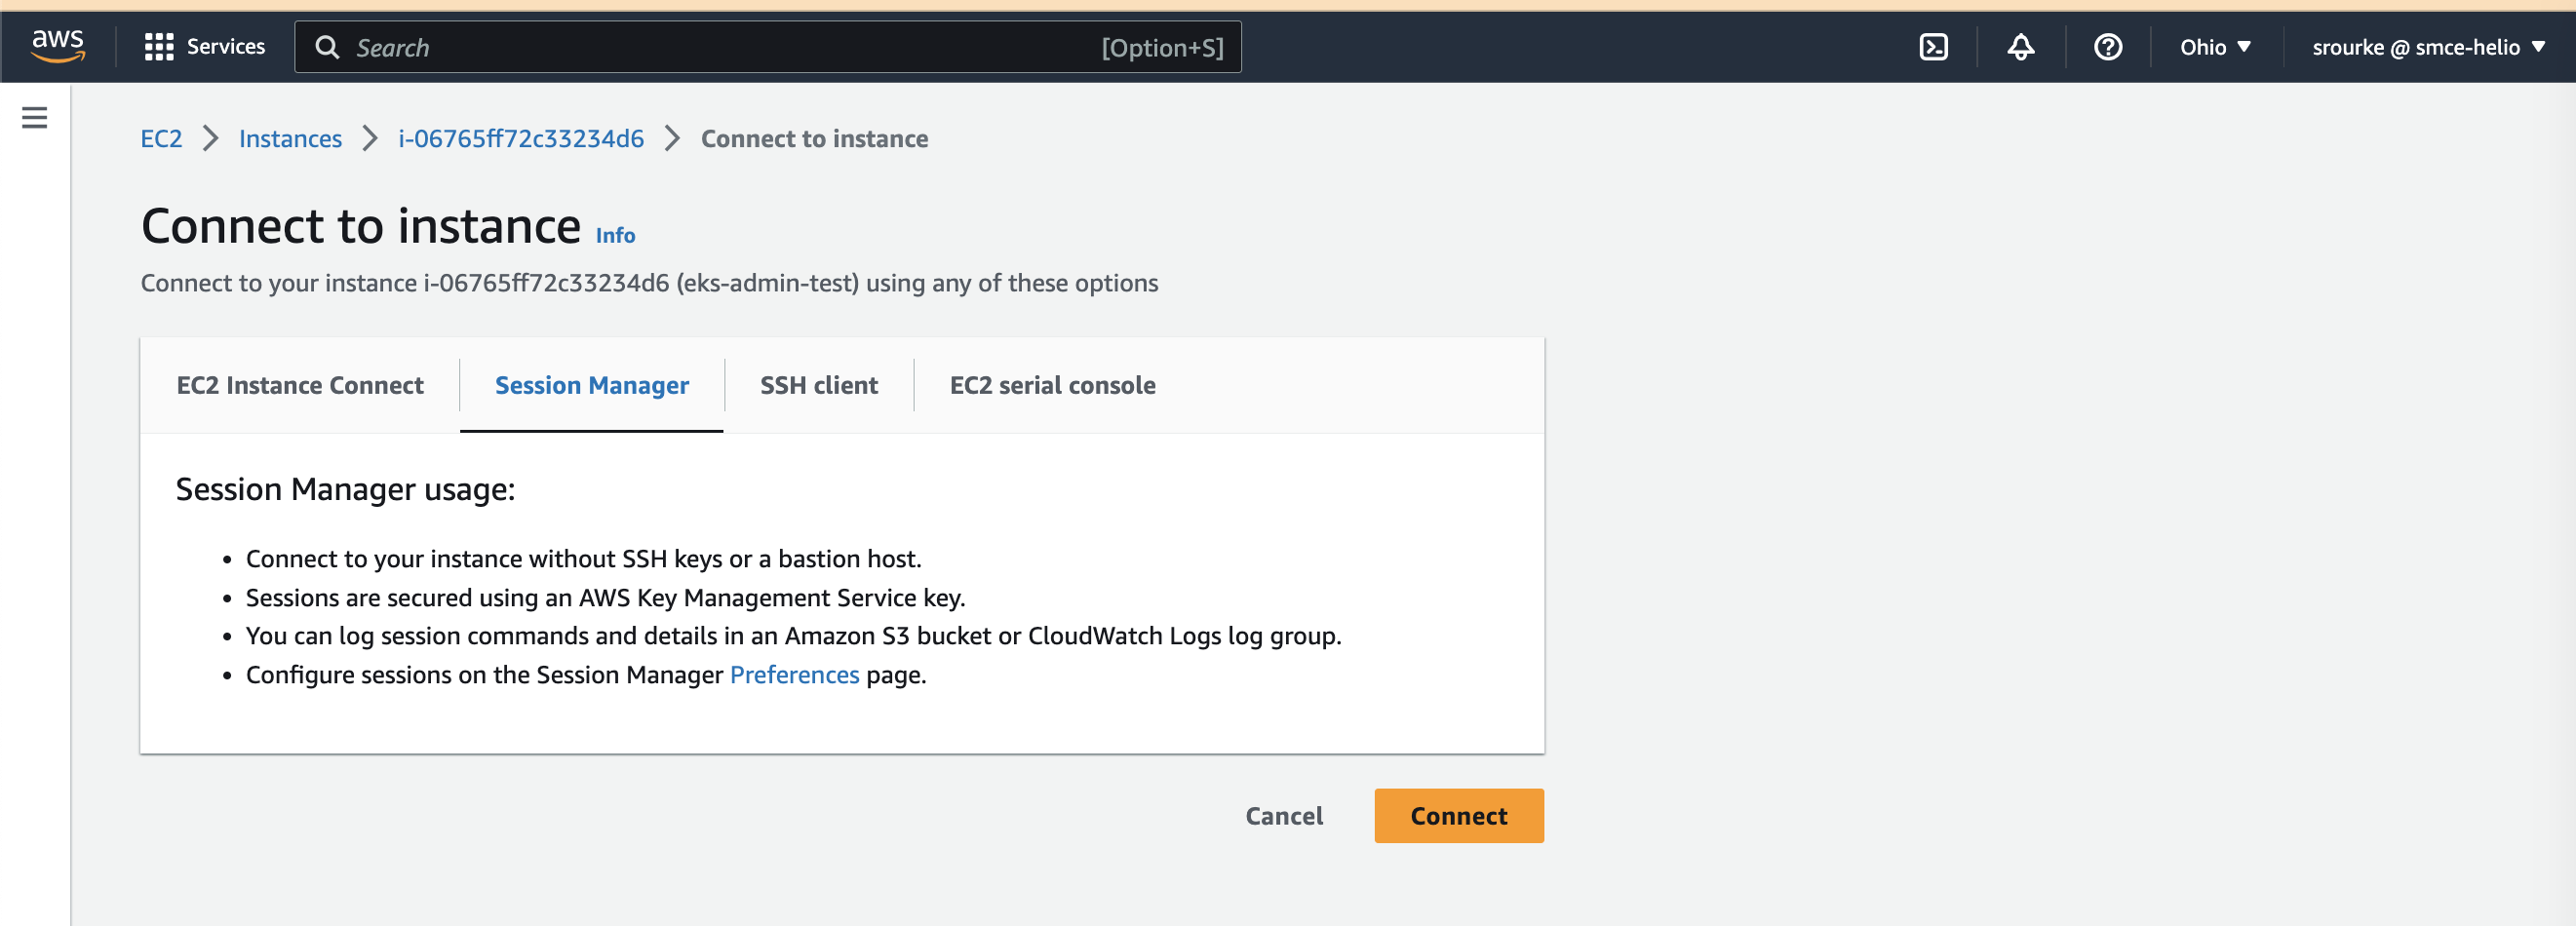
> sudo apt-get install -y ubuntu-advantage-tools
The console output should look similar to the image below:

As long as there are no unexpected warnings in the output, you can close out of session manager and move to the next step.
3)
...
Stop and Create backup of ec2 instance
From the ec2 console, select the instance you just connected to and change the instance state from *running* to *stopped*.
Note: It is very important to make sure no one is using this machine or if it is running in a production environment schedule and coordinate at least an hour of down time for maintence.
Once the instance has completely stopped, from the **Actions** menu in the upper left of the console, hover over Image and templates and select Create Image. This will ensure that a backup of the ec2 and connected volume are backed-up and available if disaster strikes.
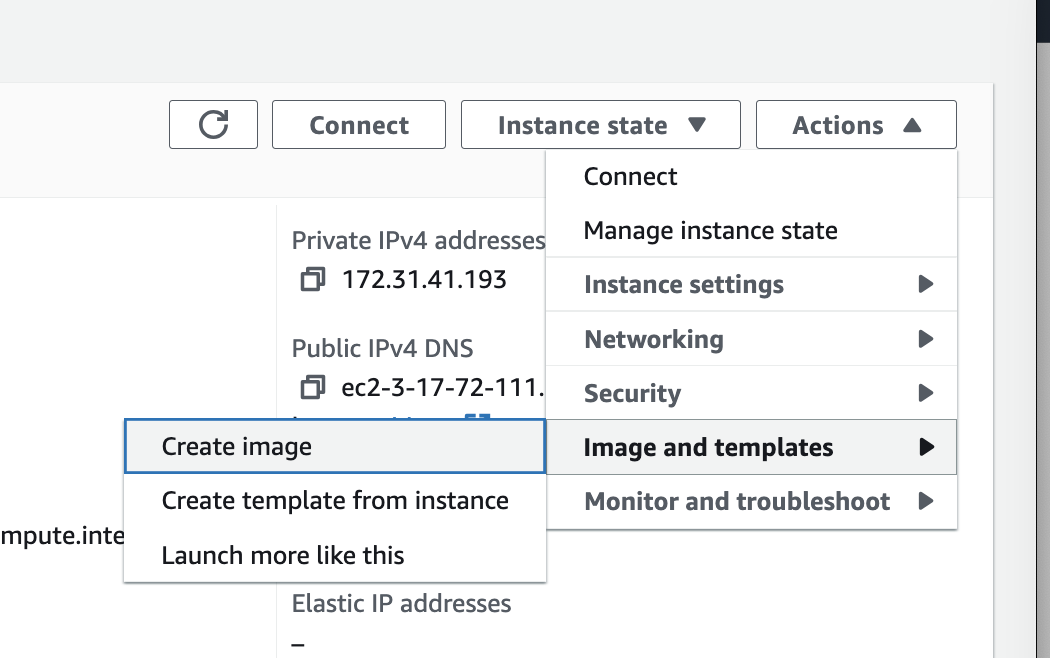
Do not turn the machine back on, leave it stopped for the License Conversion in the following steps.
4)
...
Create License Conversion
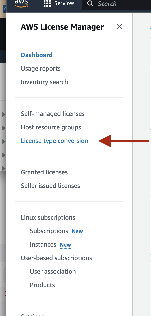
Navigate to to AWS License Manager and from the left side menu select License type conversion:
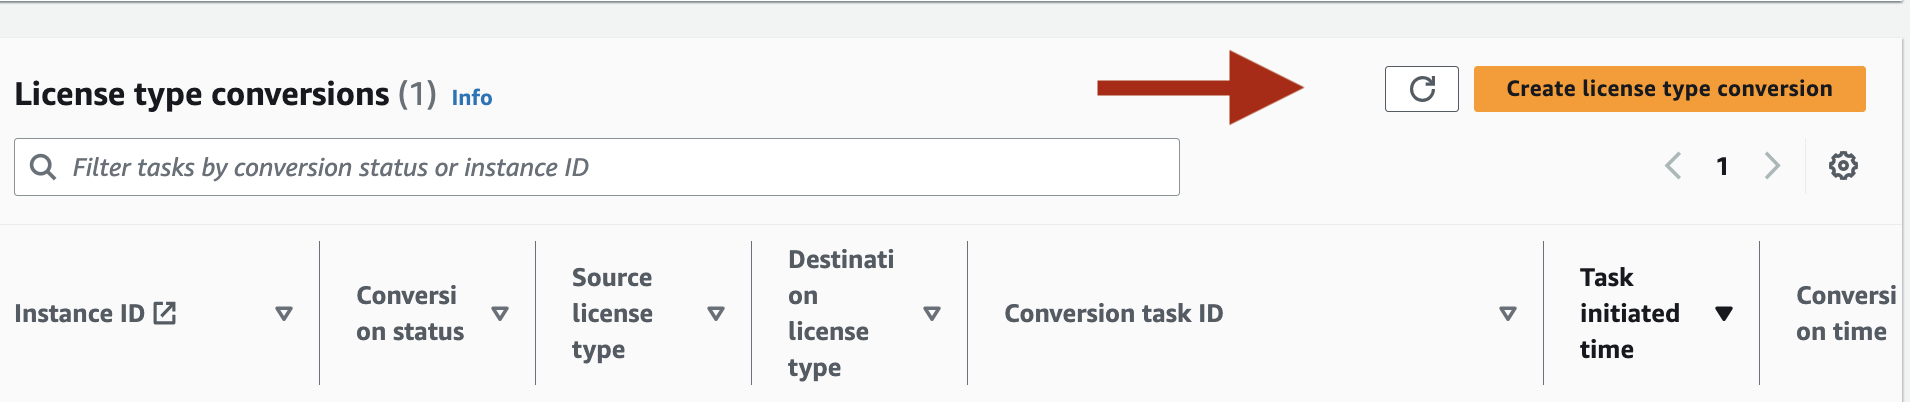
Next, select the orange button on the right labeled Create license type conversion:
From the dropdown menu select the os type you want to change (in this case Ubuntu LTS) and select the ec2 instance(s) you want to update:
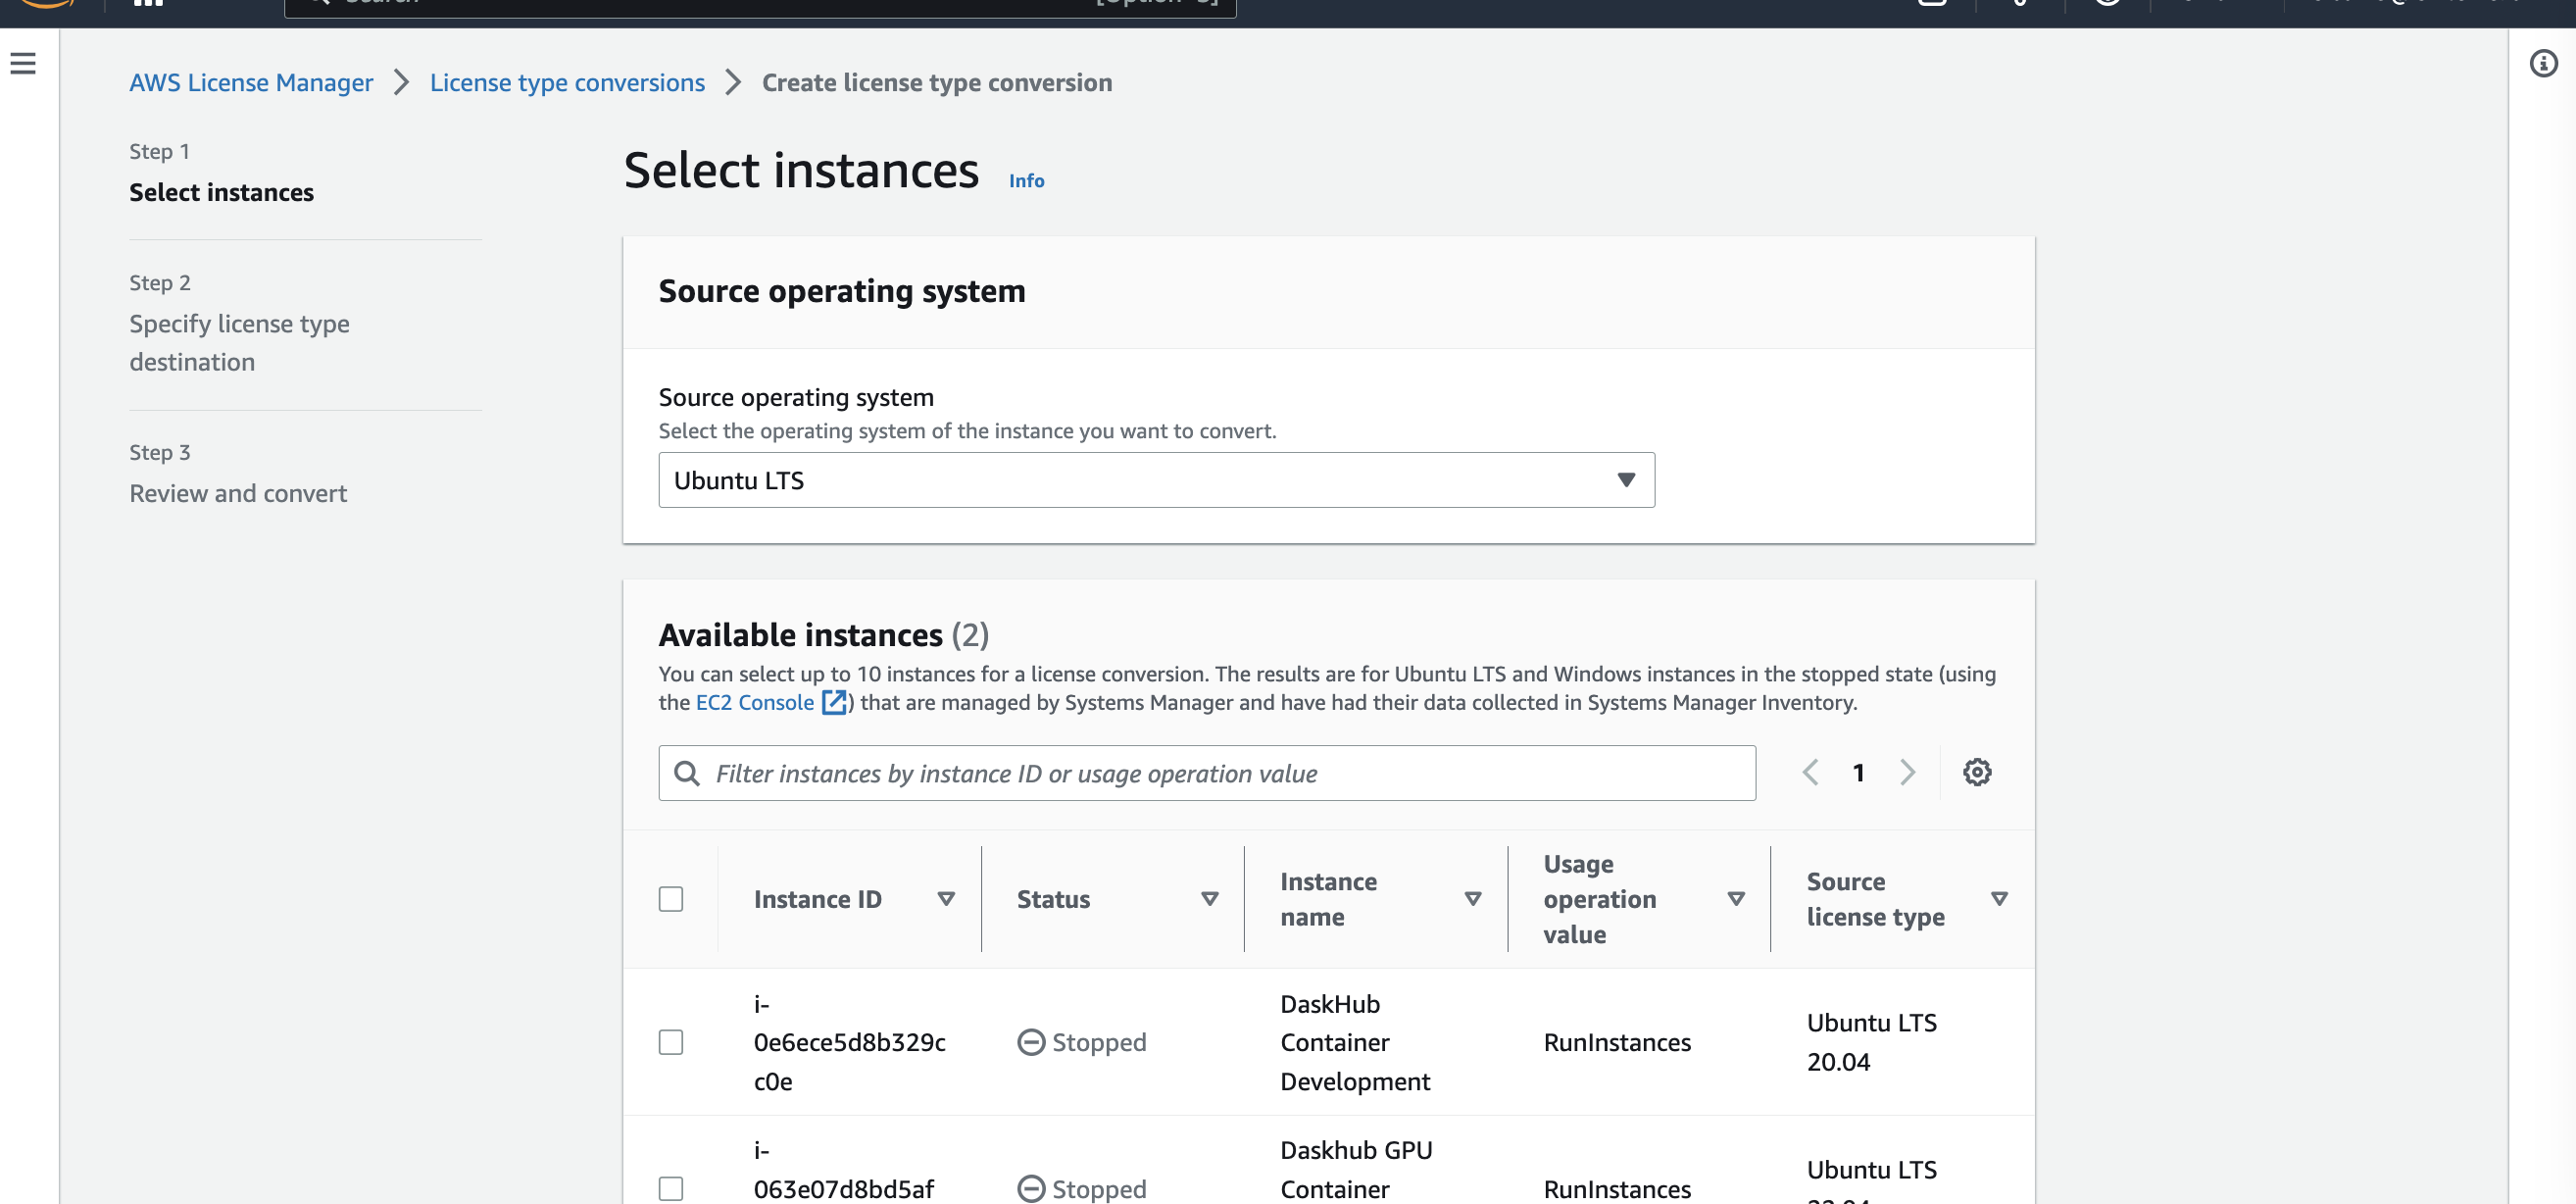
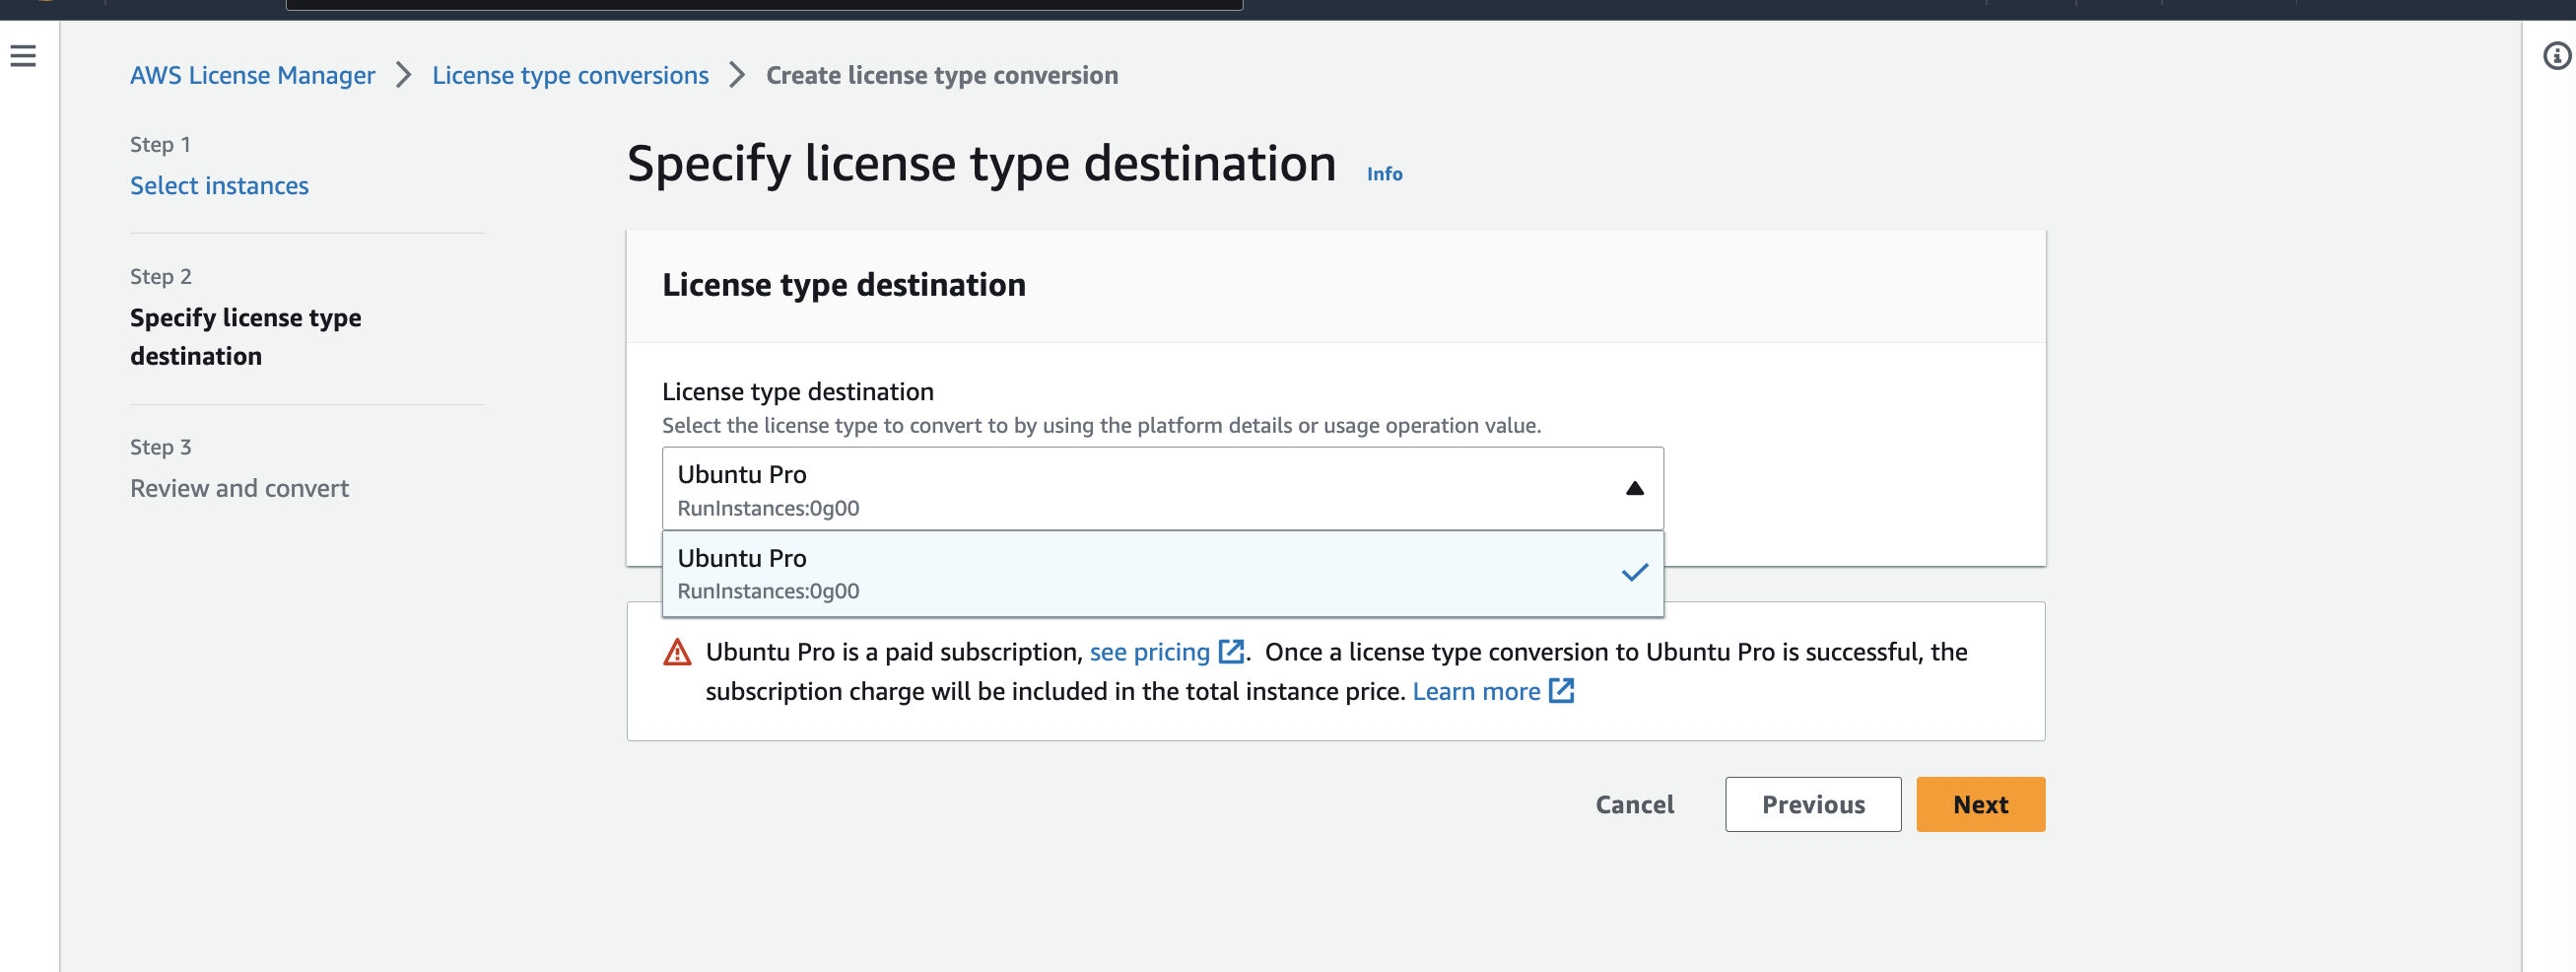
Select Next, then on the next page, select Ubuntu Pro for the License type destination.
After selecting next (again) you will see a summary of the chosen actions and if all looks correct, hit Convert:
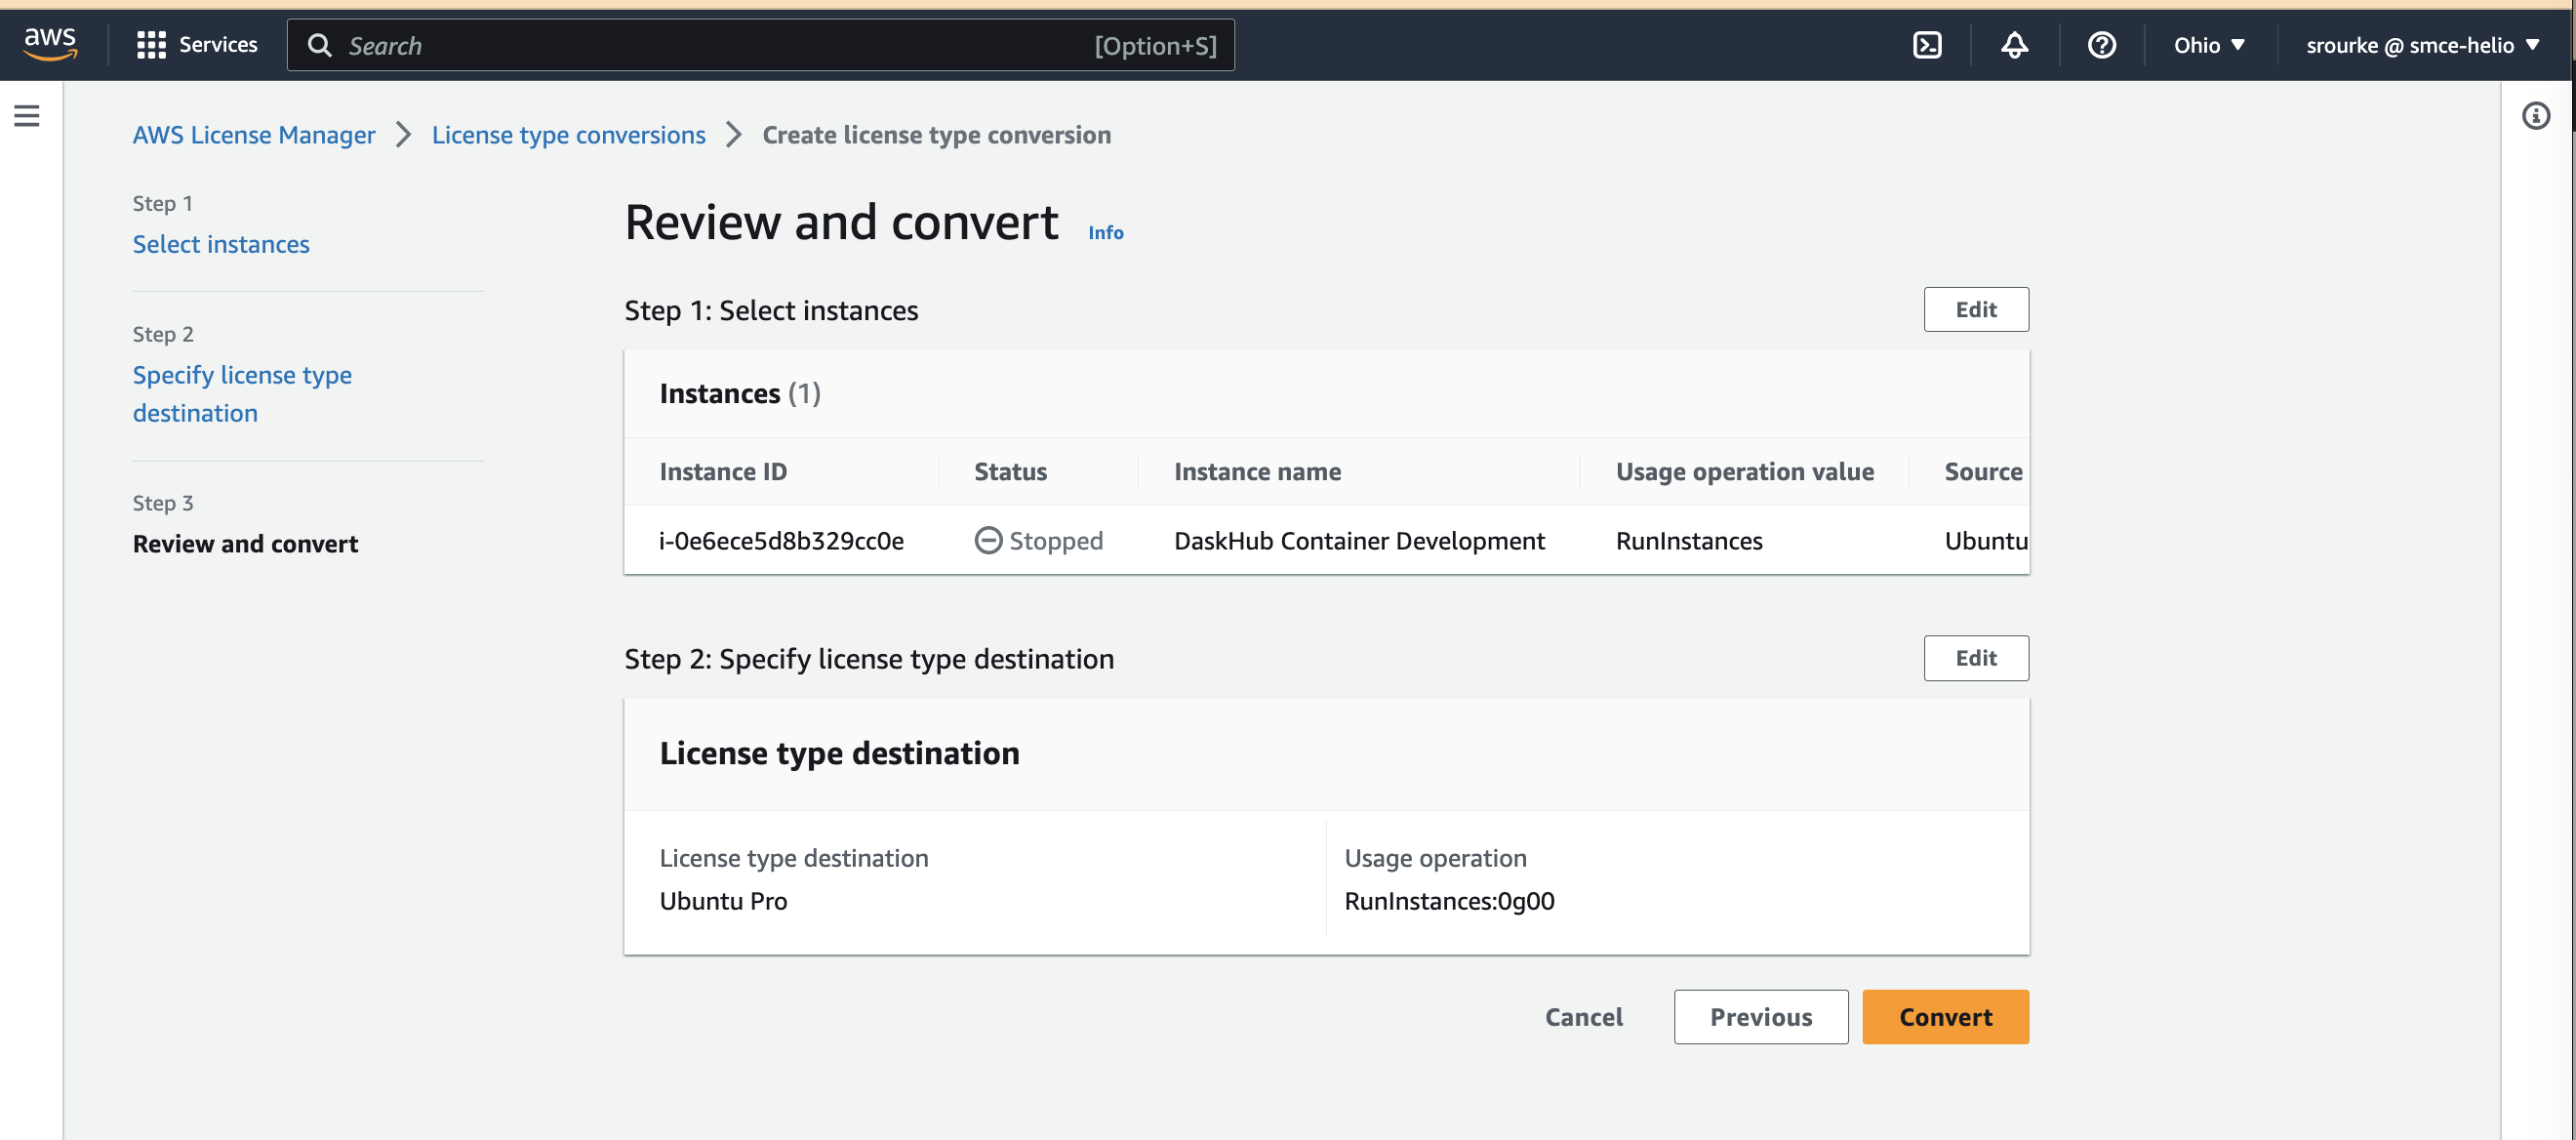
It will take a few minutes for the conversion process to complete. Once completed it is safe to turn the machine back on from the ec2 console page. Similar to how it was stopped before, you will start the machine by selecting Start Instance from the drop down Instance State menu.
Once the machine's status has changed from "Stopped" to "Running" you can validate the process worked by running the commands in the next step.
5)
...
Start Instances and Validate
Once the updating process has finished, validate that the Pro service has been enabled by logging into the running machine via session manager and execute the following command: $ sudo pro status
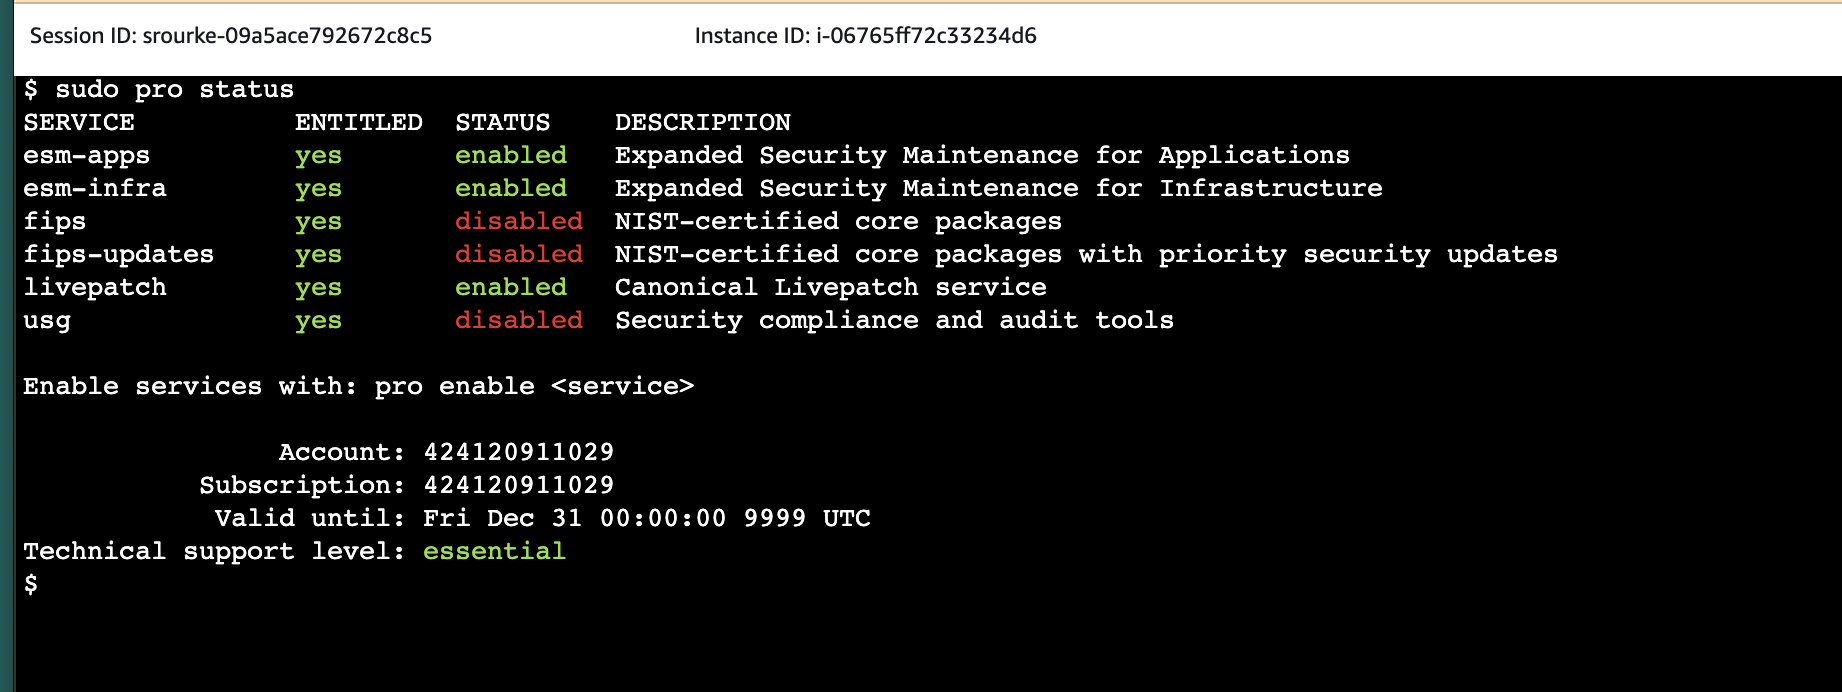
If everything worked correctly, the console output will show that the esm-apps, esm-infa, and livepatch services are enabled. To check livepatch, run: $ sudo canonical-livepatch status
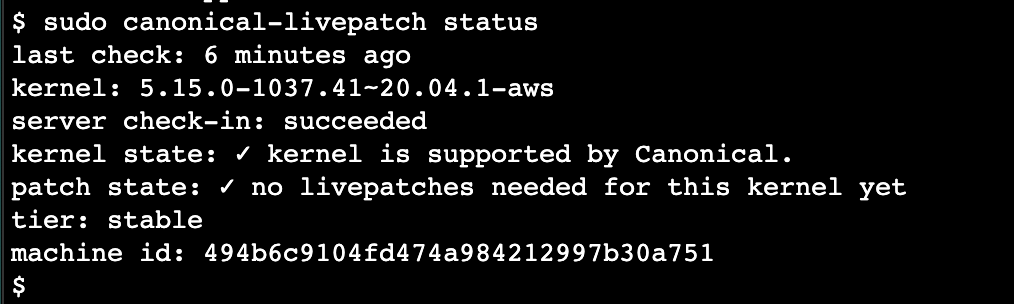
As long as the output in the terminal matches the above image, you can be assured that the update was successful and validated.
Resources
Canonical on the AWS Marketplace https://aws.amazon.com/marketplace/pp/prodview-36njlpsau6luw?sr=0-0&ref_=ucaf&applicationId=AWSMPContessa
Canonical Instructional Video https://www.youtube.com/watch?v=oYS28kmur2k&pp=ygUOdWJ1bnR1IGNoYW5uZWw%3D')